We use cookies on our website to provide you with the best possible user experience.
Option 1: Use the Standard App method to add your account to the plugin;
Option 2: Use the Cookie method to add your account to the plugin;
Option 3: Use the login&pass method to add your account to the plugin;
Option 4: Use the Personal App method to add your account to the plugin;
Before adding your account to the plugin, we need to know some Instagram rules:
1. You have four options to add your accounts. The Standard App method is recommended unless you want to have links on your story image. If you do not need to have links on your story image, use the App method. The account must be a business account to use the App methods;
2. If you want to share links on stories, you need to add your accounts using the login&password method;
3. You can Pin Instagram posts using the login&password method;
4. If you use the cookie and login&password, you need to obey Instagram rules: try to use old accounts, do not spam, do not share very frequently, do not use URL shorteners, and do not use content that people may complain about you;
5. You should have either a featured image or a video in your post, product, etc., to share posts on your Instagram account. Instagram requires an image or a video and does not accept simple text;
6. To share videos on Instagram, you should install "FFprobe" and "FFmeg" extensions on your server. If they are not installed, contact your hosting provider to install them for your server;
7. PHP EXIF must be installed and enabled. If you are not able to install it, contact your hosting provider;
8. Links are not clickable on Instagram Read more about Instagram rules
- This method is the simplest and most convenient method for adding an Instagram account. It is safer, more relevant, and works 100% of the time: no errors, no chance of being blocked by Instagram. Note: The Instagram account has to be a Professional (Business) account.
- You need just 3 clicks to authorize your Instagram account:
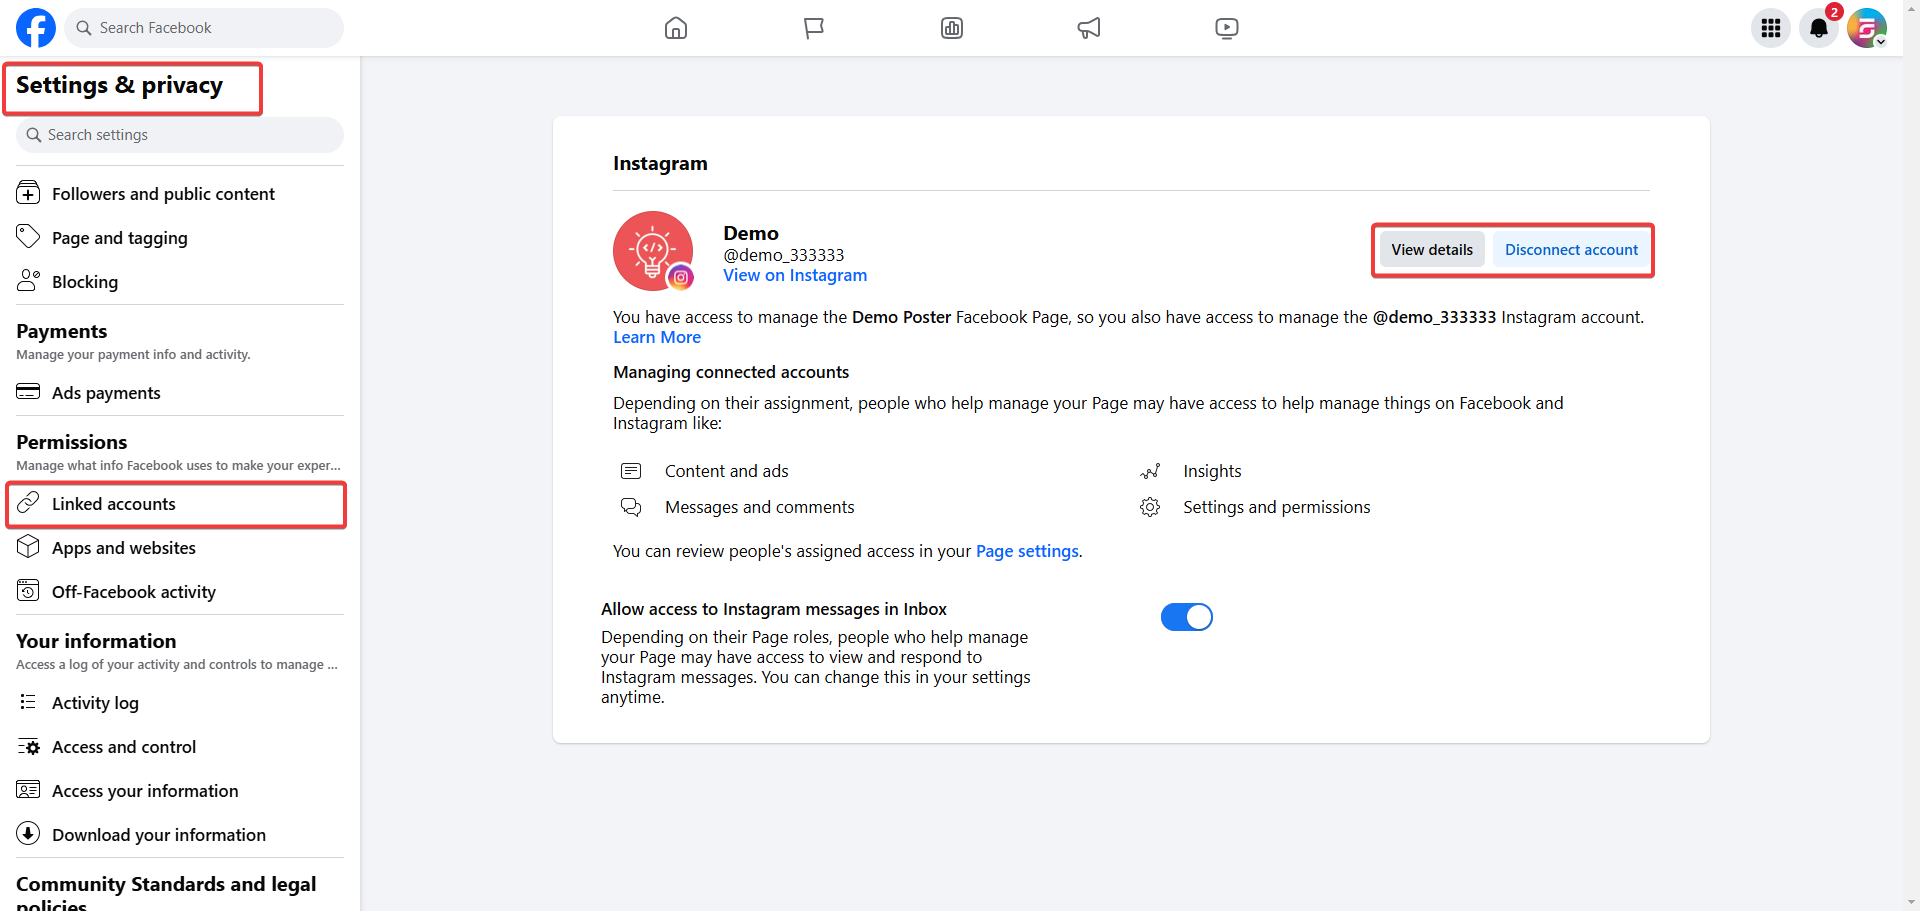
- First, you must have a Facebook page connected to your Professional (Business) Instagram account. If you have many Instagram accounts, all Instagram accounts have to be connected to pages that account is an admin of the pages, and the App is created on this account. Go to the Facebook page settings => Linked accounts menu to connect your page to the account:
- After authorizing the Instagram account, refresh the page and review the connection:
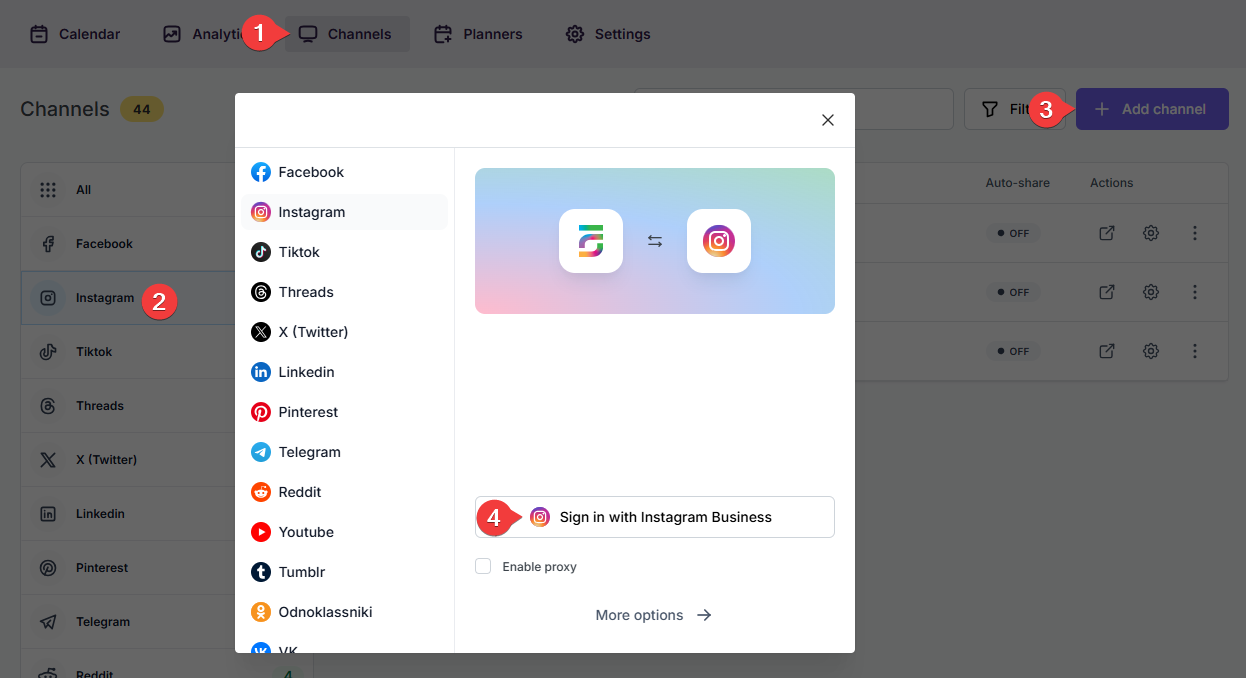
- Go to FS Poster > Channels > Instagram menu and click the Add channel button;
- Next, click the Sign in with Instagram Businessbutton;
- You have the option to add the account with a Prxoy as well;
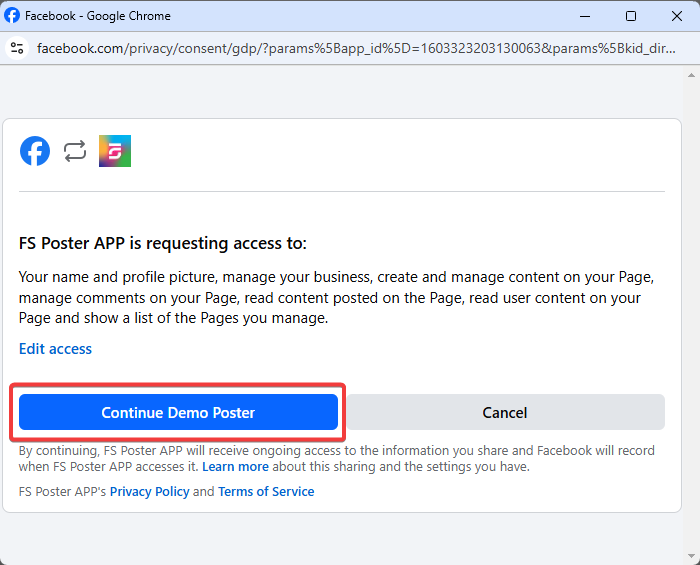
- When the Instagram authorization page appears, click the Continue (account name) button without editing access. The page will display the account name currently logged into the browser. If this is not the account you want to add to the plugin, or if you wish to add a different account, log into the desired account in a new browser tab;
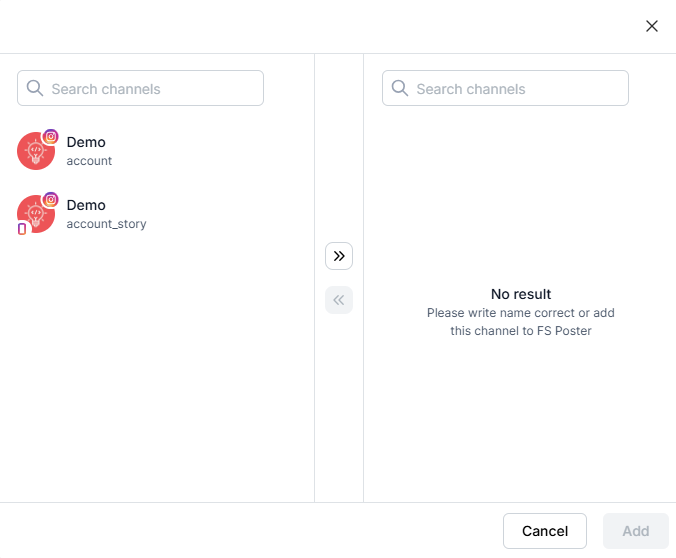
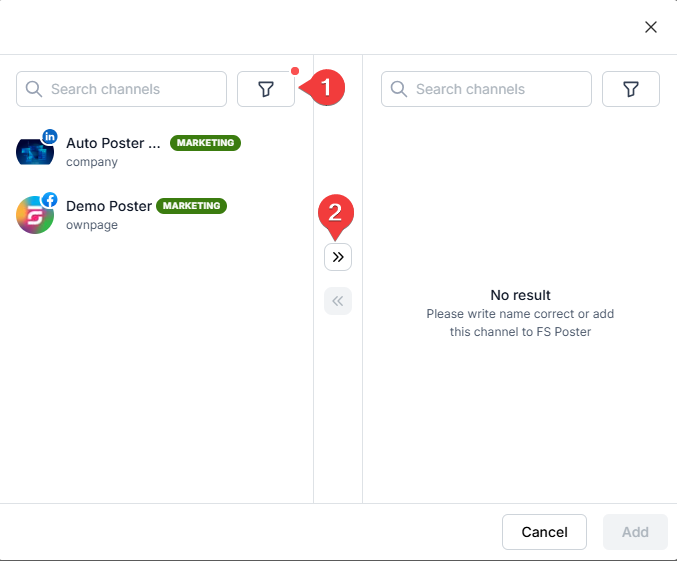
- Click the channels to add them to the plugin or click the >> button to add all of them at once;
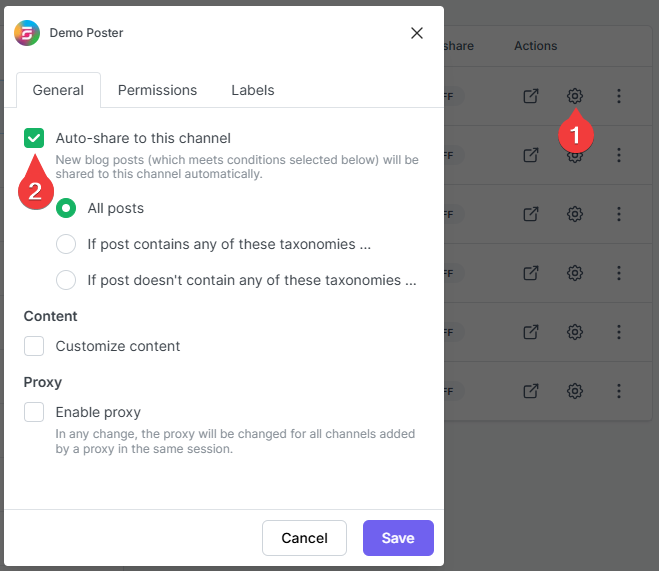
- Activate your channels to share posts on social networks automatically whenever a new WordPress post is published on your website. If you do not activate channels, you need to add them to the FS Poster section whenever you want to share specific posts on your social network accounts;
- You can also activate channels conditionally by selecting specific taxonomies to share specific posts or not share specific posts on particular channels. This will apply to only auto-posts;
- The Customize content option allows you to assign specific content for this specific channel which will override the content you specifically in the social network settings;
- Moreover, you can enable proxy or edit the proxy credentials without reauthorizing the channel to the plugin;
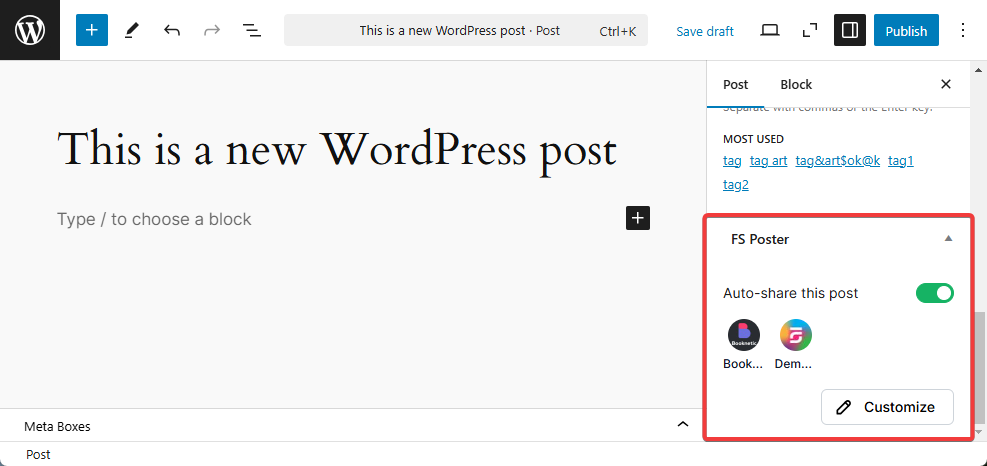
- Since channels are activated, they will appear on the FS Poster section when publishing a new WordPress post. Once the post is published, the plugin will share the post on these channels automatically;
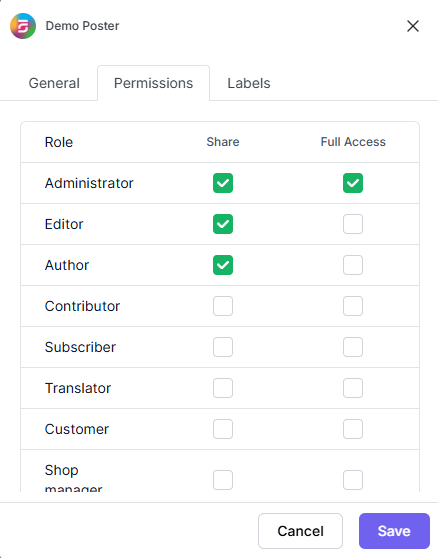
- In the Permissions tab, you can permit other WordPress users to use the channels in their FS Poster dashboard. You can either allow them to only share posts or give them full access to manage the channel, and edit its settings;
- In the Labels tab, you can organize channels into specific groups, making it easier to add a group of channels to the Planners or Schedules instead of adding them one by one.
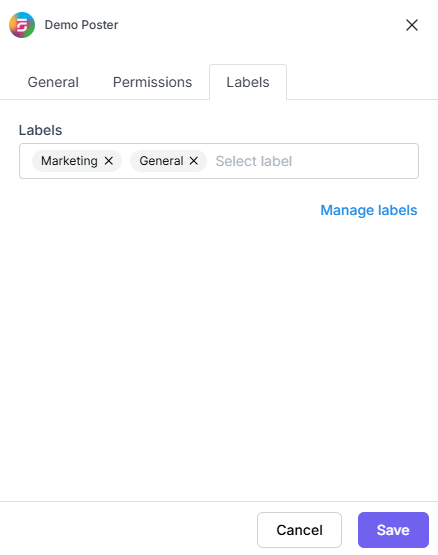
- Now, you can easily filter channels by label and click the >> button to add them all at once for sharing;
Follow the steps to add an account using the cookie method:
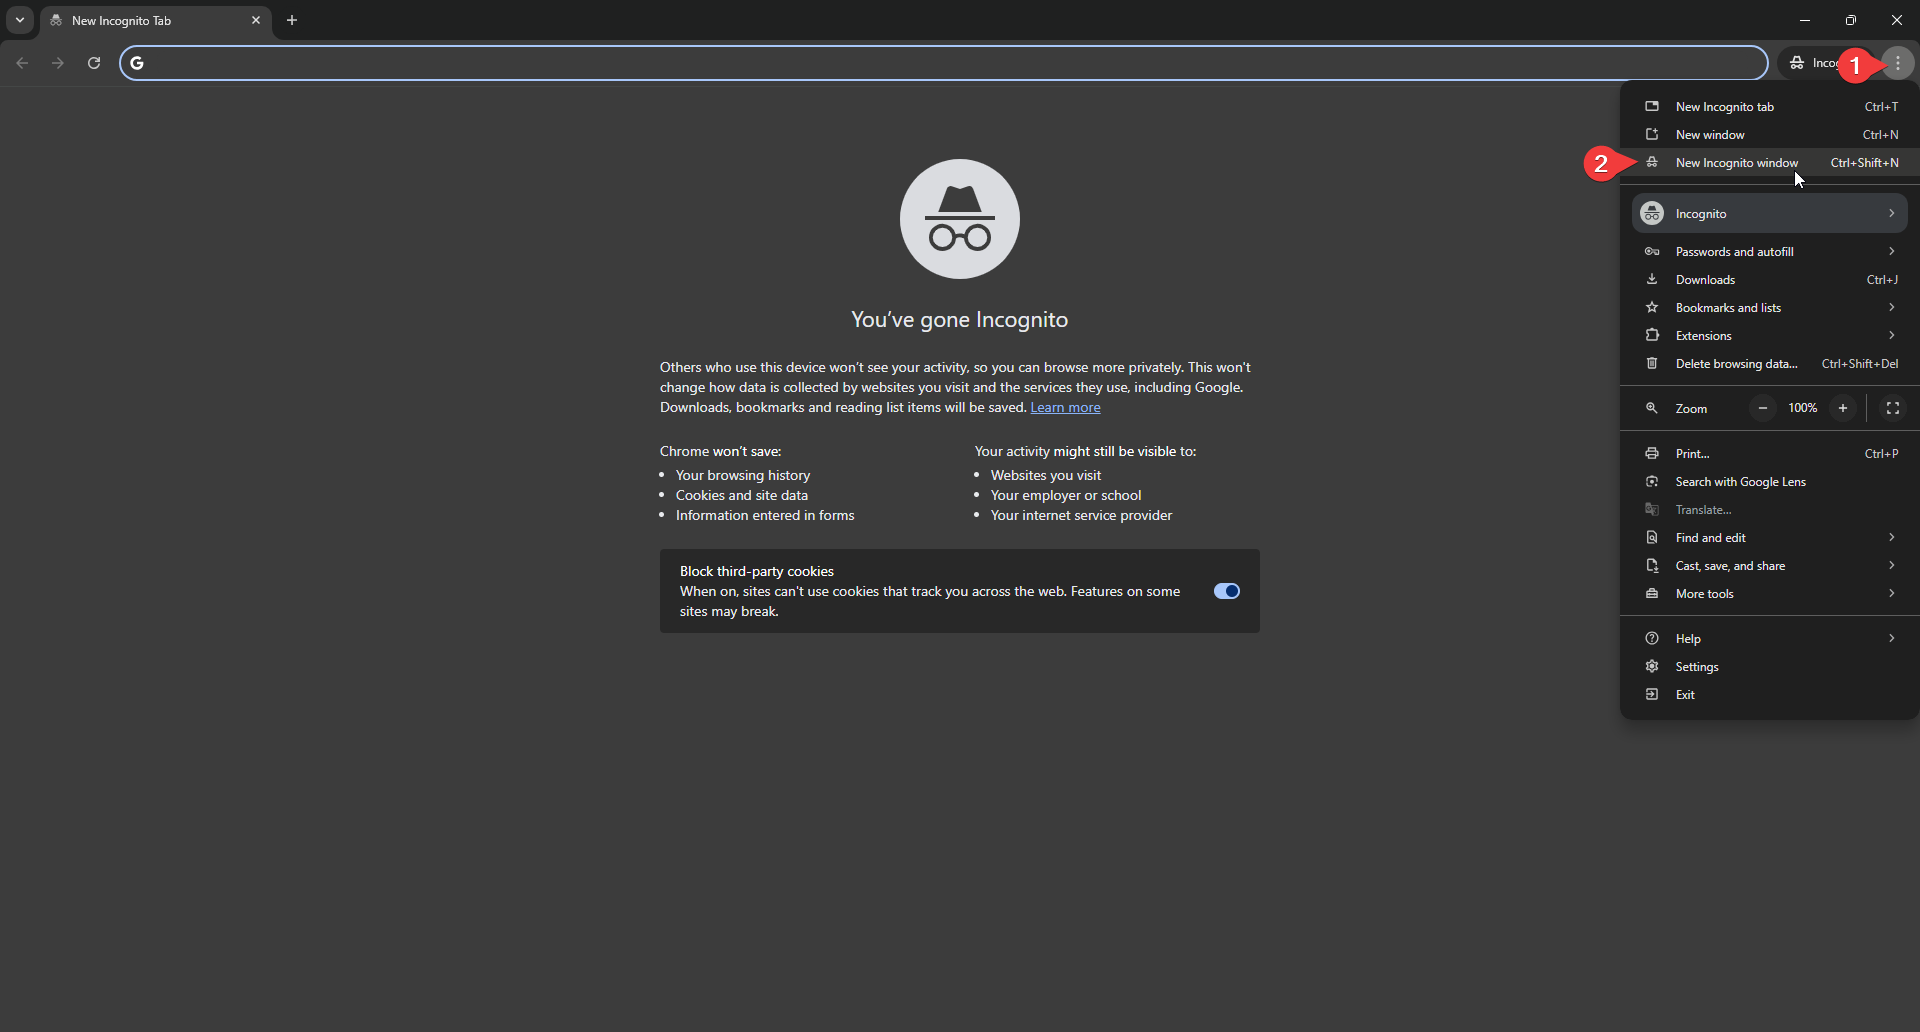
- Open the browser in the Incognito mode;
Click the "Ctrl" + "Shift" + "n" keys for opening Incognito tab in Chrome
Click the "Ctrl" + "Shift" + "p" keys for opening Incognito tab in Firefox
- Log in to your Instagram account;
- Open the Inspect element panel by clicking the F12 key or right-click on the page and click the Inspect button;
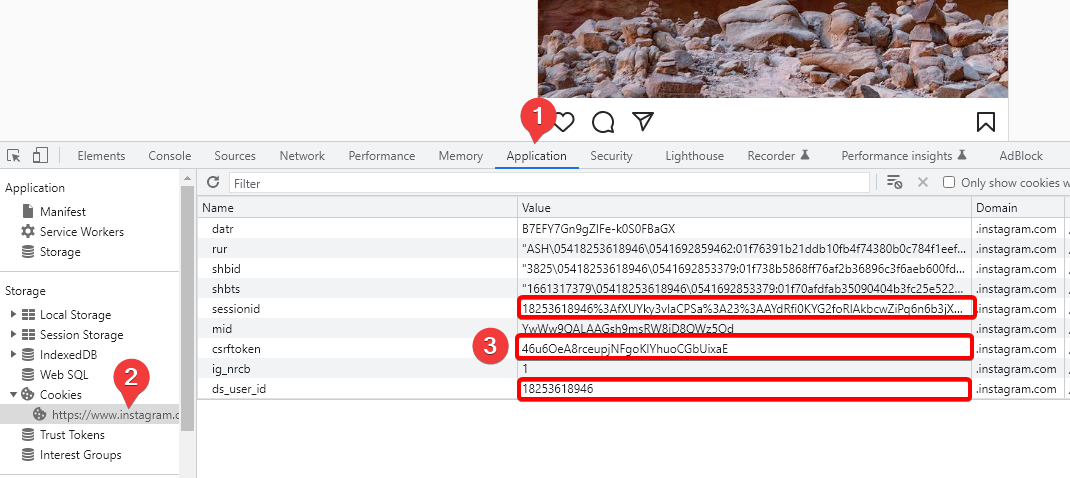
- Go to the Application tab within the Inspect element panel and click the Cookies menu. Copy the csrftoken, ds_user_id, sessionid cookie values, and close the incognito tab without logging out from your account;
- Go to FS Poster > Channels > Instagram menu and click the Add channel button;
- Next, click the More options button;
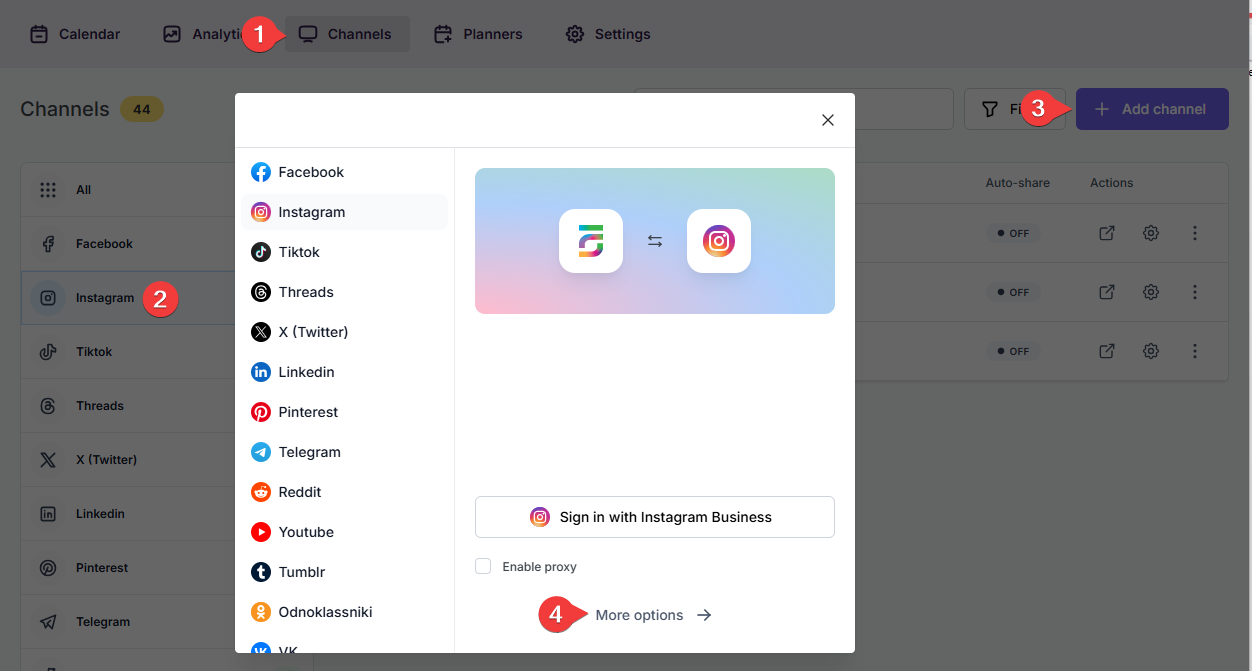
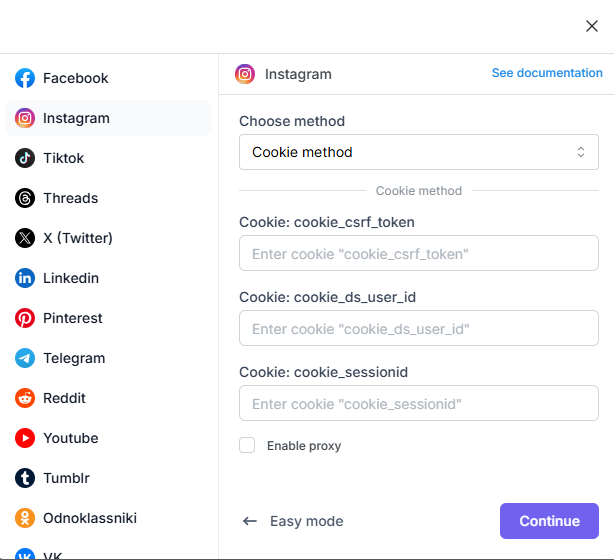
- Select the Cookie method from the methods list and paste the cookies you copied earlier. Click the Continue button to add the account to the plugin;
- You have the option to add the account with a Prxoy as well;
You might encounter consent or challenge required while adding your account using the Login method. It means Instagram has sent a message to your number or email that you have added to your Instagram account. Simply follow the steps in the email or text message. Then try to add again. If it does not help, add your account using the App method.
When you add your account to the plugin and because the plugin is installed on your server, Instagram detects an unusual activity login. As a result, Instagram might block your session for your security. Please go to Instagram account Settings > Login activity. Click the “It was me” option and confirm if you see any suspicious logins.
- Go to FS Poster > Channels > Instagram menu and click the Add channel button;
- Next, click the More options button;

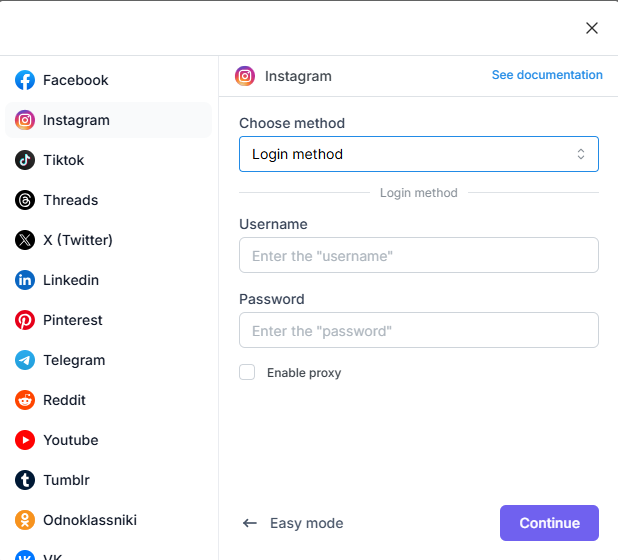
- Select the Login method from the methods list and type your account credentials. Click the Continue button to add the account to the plugin;
- You have the option to add the account with a Prxoy as well;
- You might encounter consent or challenge required while adding your account using the Login method. It means Instagram has sent a message to your number or email that you have added to your Instagram account. Simply follow the steps in the email or text message. Then try to add again. If it does not help, add your account using the App method.
- When you add your account to the plugin and because the plugin is installed on your server, Instagram detects an unusual activity login. As a result, Instagram might block your session for your security. Please go to Instagram account Settings > Login activity. Click the “It was me” option and confirm if you see any suspicious logins.
Note: The Instagram account has to be a Professional (Business) account.
- First, you must have a Facebook page connected to your Professional (Business) Instagram account. If you have many Instagram accounts, all Instagram accounts have to be connected to pages that account is an admin of the pages, and the App is created on this account. Go to the Facebook page settings => Linked accounts menu to connect your page to the account:
- After authorizing the Instagram account, refresh the page and review the connection:

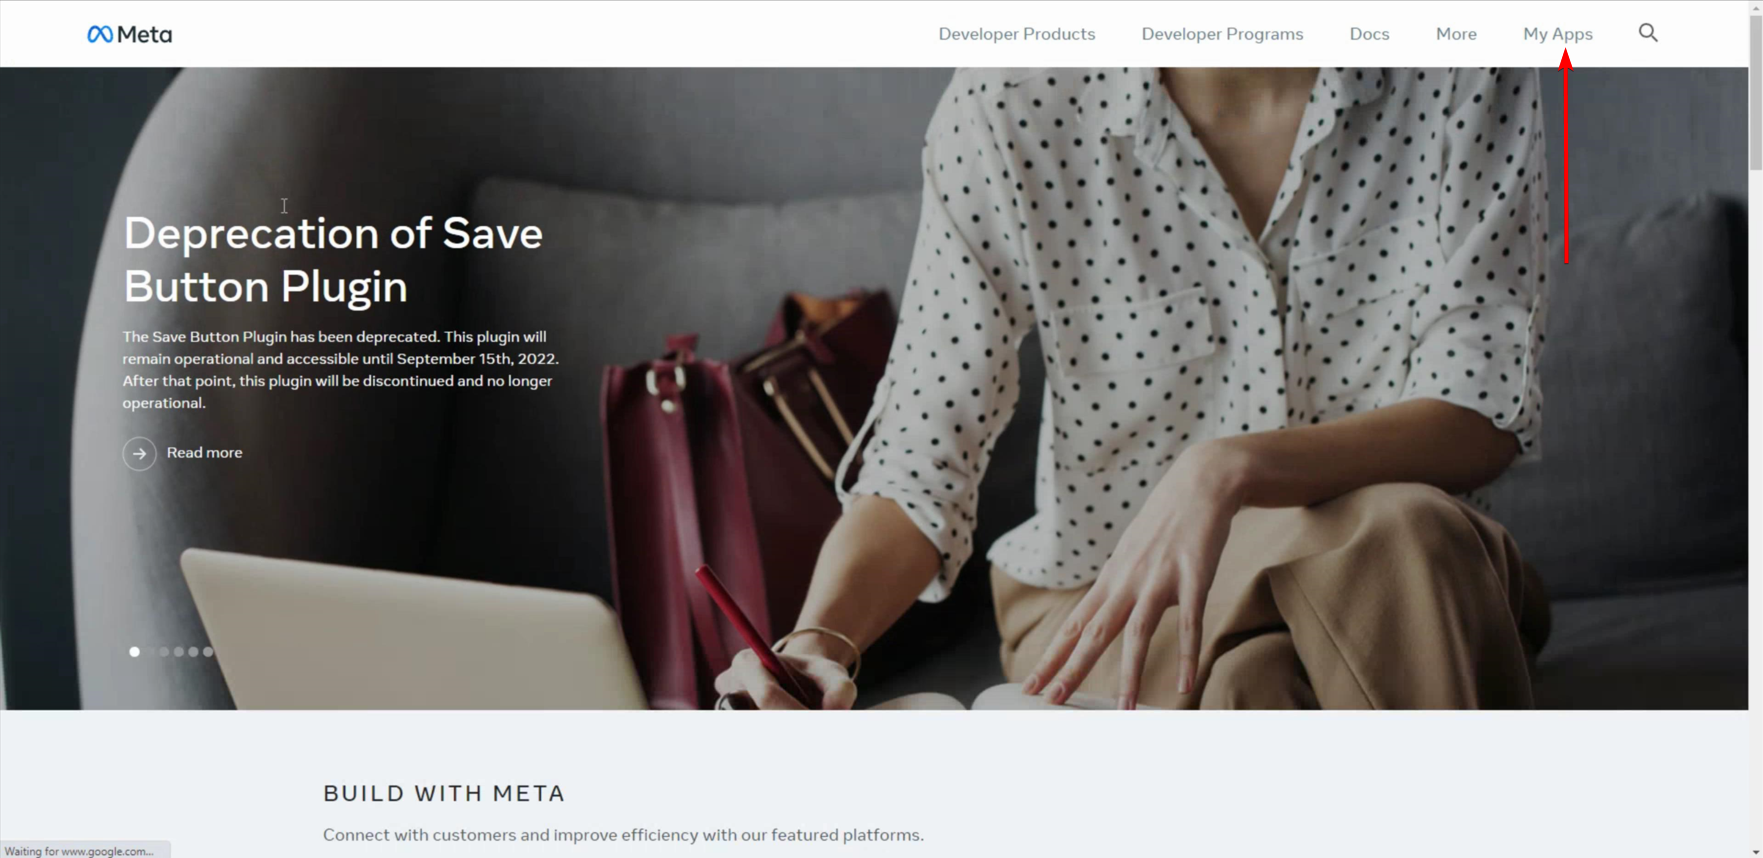
- Go to the Meta for Developers and then the My Apps menu. If you have not applied for the Meta for Developers so far, you will need to apply first to create Apps:
- Create a new App:

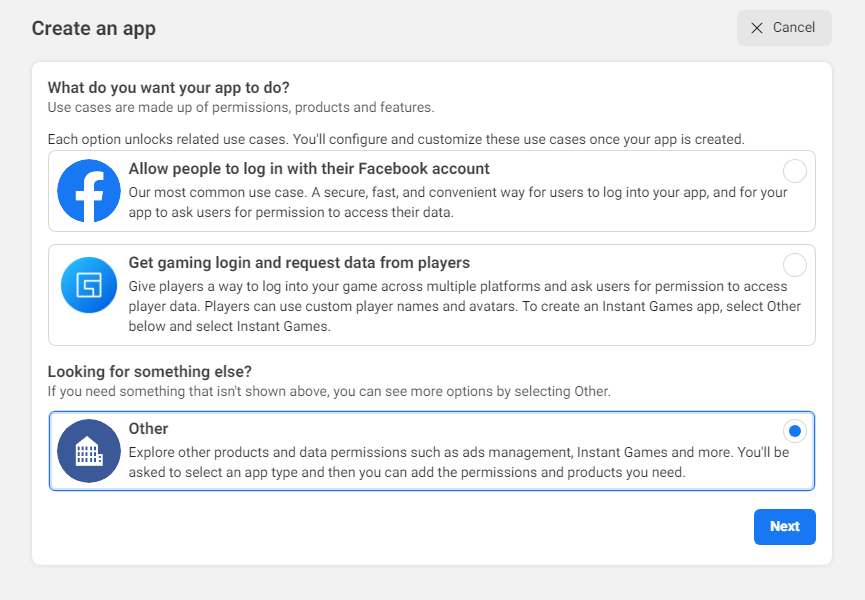
- Select the Other option;
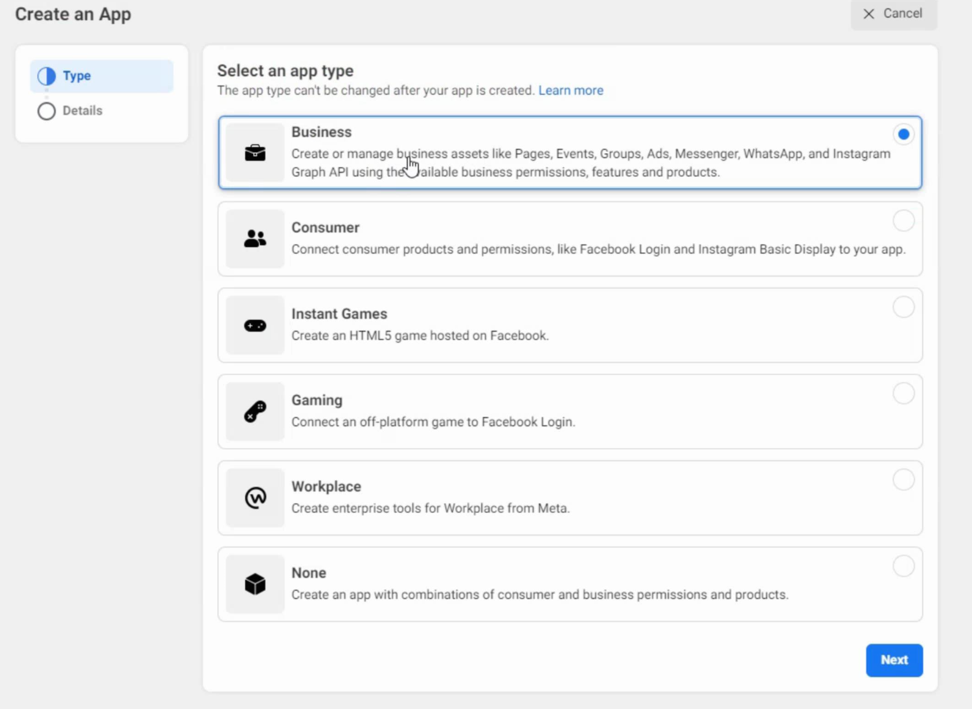
- Then select the App type as Business and click Next;
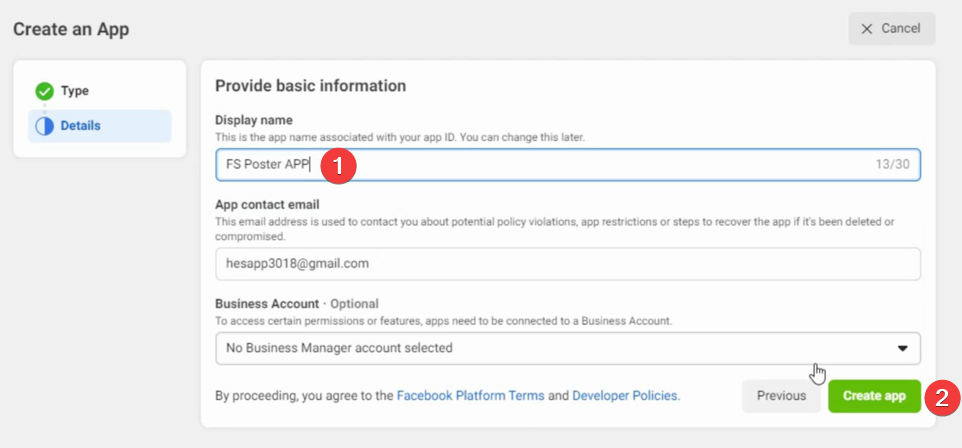
- Type a name that suits your Business and create the App:
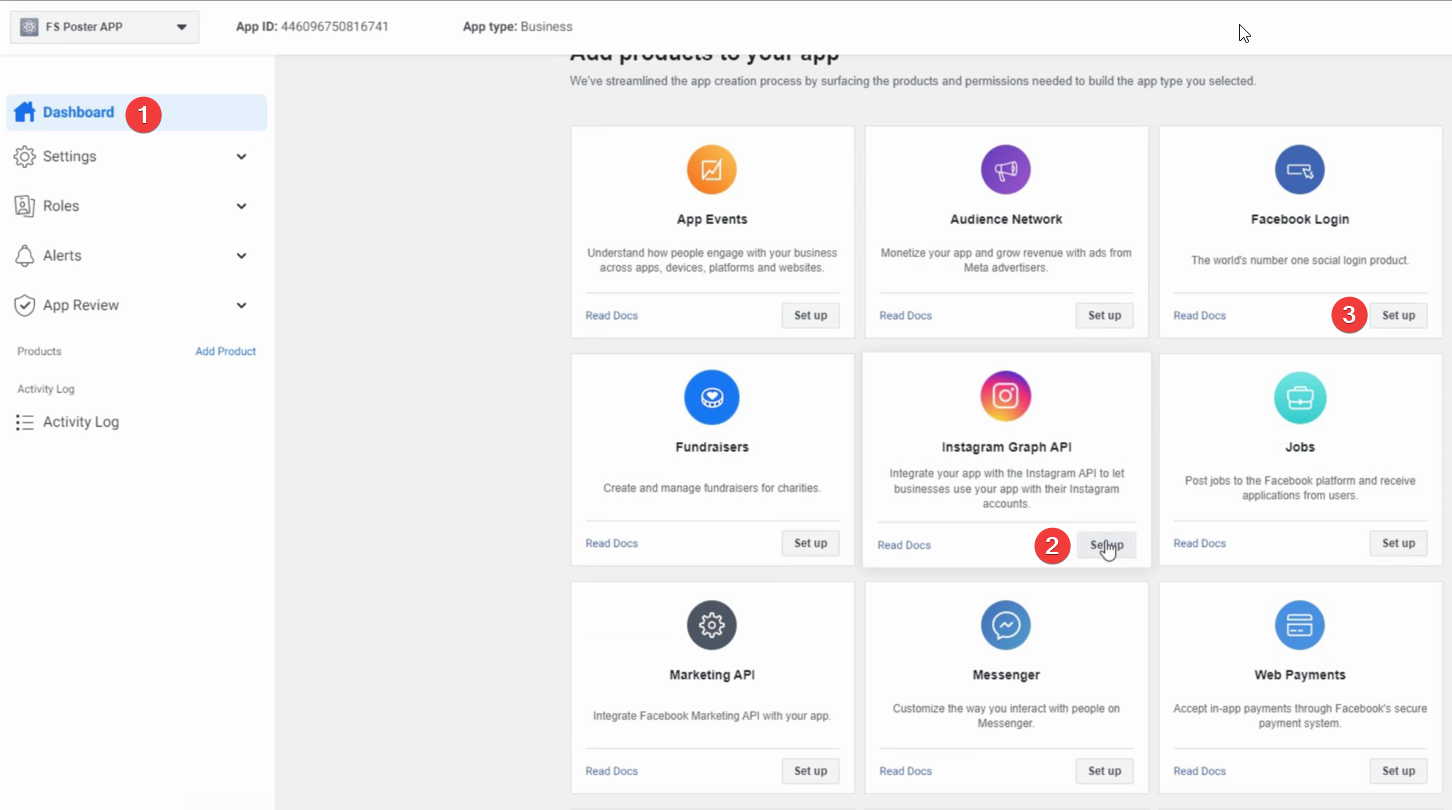
- In the App dashboard, you need to click the Set up buttons for the Instagram Graph API and then Facebook login:
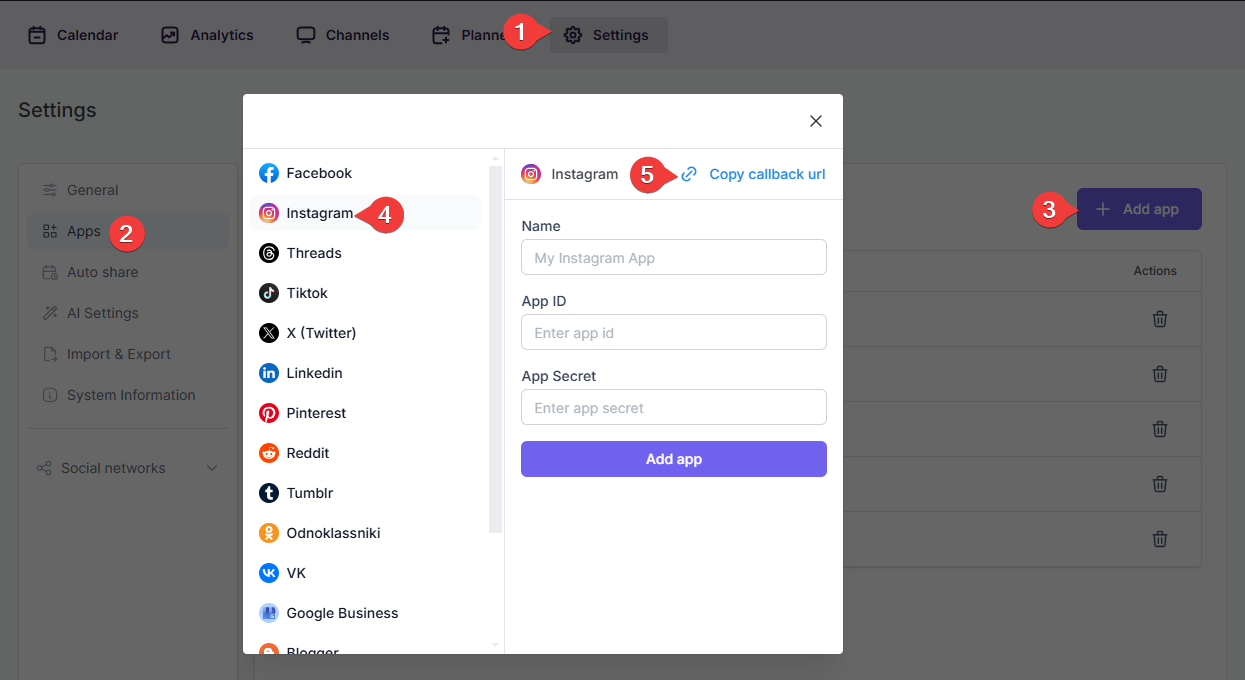
- Then go to the FS Poster Apps => Instagram menu to copy the Redirect URL:
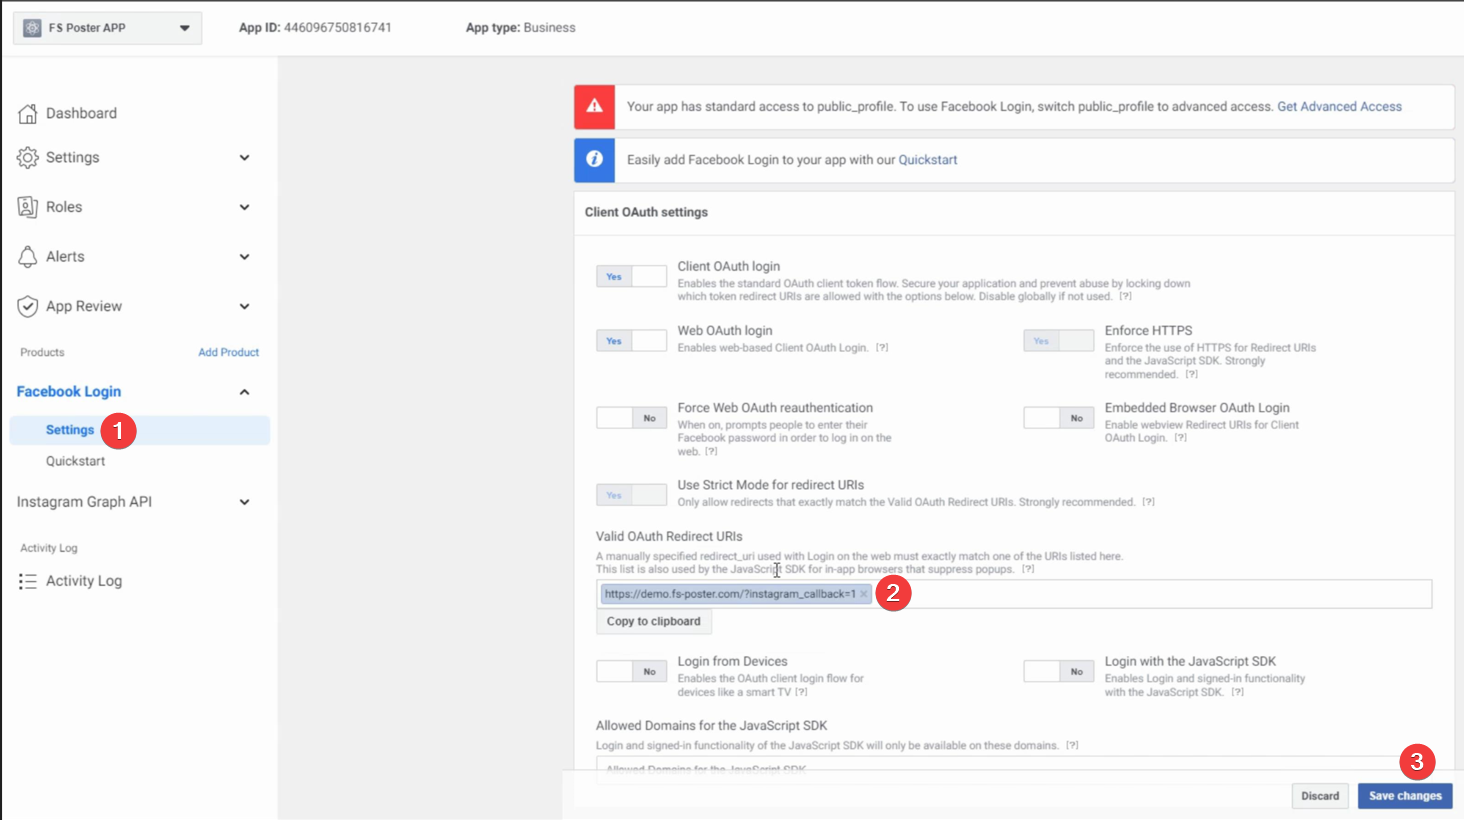
- And then paste it into the Facebook Login settings. Save changes:
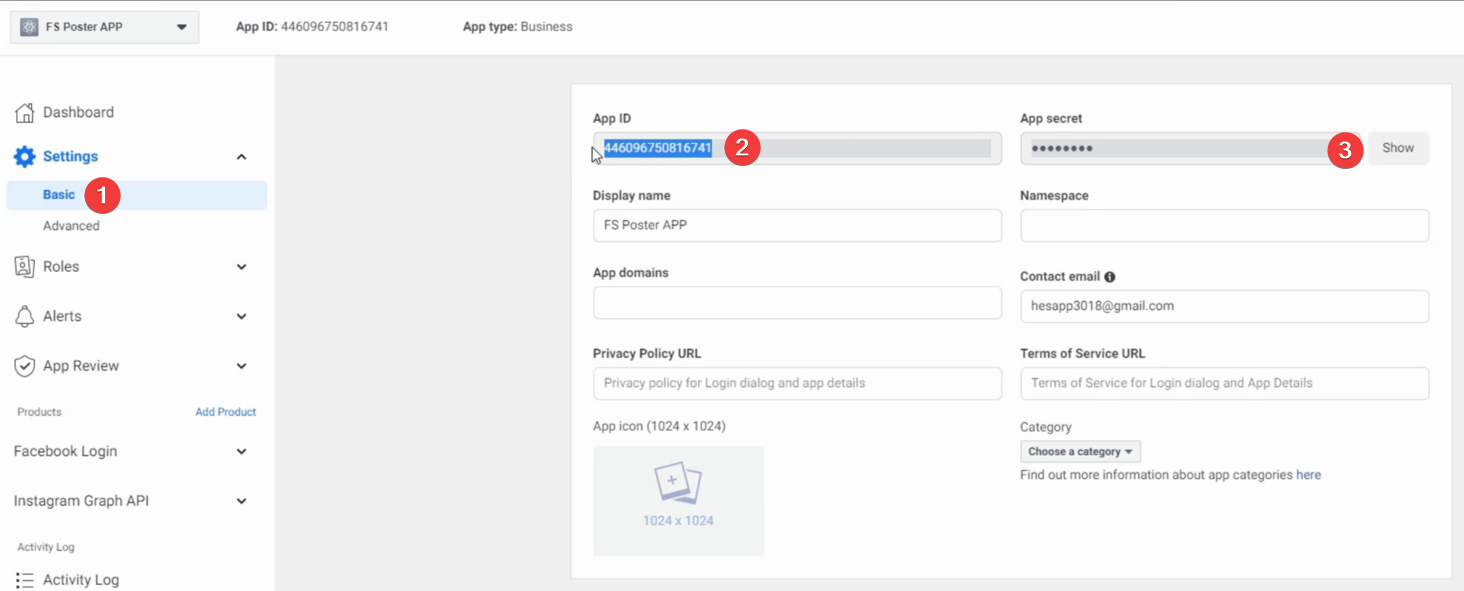
- Copy your App credentials:
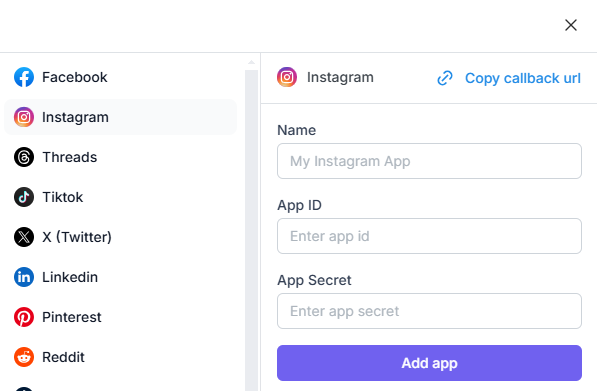
- Now you can give a name for the app to recognize it and add the App credentials to the plugin;
- Go to FS Poster > Channels > Instagram menu and click the Add channel button;
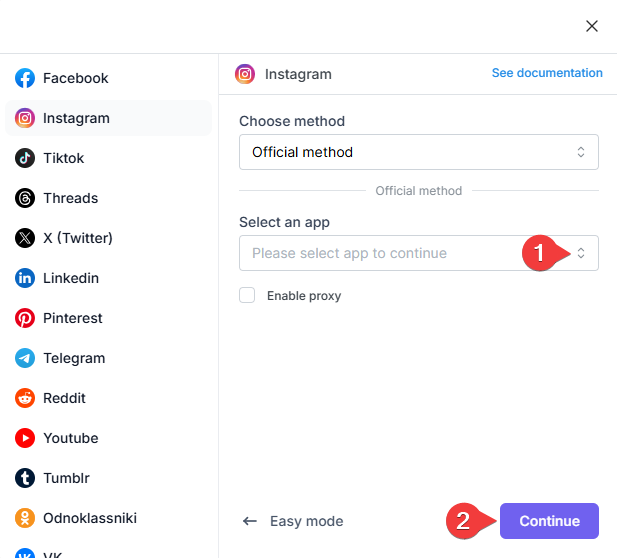
- Next, click the More options button;

- Select your App from the list and click the Continue button.
- You have the option to add the account with a Prxoy as well;
