![How to Auto-Post to VKontakte from WordPress [A complete guide]](https://www.fs-poster.com/uploads/posts/186e7d1c0cfdeb52daec499022a7df0c.png?ver=710)
Saritel Abbaszade
Author
VKontakte (shortly Vk.com and the meaning is InContact) is one of the most popular Social networks globally and the most popular and used Social Network in Russia and Post-Soviet countries with over 500 million users. Most people call it Facebook of Russians, and it has some similarities and some advantages over Facebook like a huge amount of free music and video.
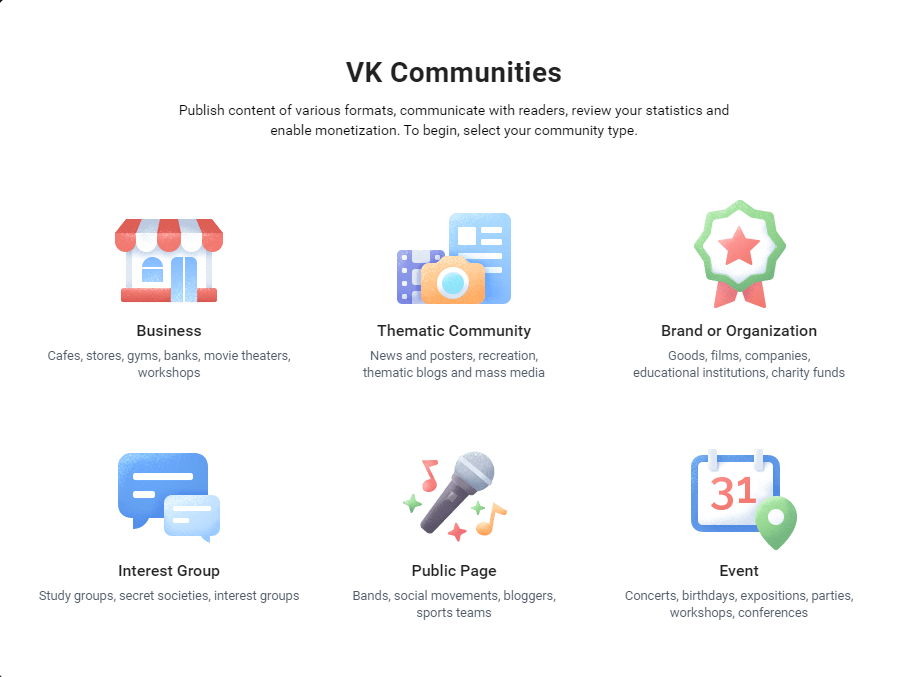
VKontakte has different types of communities: public pages, groups, events, and a few more, which allows you to create a community according to the subject so that you can discuss it individually with your followers, customers, or readers.
That being said, sharing your WordPress posts on VKontakte can increase visitor traffic to your WordPress website. When we write blog posts or publish our products on our website, most of our readers are not aware of it because most people are lazy and do not search it.
By sharing your posts on Social Networks, you can engage your posts to your readers or customers.
I suppose you are saying that you do not have time to share every blog post to VKontakte manually because it is time-consuming and boring.
I want to introduce you to a FS Poster social media auto poster plugin that will make your work easier and do your manual work.
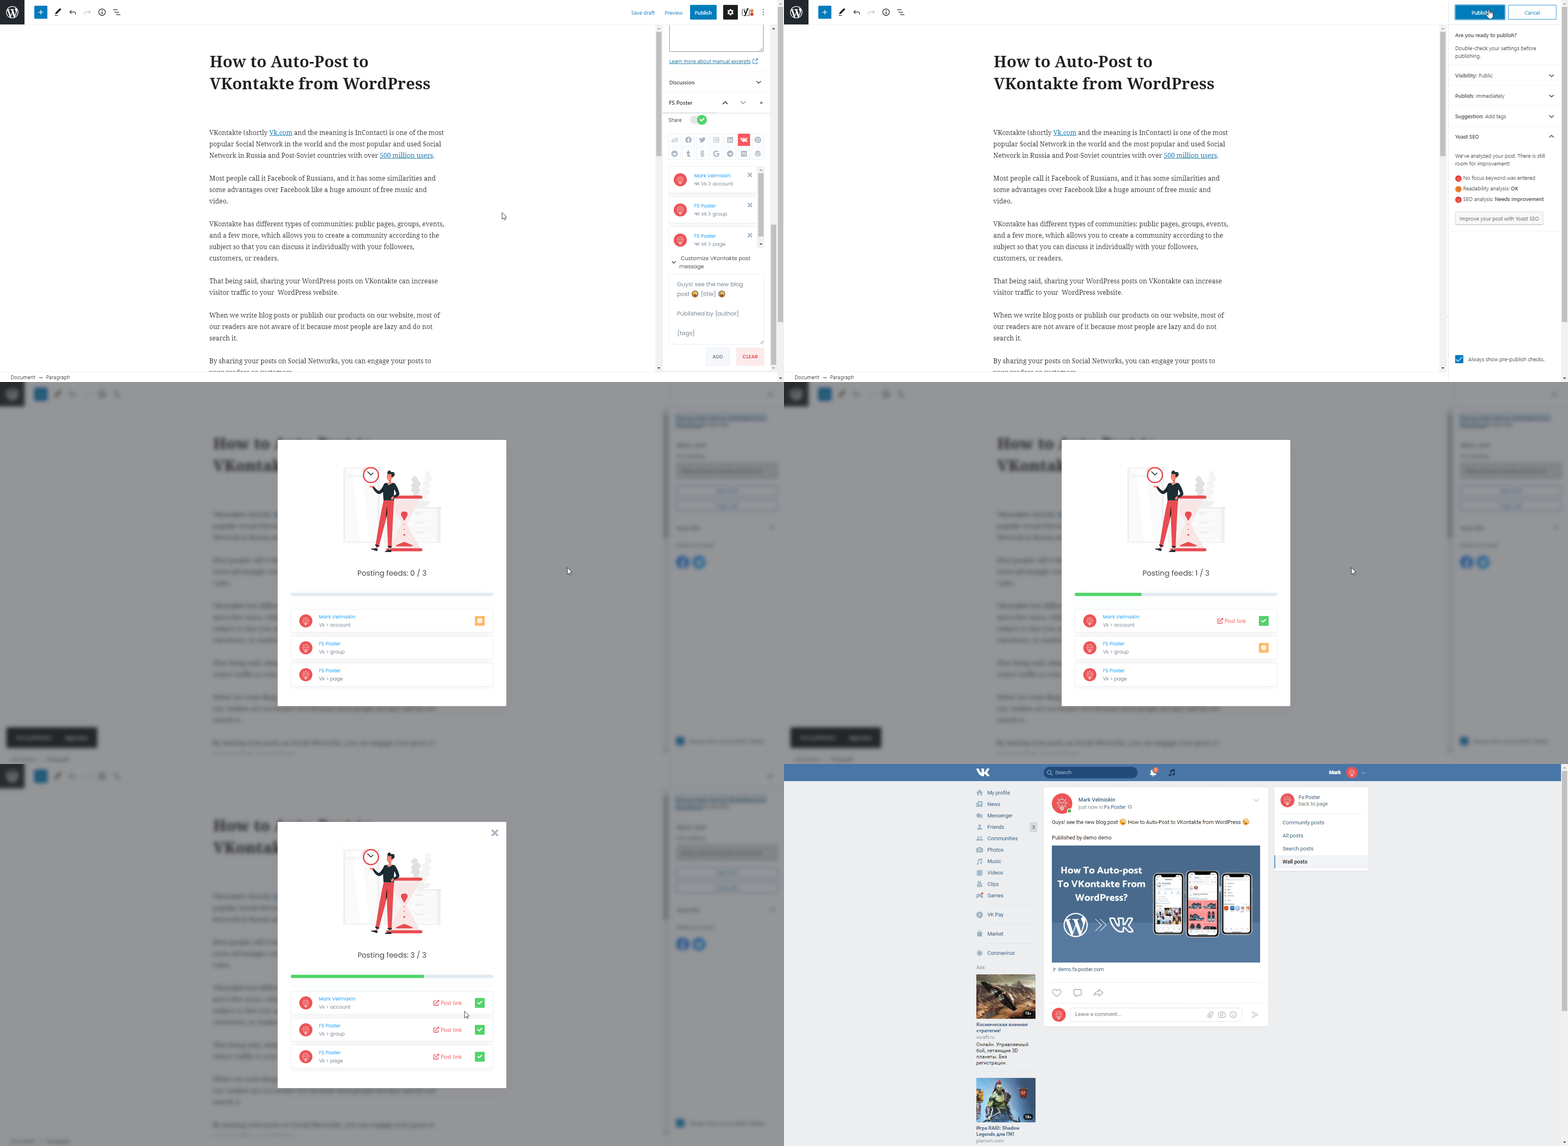
This article will discuss on how to post to VKontakte from WordPress automatically.
How to Add Accounts for Auto-posting
While you are reading the article, you can also try the demo version of the plugin.
Please note that every hour, the plugin gets its initial state. So, your accounts might be deleted from the plugin at the end of each hour.
We will start by adding our accounts to the plugin.
Adding accounts to the plugin once allows you to get rid of logging into your account each time to share a post.
Head to the VKontakte menu of the Accounts tab.
You can add as many accounts as you want because there is no account limit.
Click the ADD AN ACCOUNT button.
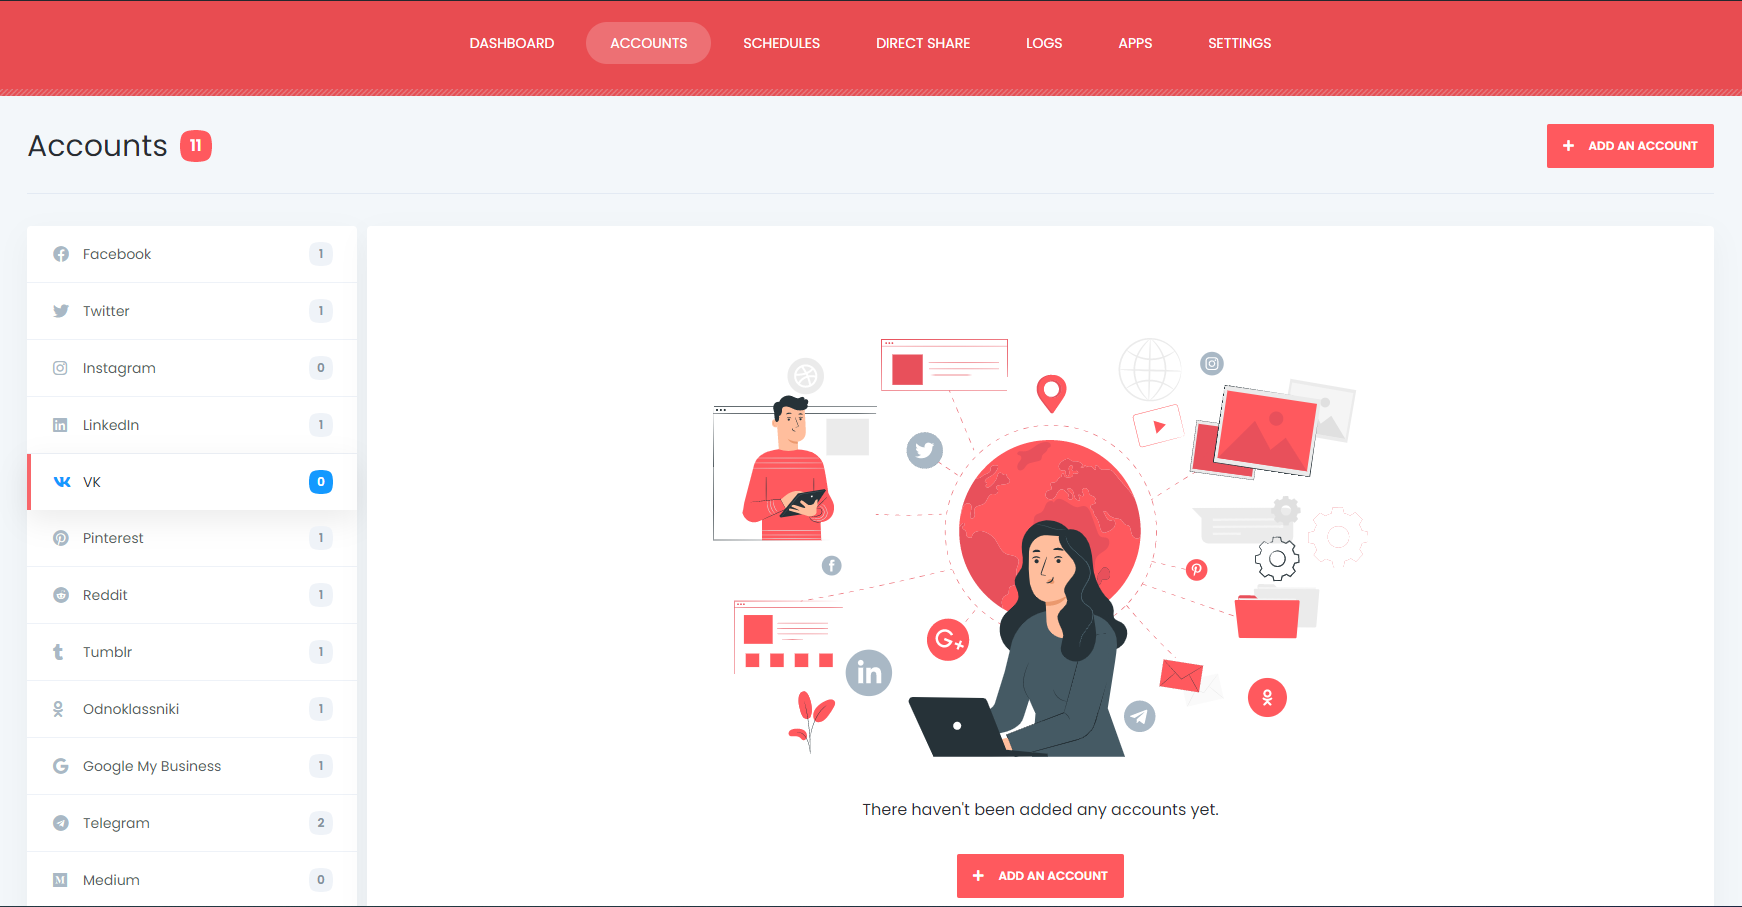
Next, you will see a modal page where you need to authorize your account by clicking the Get Access button.
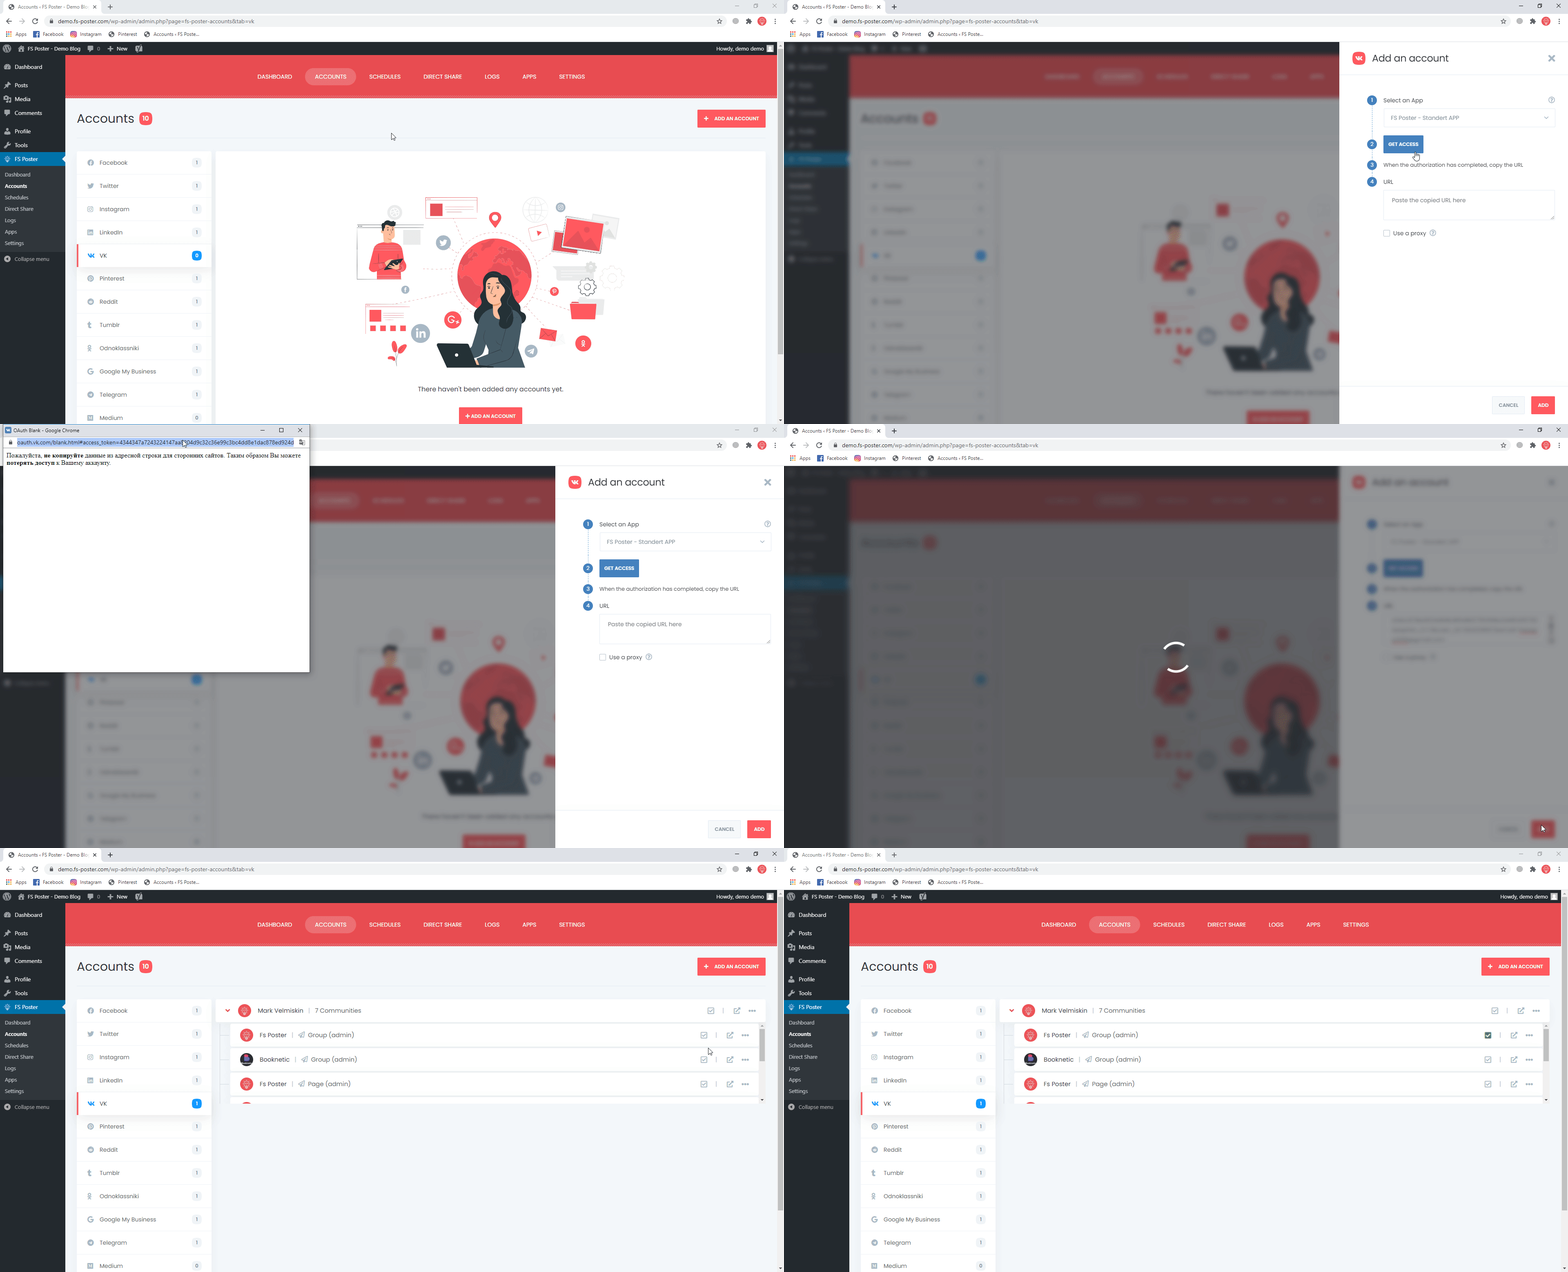
VKontakte's official API is integrated into the plugin. So, when you authorize your account, the API will provide you an access token.
We need to copy and paste the token to the dedicated box and click the Add account button.
You will see a warning that "Please do not copy the data from the address bar for third-party sites. Thus, you may lose access to your account."
That is important, guys. Please never add or give your tokens to other websites or someone else. Because if you add it to other websites, they will have your lifetime access token.
Some auto-poster providers ask you to add your website, account credentials, and account tokens to their website or service. That is totally unprofessional, and your accounts are not safe.
But if you use the FS Poster plugin, you copy the token and add it on your personal site. That token is stored in your database, and no one can access it unless someone hacks your website.
Here is how our accounts, pages, groups, and events will be seen on the plugin.

If you need to hide your IP address or your country does not allow you to use Social Networks, you can use a proxy to avoid the prohibition.
As you know, in some countries like China, it is not possible to access Facebook, Instagram, and so on.
Luckily, the plugin allows you to add a proxy to the plugin so that you can enjoy using the most popular Social Networks.

The plugin has three options for an account status: activated, activated with the condition, and deactivated.

If you activate the account, the plugin will share your posts on those activated ones.
There might be some time, or for some reason, you would not like to share your posts to your accounts automatically.
You will need to deactivate the account to keep your accounts on the plugin but do not auto-post for a specific time.
You will need the condition feature when you have a specific category for specific pages or groups.
For example, you want to share the Book WordPress category's post on the page all about books. You simply set the condition, and the plugin does the rest for you.
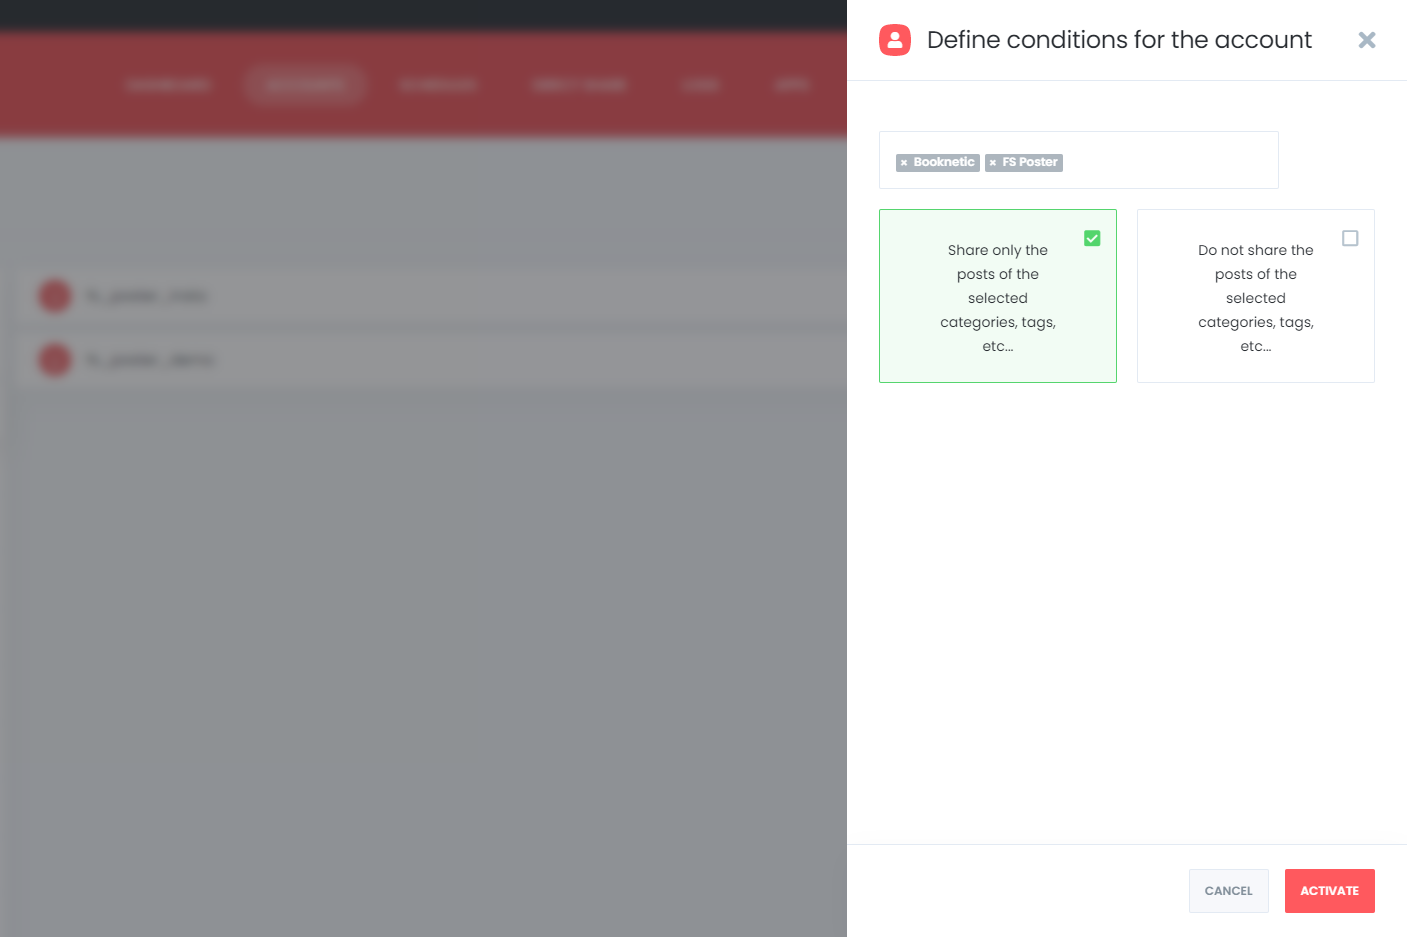
The plugin supports the multi-user platform. Each WordPress users can add and manage their own social accounts.
This feature allows your authors to add their accounts and auto-share posts to those accounts.
But if you have a common account like a business or company accounts and all your posts need to be shared on this account, you can make this account public for other WordPress users.
As a result, other WordPress users can auto-post on this account by activating it.

We are also able to set a custom message as a title for the VKontakte posts. We can use ready keywords to share some details about our WordPress post.
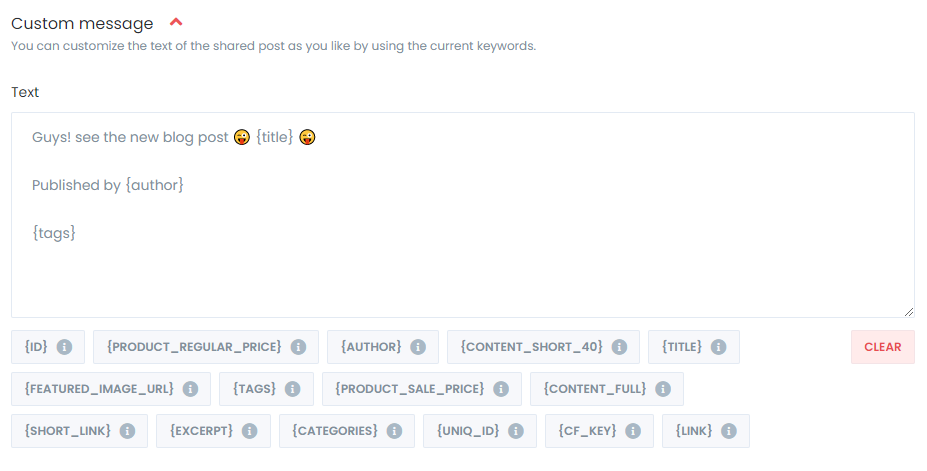
We have completed most of the job. Now, we can enjoy auto-posting.

We have the option to hide the modal that shows the result in the settings so that while the plugin shares posts in the background, we can continue the rest of the work.
The plugin shared the post on an account, a page, and a group in 5 seconds.
I cannot imagine how long it takes when you have hundreds of Facebook or VKontakte groups, pages, etc.
If you want to make the custom post text different from the custom text in the settings, you can add the custom text for each Social Network.
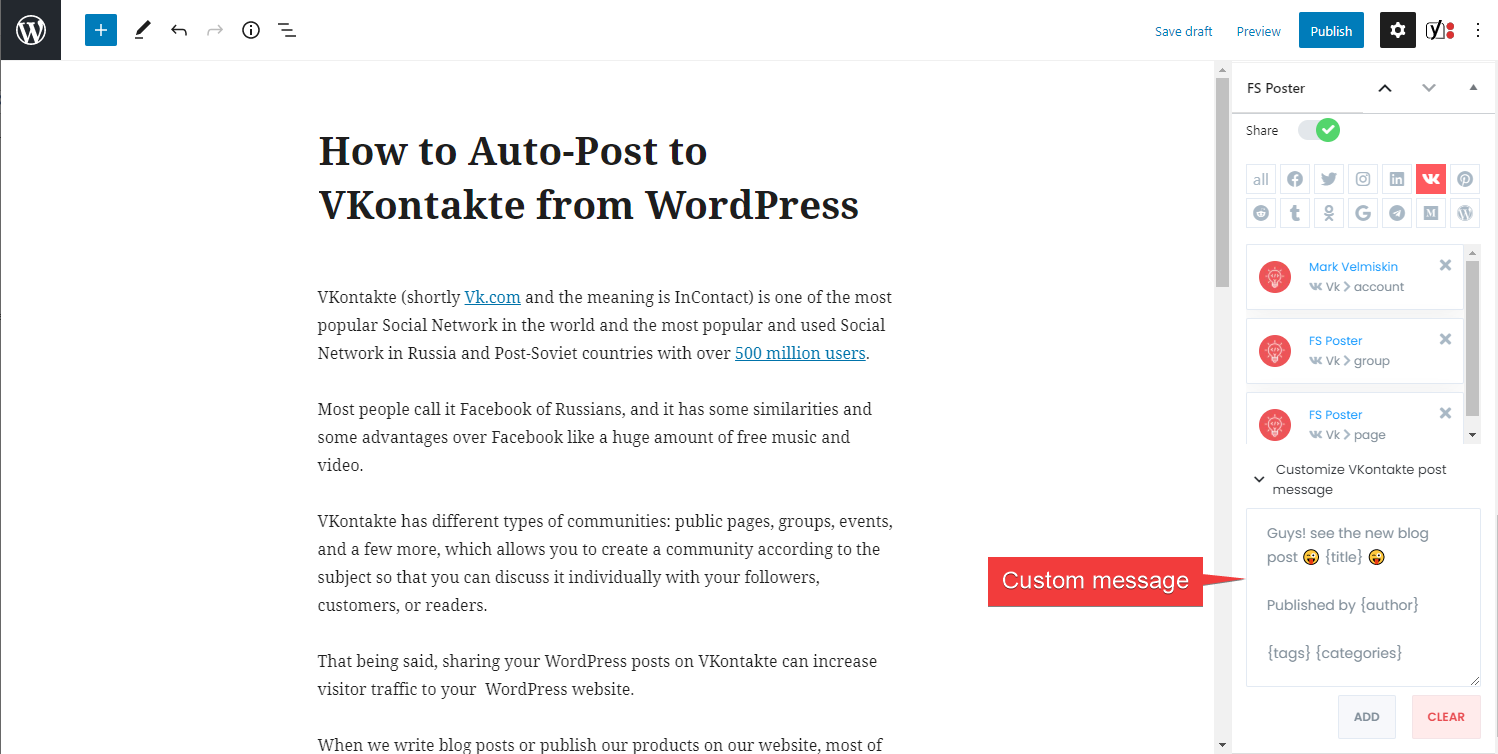
The activated communities will be listed in the dedicated box for auto-posting. You can add or remove them according to your post.
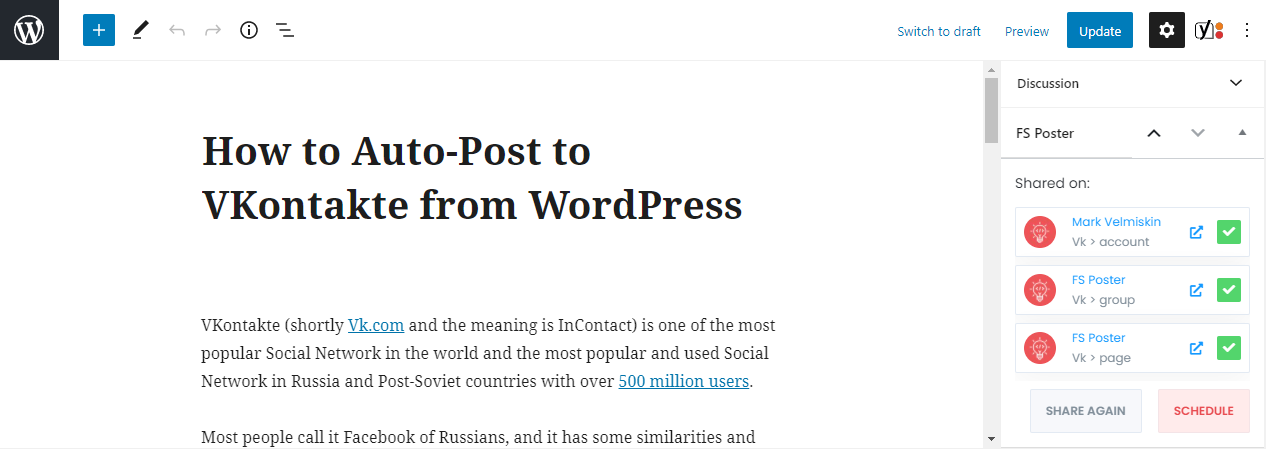
Once you have published the WordPress post, you can go to the post link where it is shared. You can share the post again, or schedule the post for a specific time.
The plugin gives you an option to insert a column to your post list. As a result, you can share, schedule a post, or bulk schedule some posts from the post table.
If you want, you can hide the column by disabling the option in the settings.

How to schedule posts on VKontakte from WordPress
We love scheduling our posts because we are not online all the time, or we need to share the post at rush hours.
The schedule module will let you schedule all your posts.
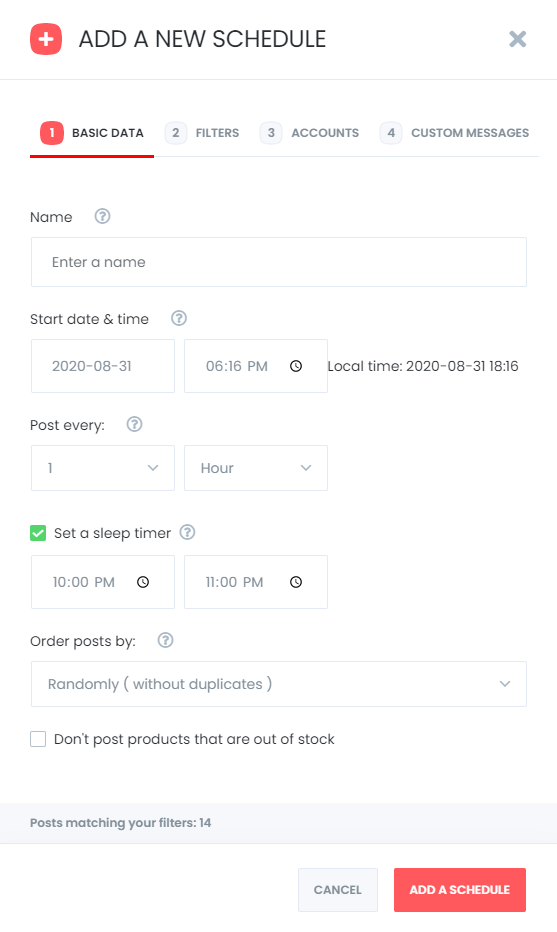
You can set an interval time for each post in the "Post every" section.
The " Set a sleeper time" allows you to exclude a specific time period when you do not want to share.
You have four options to order post by:
- Randomly (without duplicates): shares each of your posts once;
- Randomly: shares all your posts. If you do not stop the schedule, it will share posts repeatedly;
- Old posts first: start sharing from the old one;
- New posts first: start sharing from the new one;
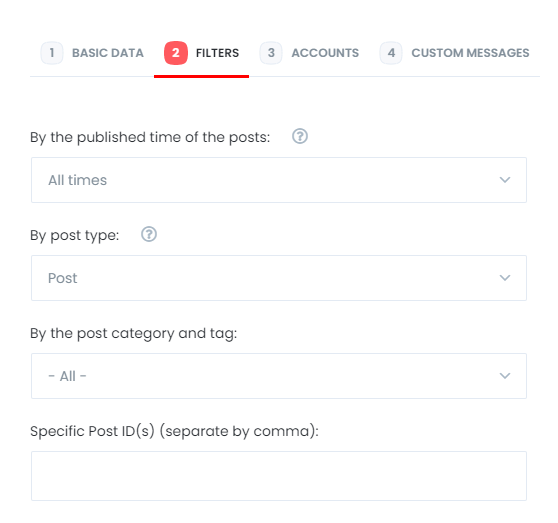
The second tab will let you filter posts by time, type, category, tag, and id.
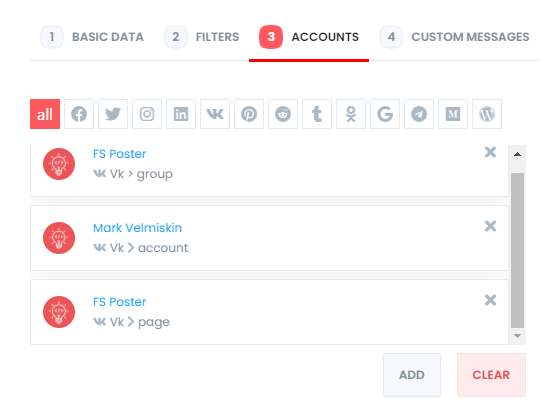
Use the Accounts tab to add or delete your accounts, depending on your posts.
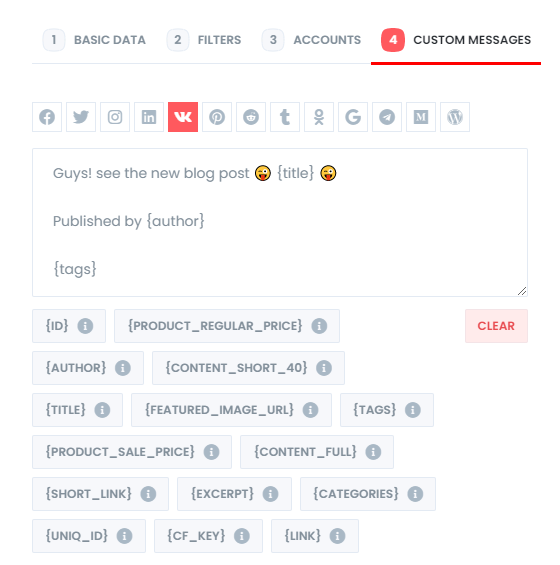
The Custom messages tab will let you add custom messages for your schedules.
The edit, re-schedule, pause and delete functions are added to the schedule.

The logs tab will record all the published posts for you.

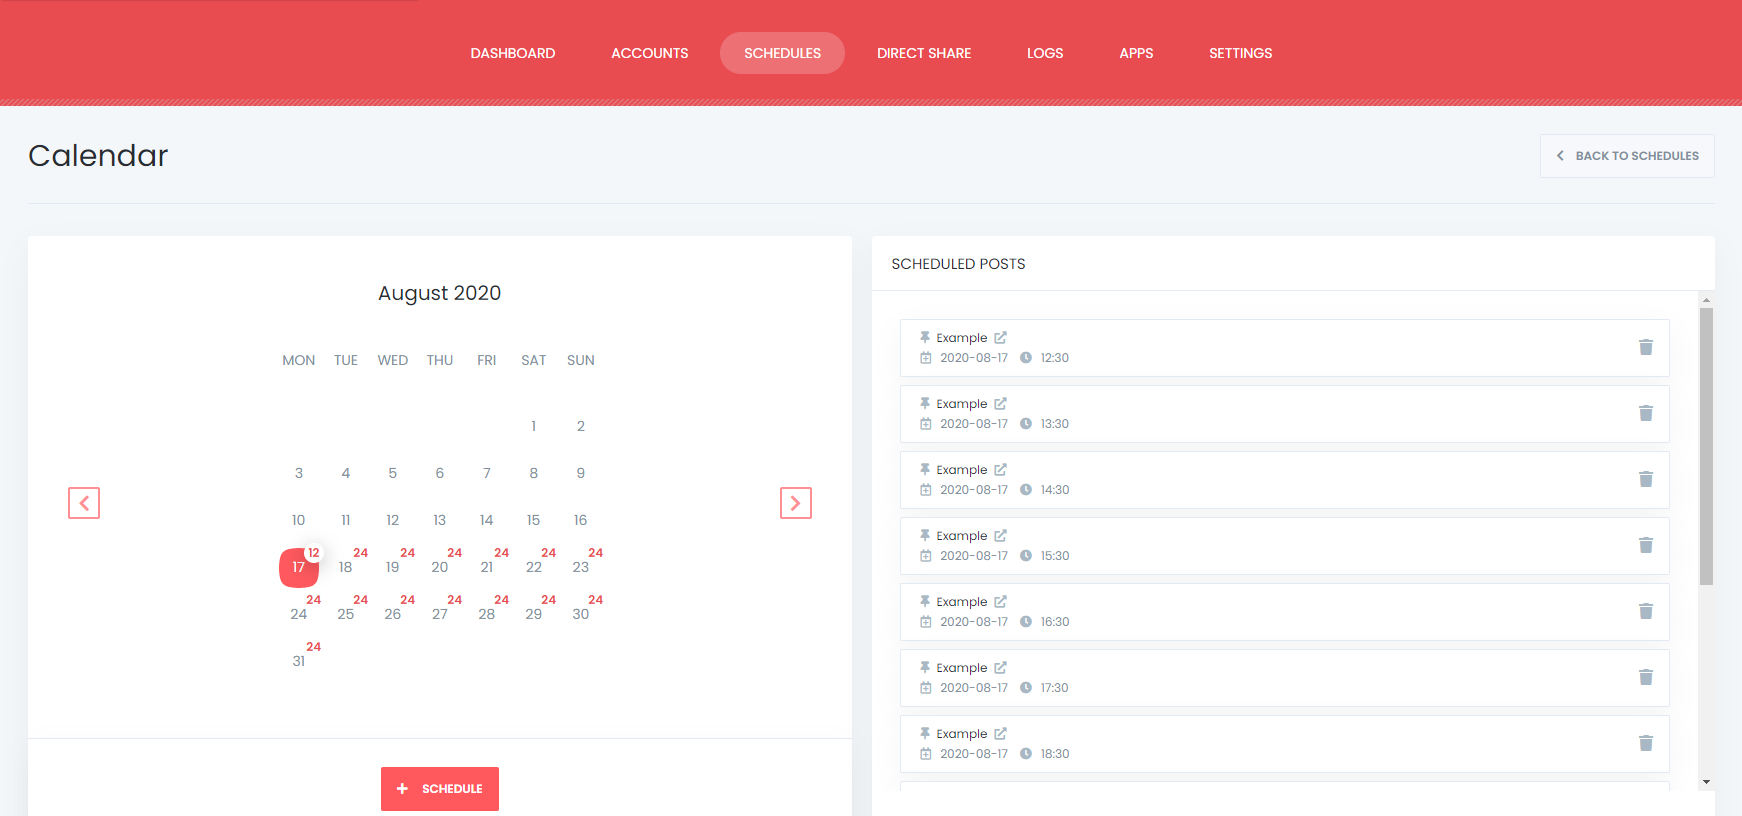
Here is how you will be able to see your scheduled posts on the Calendar view.
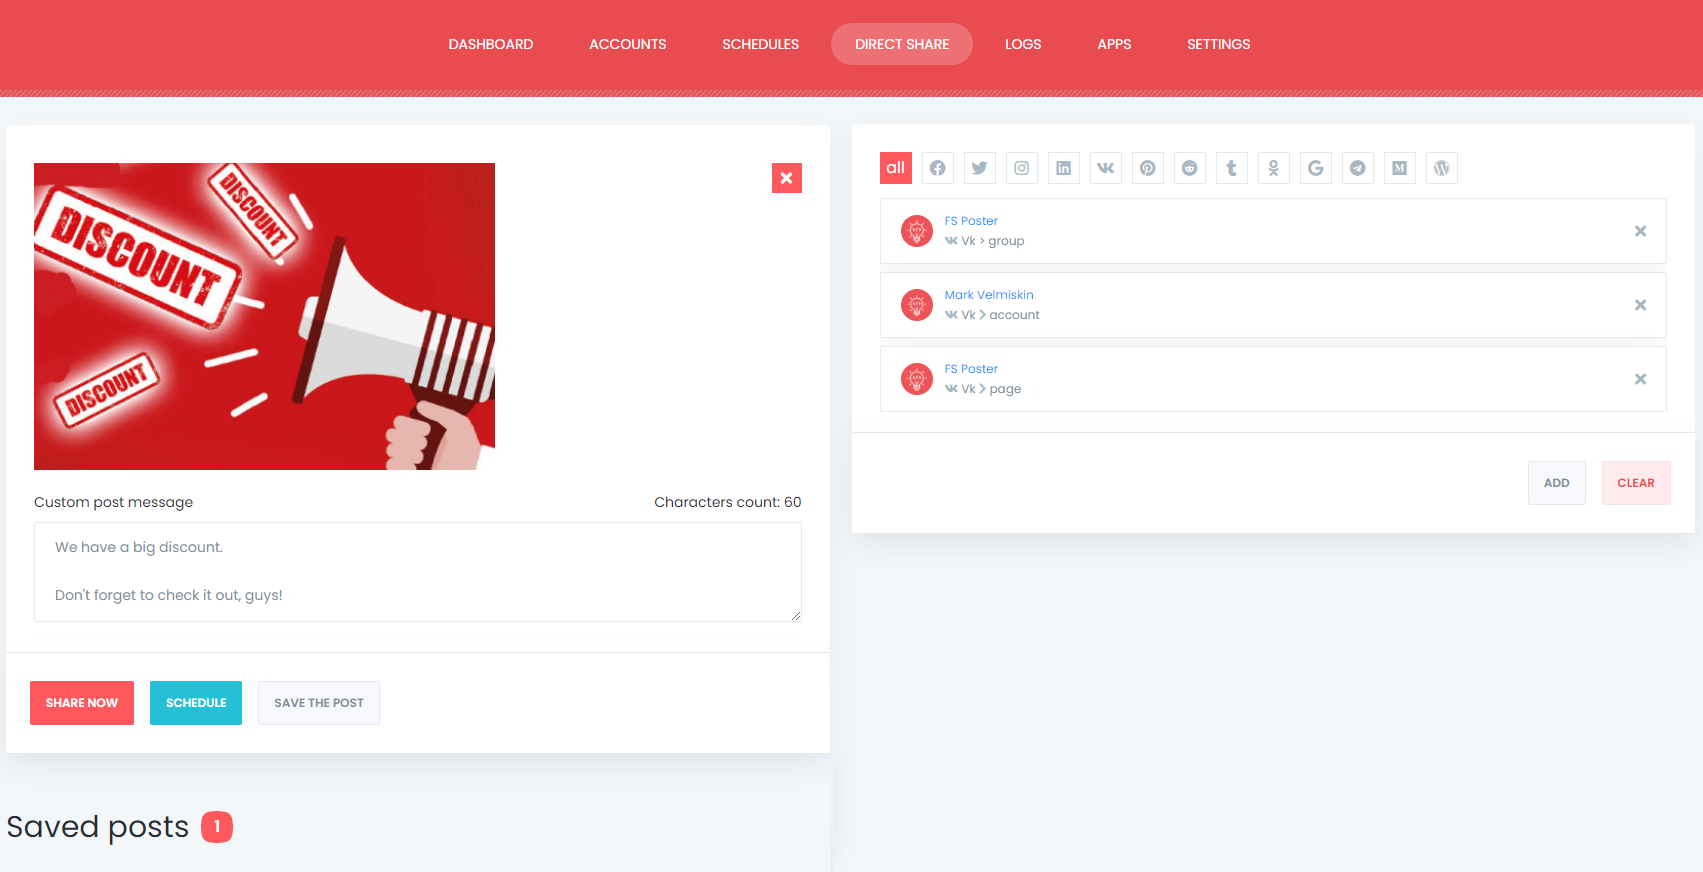
How to share or schedule posts to VKontakte without creating a WordPress post
The Direct Share tab allows you to share or schedule custom content, images, links on your account, pages, and groups without creating a WordPress post.
If you need them later, you can also save these FS Poster posts to share them later again and again.
The Dashboard tab allows you to view shares count, clicks count, and comparison of social networks.

Conclusion
This article discusses how to auto-post to VKontakte from WordPress using the best auto poster plugin, FS Poster.
You can check out the core features of the plugin
Contact us for any pre-sale questions: [email protected]
If you decide to continue with FS Poster, you can check out the official website.


![Автопостинг в ВКонтакте из WordPress [Полное руководство]](https://www.fs-poster.com/uploads/posts/f925e980df0074b4cf2f74b62489960d.png?ver=710)
![How To Auto-Post To LinkedIn From WordPress [A Complete Guide]](https://www.fs-poster.com/uploads/posts/49fa779d1d0a6e2d5ba7fee1d0f4d130.png?ver=710)
![How to Auto-Post to Facebook from WordPress FREE [A Complete Guide]](https://www.fs-poster.com/uploads/posts/a75b7b057fda82186b29744772510010.png?ver=710)
