![How To Auto-Post To Pinterest From WordPress [A Complete Guide]](https://www.fs-poster.com/uploads/posts/74a299c309503e82b8e4a570f992952b.png?ver=710)
Saritel Abbaszade
Author
Do you use Pinterest for your business? And do you looking for a time-saving plugin that can share your posts on Pinterest? You have found this plugin now. FS Poster is here for auto posting and scheduling your posts from WordPress to Pinterest.
Now, Pinterest has more than 320 million monthly active users.
Pinterest's traffic has more than doubled in size in a few years. And we want that traffic to our website, right?
This post will discuss the best WordPress plugin to pin your blog post images to your Pinterest account automatically.
Here is how it works.
How to Add Accounts for Auto-posting
In order to share our posts to Pinterest, we need to add our accounts and boards to the plugin.
Once you added your account to the plugin, your boards will be added to the plugin automatically, and you will get rid of logging into your account each time to share a post.
While you are reading the article, you can also try the demo version of the plugin.
Please note that every hour, the plugin gets its initial state. So, your accounts might be deleted from the plugin at the end of each hour.
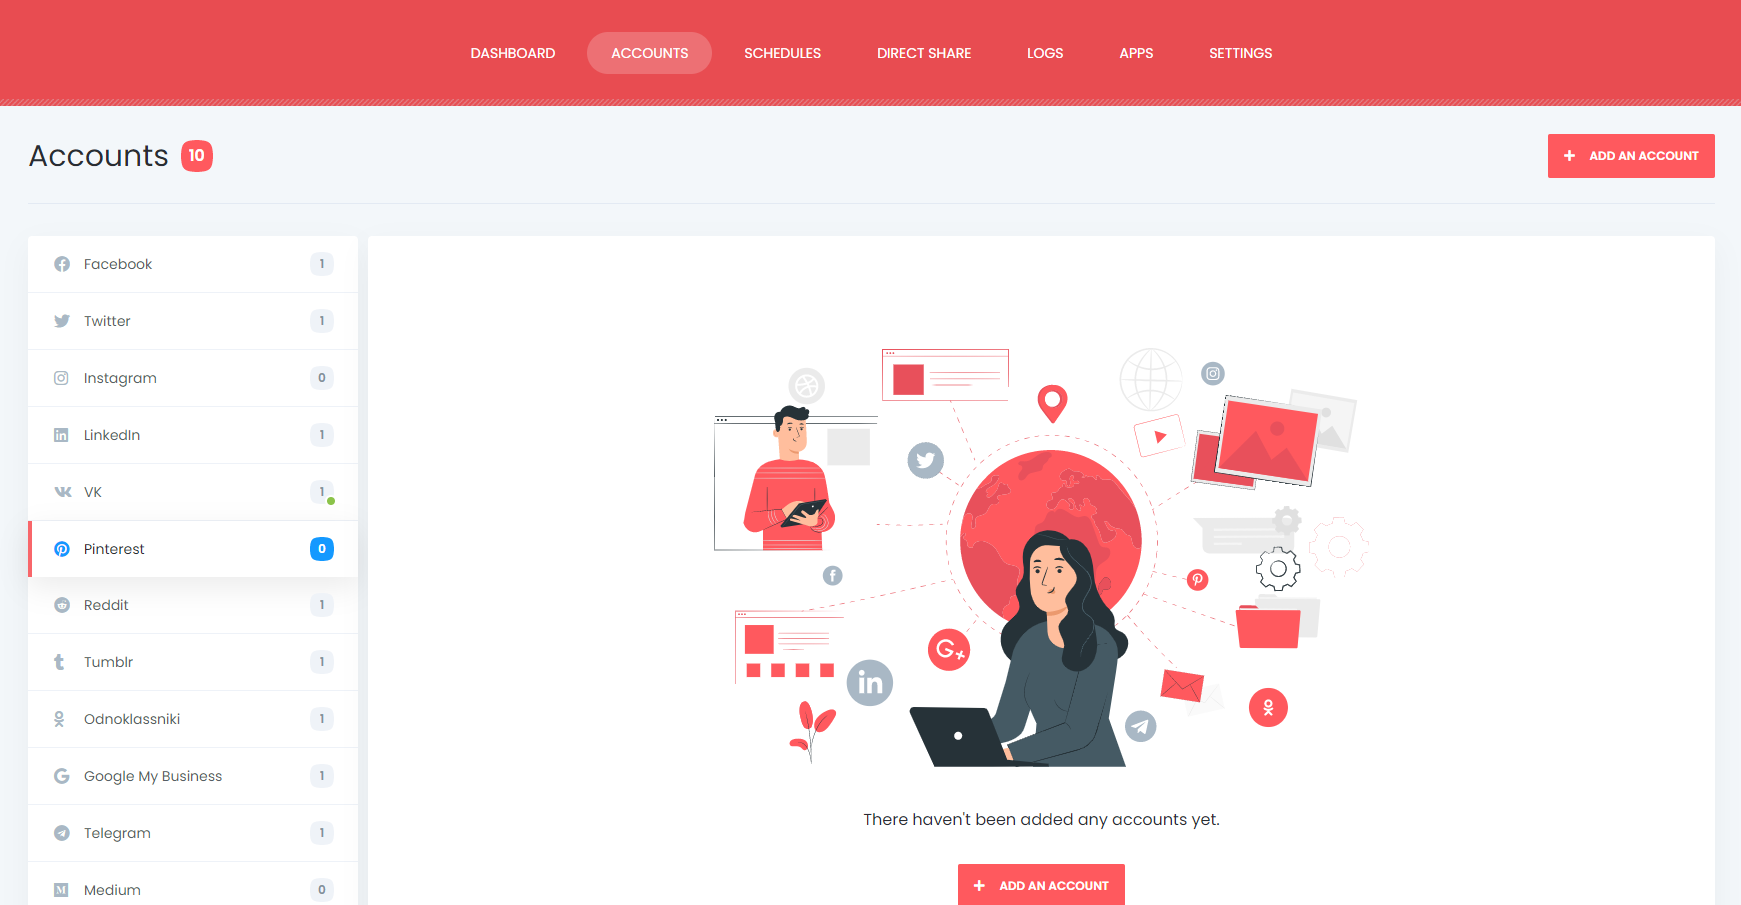
Head to the Pinterest menu of the Accounts tab to add your Pinterest account to the plugin.
Luckily there is no limit for adding accounts. You can add as many accounts as you want.
Click the ADD AN ACCOUNT button to add your account.
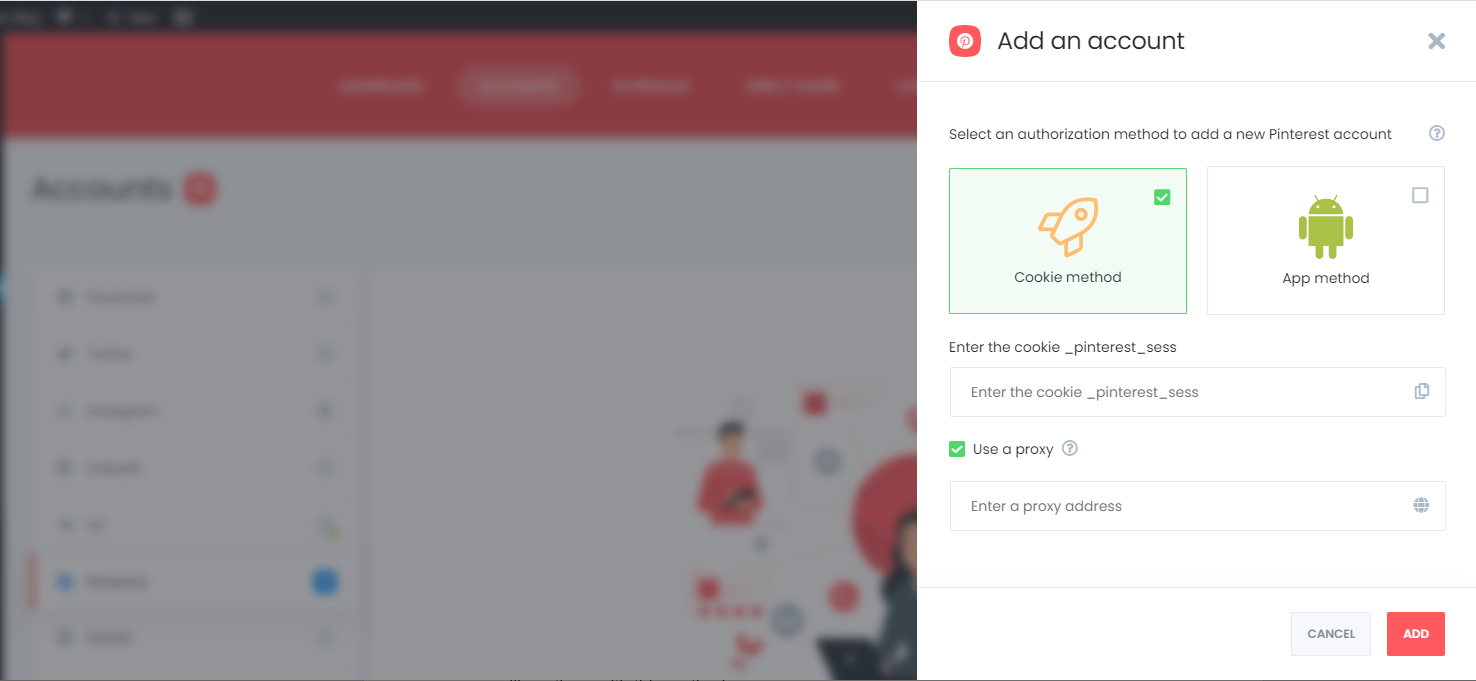
The plugin has two options to add your account; the cookie and app method.
Because the fastest way to add a Pinterest account to the plugin is the cookie method, we will continue with this method.
Select the cookie method and click next.
Open the Incognito tab in the Chrome browser (you can open the Incognito tab in Chrome by pressing Ctrl+Shift+N keys) and log in to your Pinterest account.
Press the F12 key in your keyboard or Inspect element to go to the "Application" tab within the opened window and copy the "_pinterest_sess" cookie value.
Next, paste the cookie value to the required box and click the ADD button.
The plugin also allows you to create and add an API to the plugin to add your accounts to the plugin using your personal API.

Here is how you can create a Pinterest API.
When someone shares many posts from the same IP address in their home or office, they might get banned.
Therefore, it is advisable to use your own country-specific proxies. By doing this, you will reduce the likelihood of being blocked on social networks.
Luckily, the plugin allows you to add a proxy to the plugin so that you can enjoy having many accounts.
By activating your board, you will be able to share your posts on activated ones automatically.
If you do not want to share posts for a specific time, you can deactivate them.

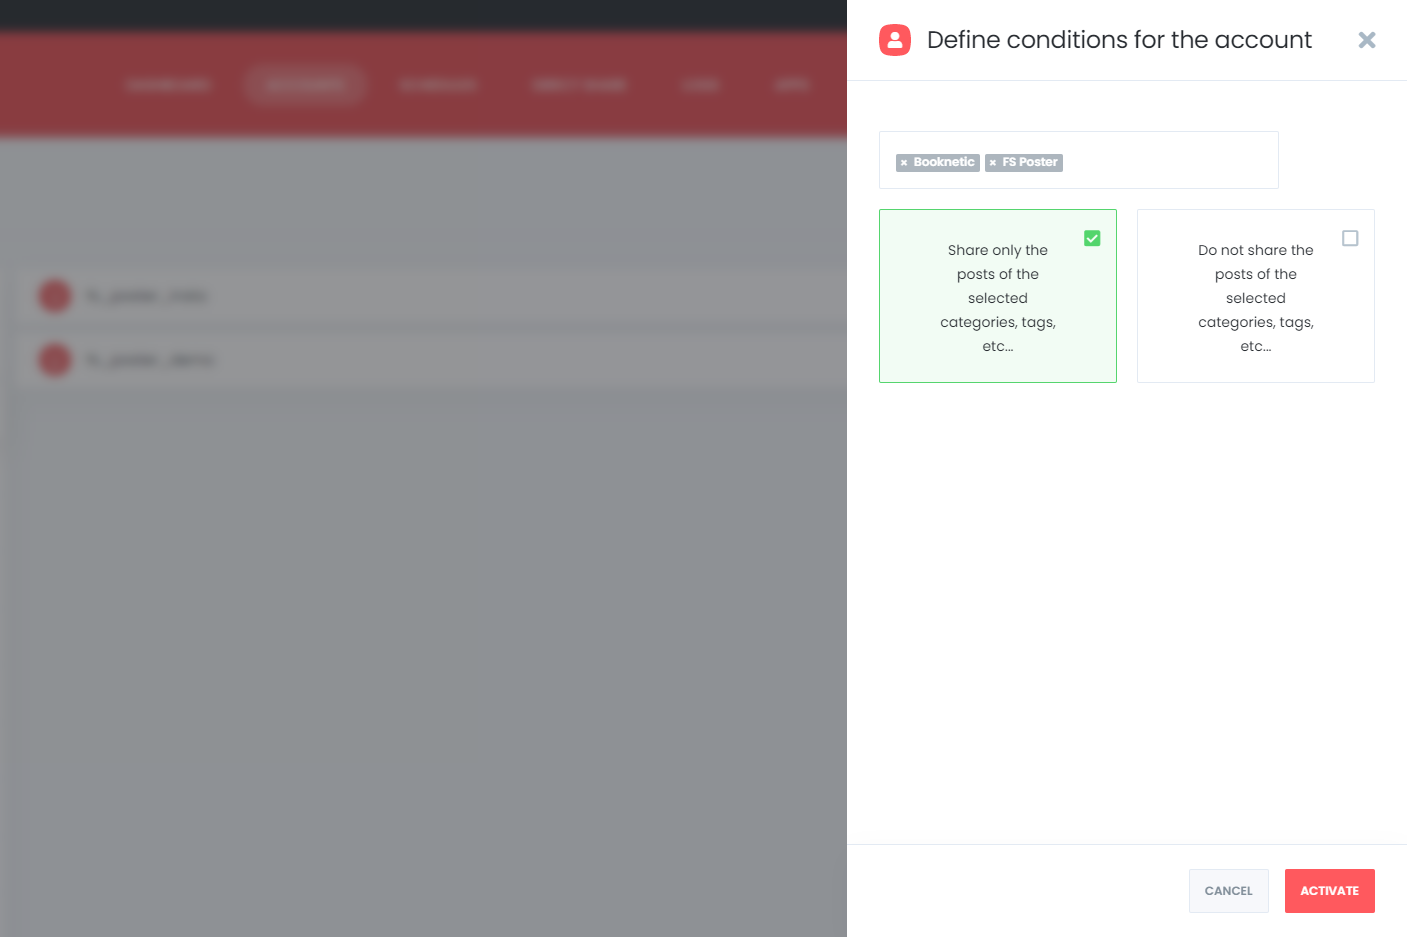
The "Activate condition" feature allows you to auto-post specific category posts on the specific accounts. You just need to select the categories that you want to share on an account.
The plugin supports the multi-user platform. Each WordPress users can add and manage their own social accounts.
One WordPress user cannot share any post on other's accounts. But you can make your accounts public for other WordPress users.
For this, you should activate the Make Public option. As a result, other WordPress users can post on those accounts by activating these accounts for auto-post.

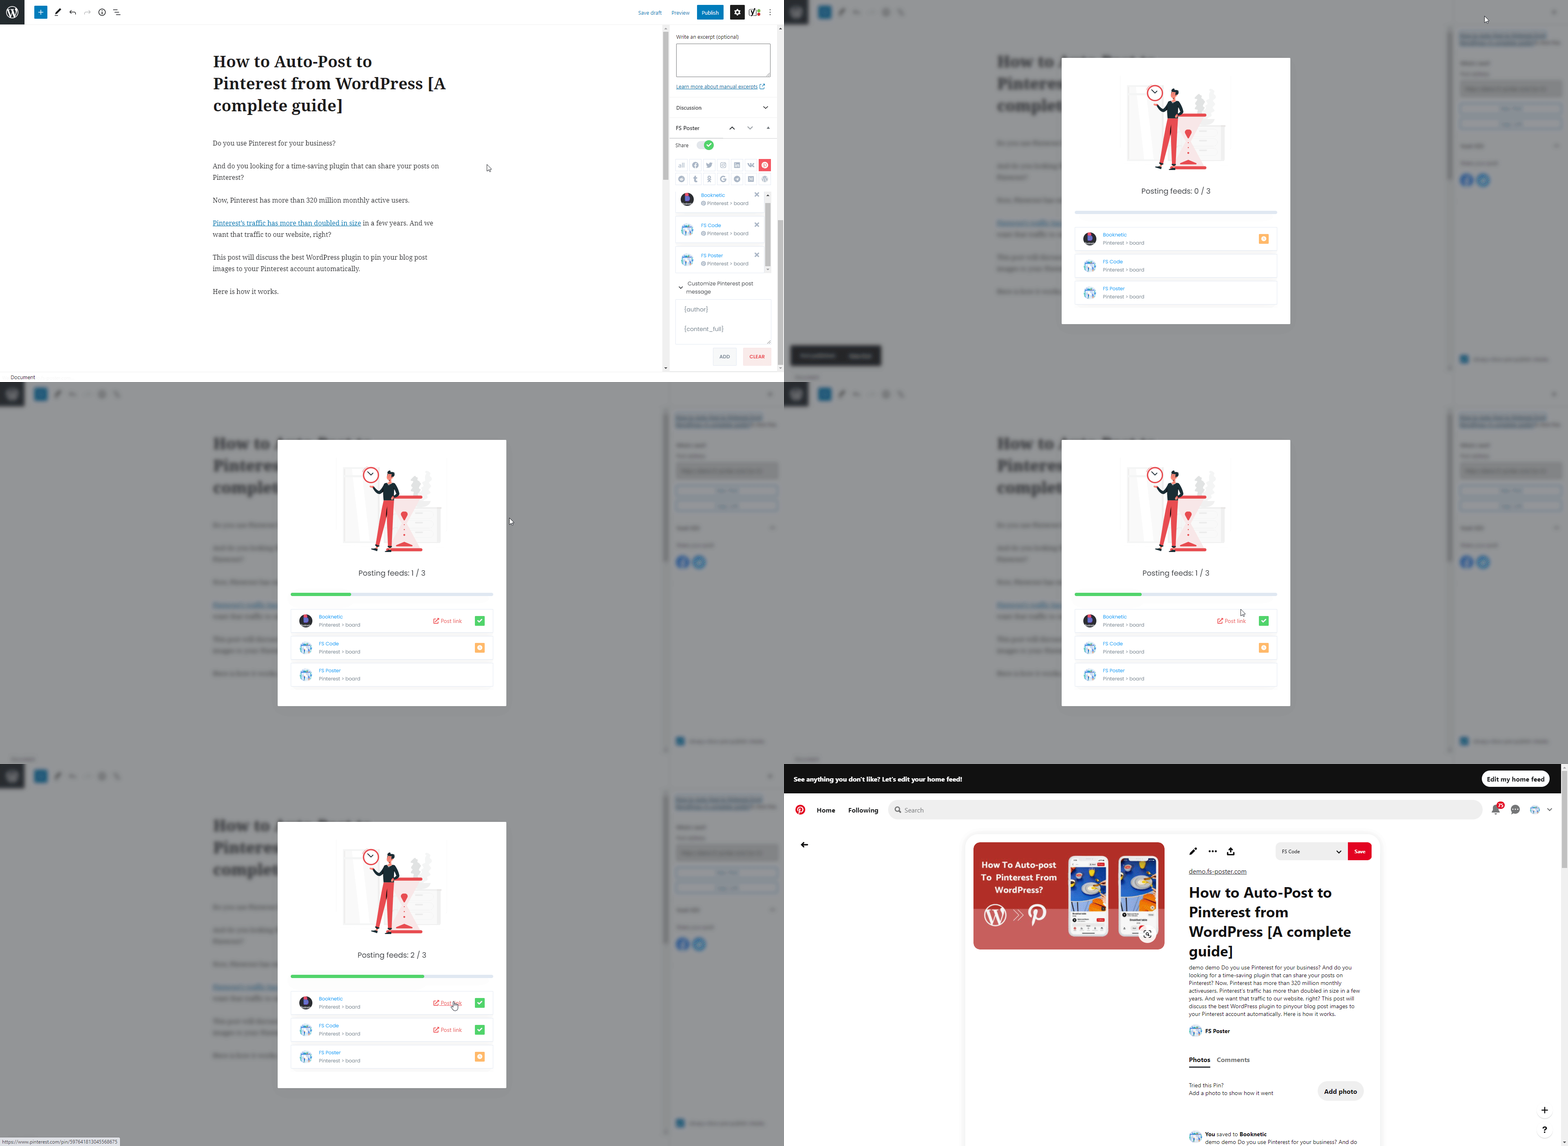
Let's publish a post and see how FS Poster auto-posts WordPress posts on Pinterest boards.

You can also share posts in the background to continue your work on the website.
The plugin shared the post on three boards within seven seconds.
How long does it take when you log in all those accounts one by one and share your posts? Of course, it depends on how many Social Media accounts do you have.
I have seen customers with hundreds of Facebook pages, and it is a time consuming and boring activity to share your posts on all your accounts one by one manually.
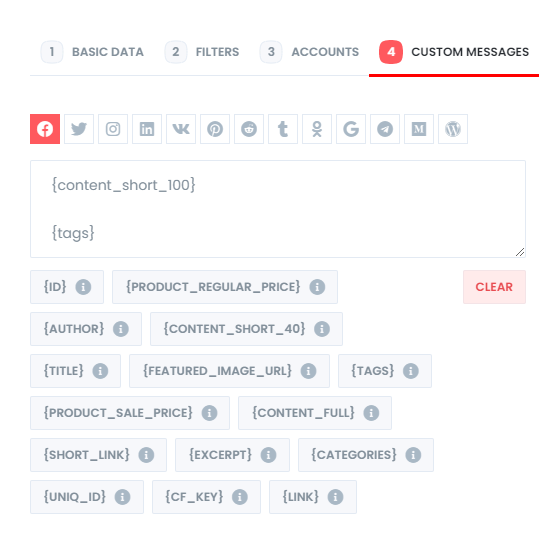
You can set a custom message with ready keywords for all your posts in the settings, and you can also customize it when you publish a post.
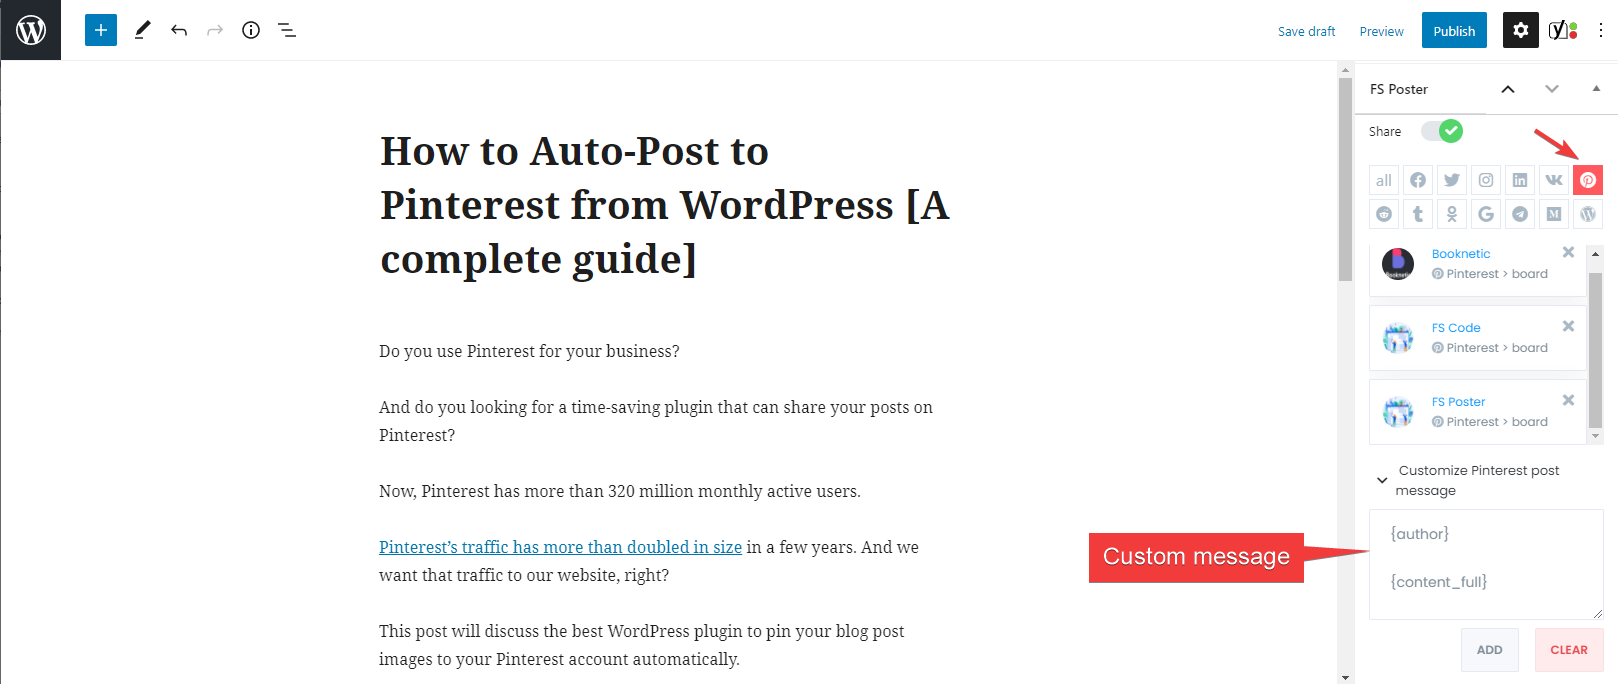
The activated communities are on the list automatically. You can add or delete them, depending on your post.
You can also go to the post link, share the post again, or schedule the post again after sharing.

You can also share, schedule a post, or bulk schedule some posts from the post table.

How to schedule posts on Pinterest from WordPress
Scheduling previously published WordPress posts, products, etc. on Pinterest using the FS-Poster Schedule module is extremely simple.
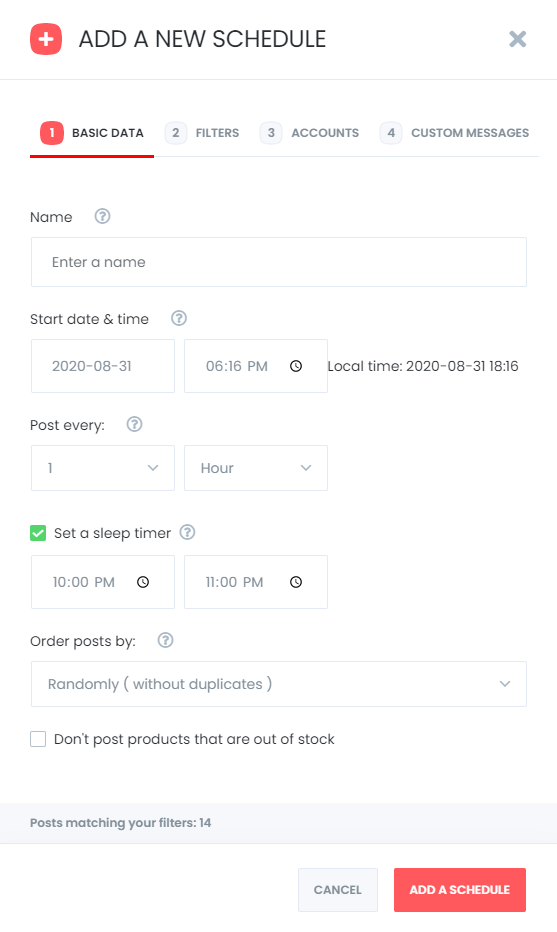
You can set an interval time for each post in the "Post every" section.
The " Set a sleeper time" allows you to exclude a specific time period when you do not want to share.
You have four options to order post by:
- Randomly (without duplicates): shares each of your posts once;
- Randomly: shares all your posts. If you do not stop the schedule, it will share posts repeatedly;
- Old posts first: start sharing from the old one;
- New posts first: start sharing from the new one;
The second tab will let you filter posts by time, type, category, tag, and id.
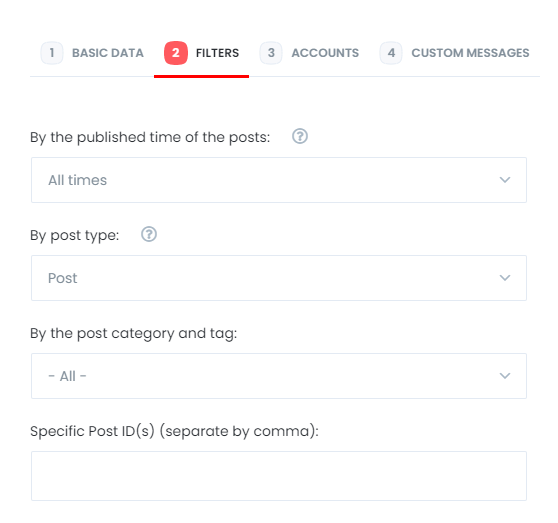
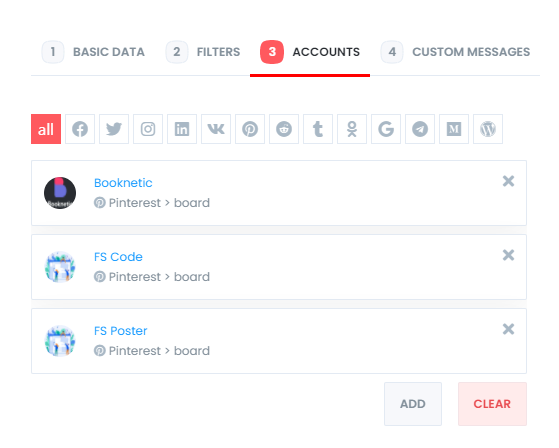
You can add or delete your accounts, depending on your posts to the Accounts tab.
Lastly, customize your message for the schedule.
You are able to edit, re-schedule, pause, and delete schedules.

You can look at the logs of the schedules as well.

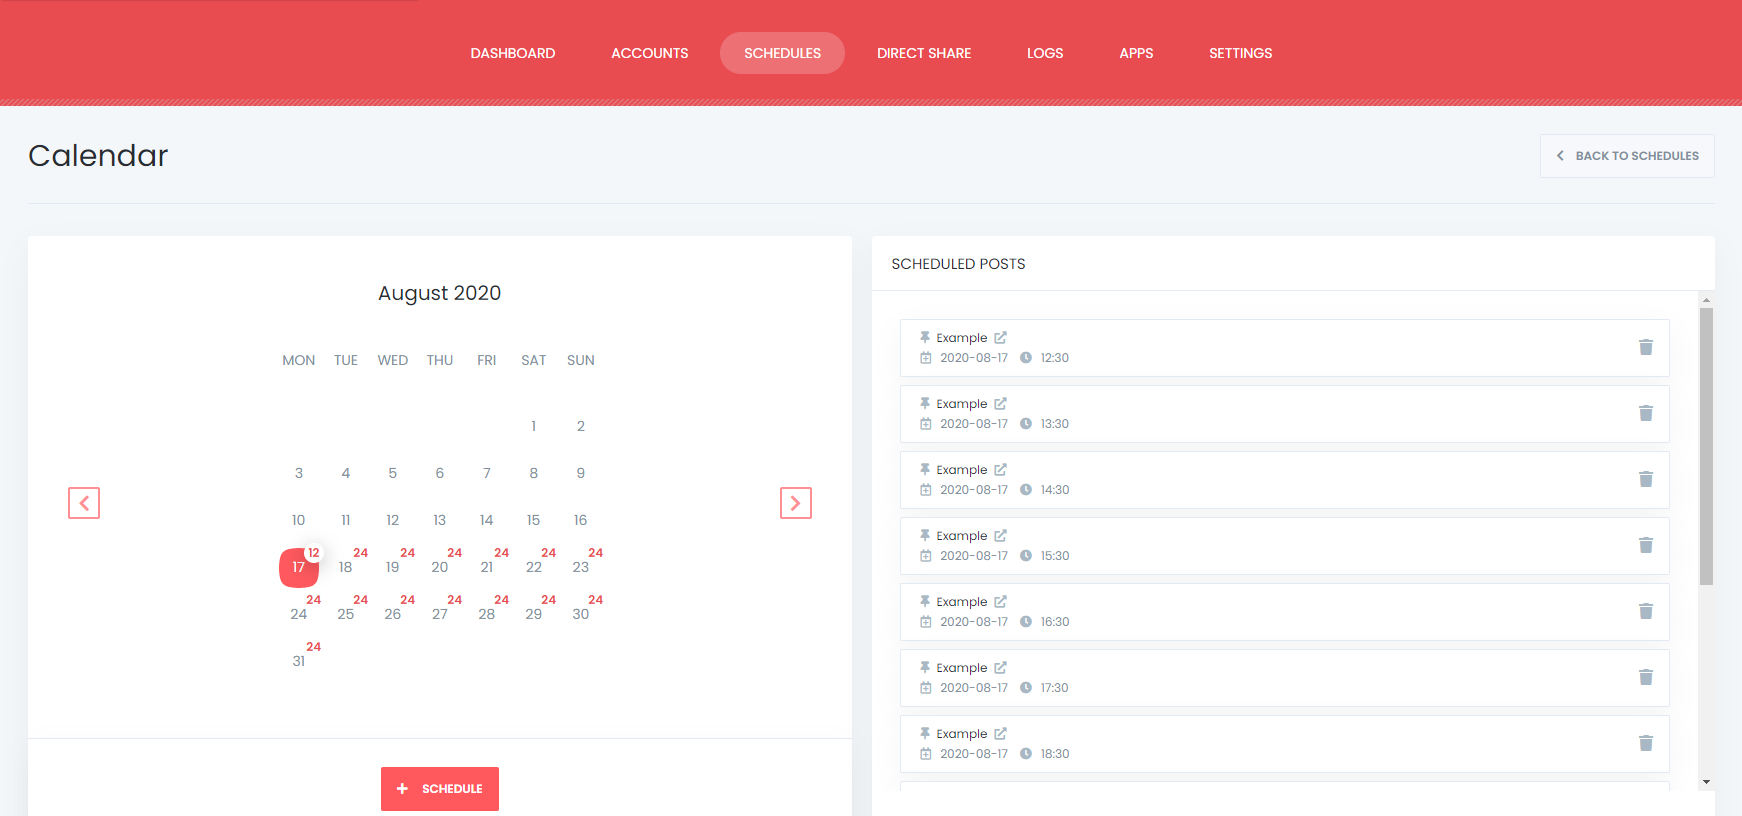
And you can see all Scheduled posts in the Calendar view.
How to share or schedule posts to Pinterest without creating a WordPress post
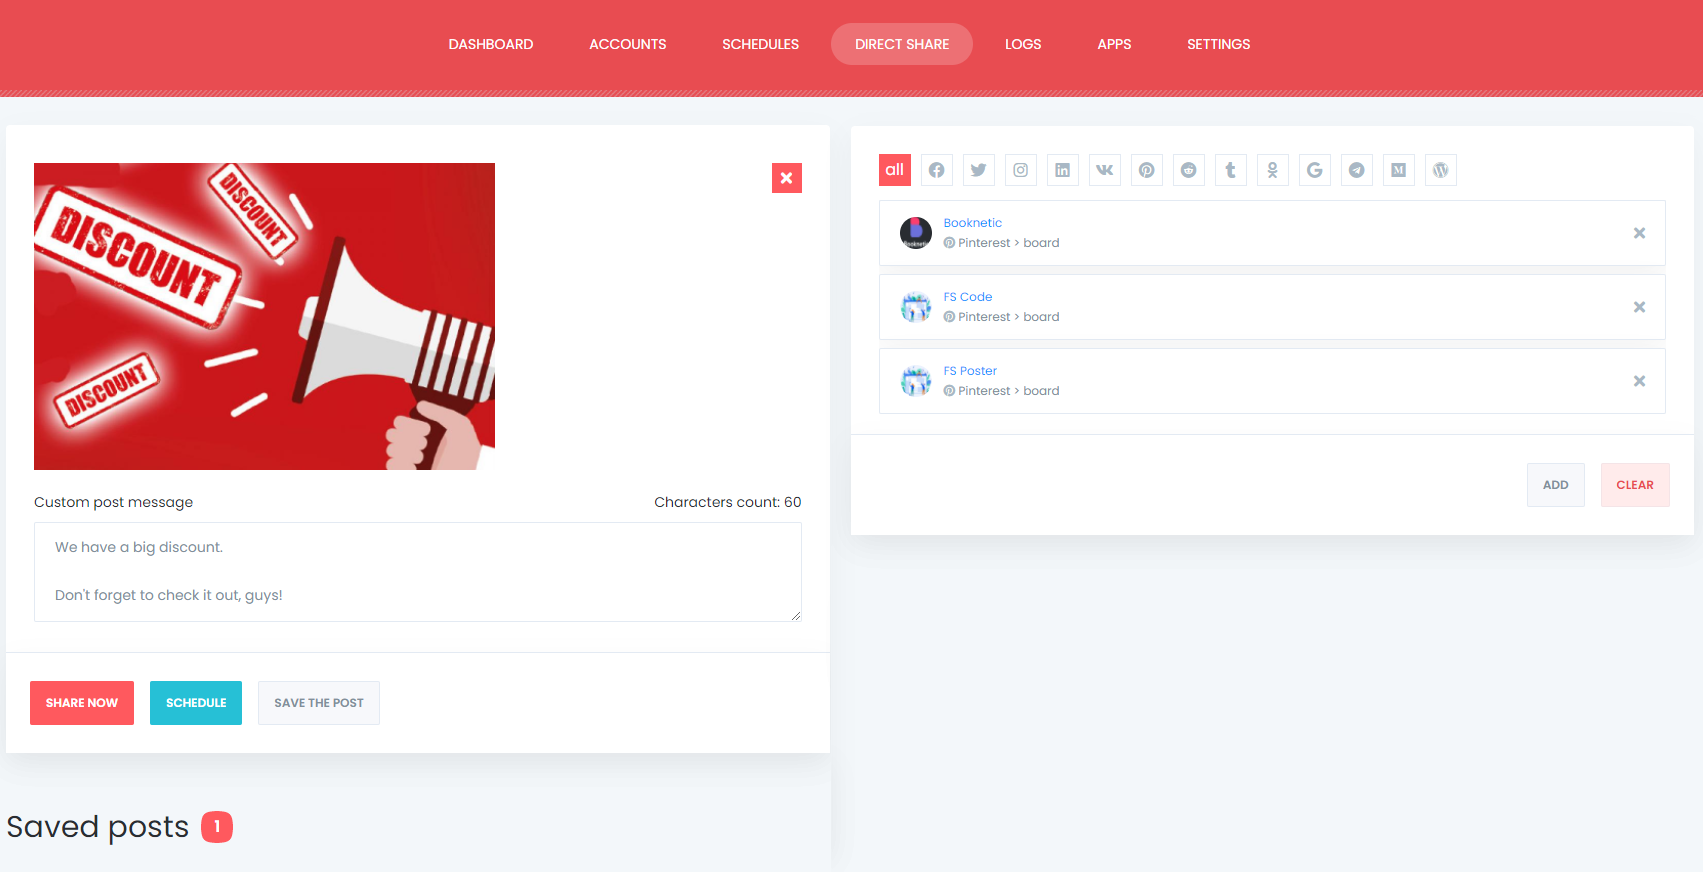
If you do not want to share a post on your blog, but you would like to share or schedule custom contents, images, links on your account, you can use the Direct Share Panel to achieve your goal.
You can also save these FS Poster posts to share them later again and again.
You can see auto-post insights on the Dashboard tab.

Conclusion
This article discusses how to auto-post to Pinterest from WordPress using the best auto poster plugin, FS Poster.
You can check out the core features of the plugin
Contact us for any pre-sale questions: [email protected]
If you decide to continue with FS Poster, you can check out the official website.


