![How To Auto-Post To Google Business Profile From WordPress [A Complete Guide]](https://www.fs-poster.com/storage/posts/66a37b755388e11f6b11fe0bab178f5b.png?v=1609405305)
Saritel Abbaszade
Author
Google Business Profile, is a platform to help businesses manage the search results that show when someone searches your business name. This is where businesses manage contact information, open hours, reviews, and pictures. You can post updates to Google Business Profile listing, allowing you to share photos, products, and list upcoming events.
Google Business Profile posts show up when someone searches your business's name on Google and drawing more attention and traffic to your website. If you run a business, Google Business Profile is a great platform to make your business more visible in search results.
But manually posting to Google Business Profile can be boring and time-consuming. With FS Poster social media auto poster you can share your updates from WordPress to Google Business Profile automatically. This is a step by step guide on how to auto-post on Google Business Profile automatically.
How to Add Accounts for Auto-posting
After installing the plugin on a website, we need to add our accounts to the plugin.
You can also try the demo version of the plugin while we are discussing the plugin.
Please note that every hour, the plugin gets its initial state. So, your accounts might be deleted from the plugin at the end of each hour.
We can add our accounts for each Social Network on the dedicated menu, and the menus are labeled as the name of the Social Network.
Each menu contains an ADD AN ACCOUNT button. We can add accounts by clicking it.
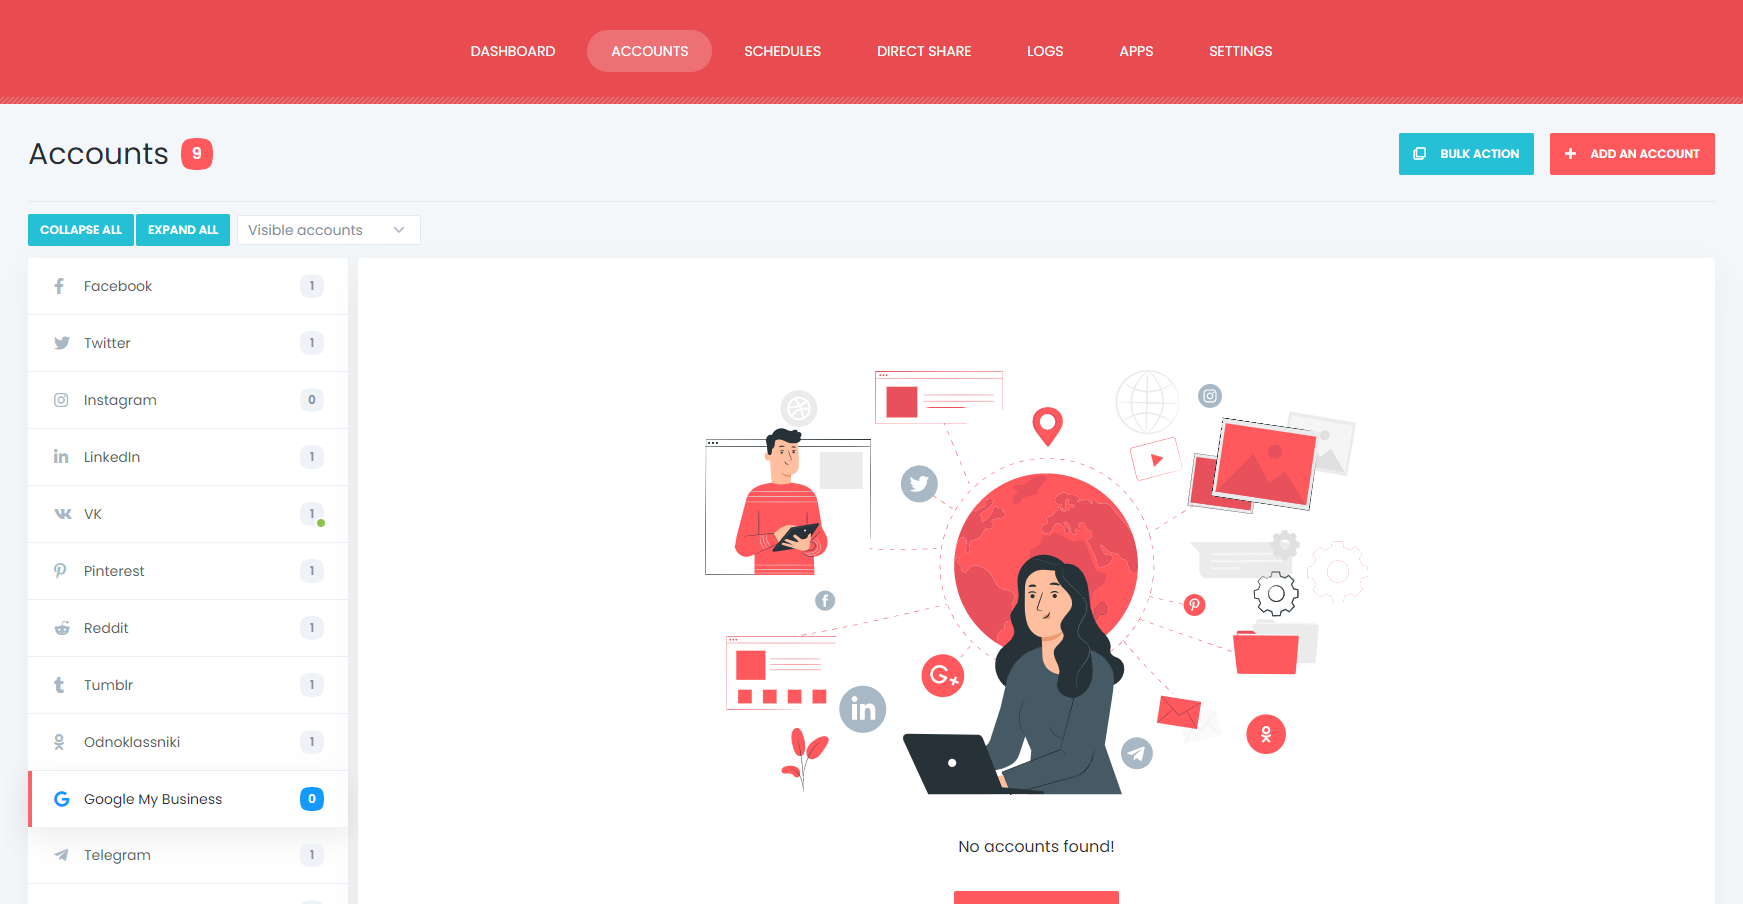
One thing I like the most about the plugin is that there is no limit for adding accounts. We can add as many accounts as we want.
Adding an account to the plugin requires only three clicks because Google Business Profile's official API is integrated into the plugin, and we need to authorize our account.
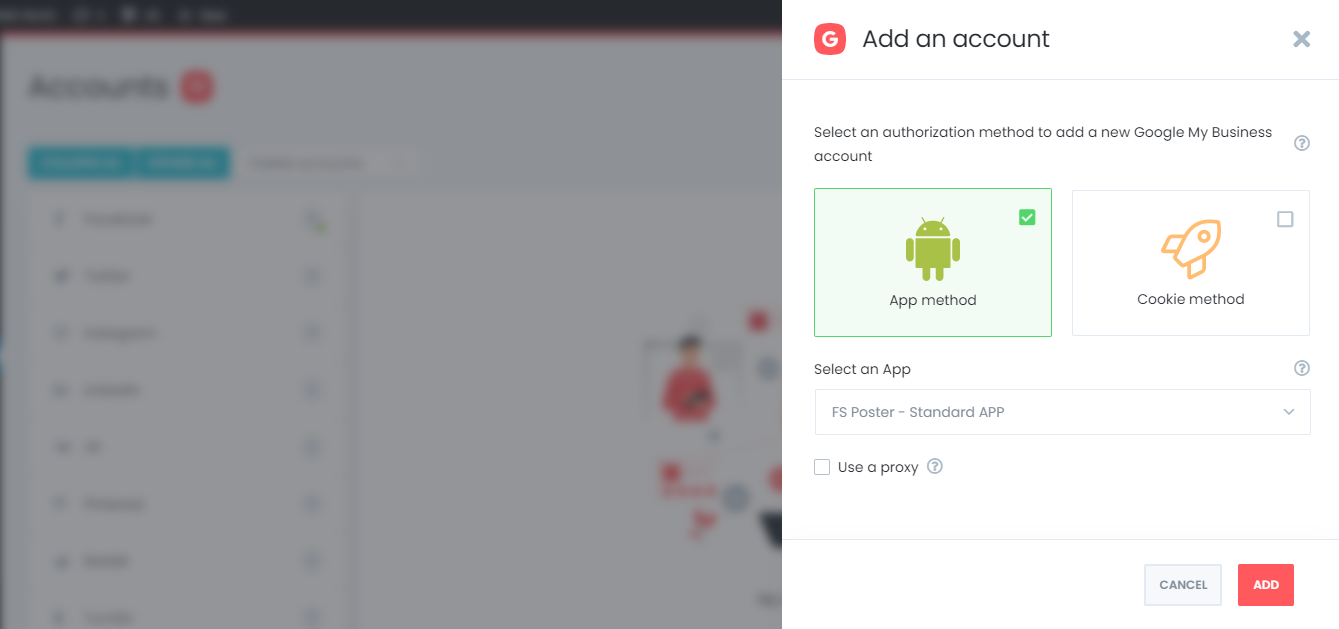
I used to be fed up logging into my accounts to share a post every time I need to share a new post. Now, we need to add it once and enjoy publishing for a long time.
It sometimes happens to some people that Social Networks block their server's IP addresses. For this reason, or any other reason, if you would like to use a Proxy, the plugin also supports proxies.
We need to activate our locations to share posts on them.

We may deactivate some locations not to automatically share the posts on them for a specific period of time.
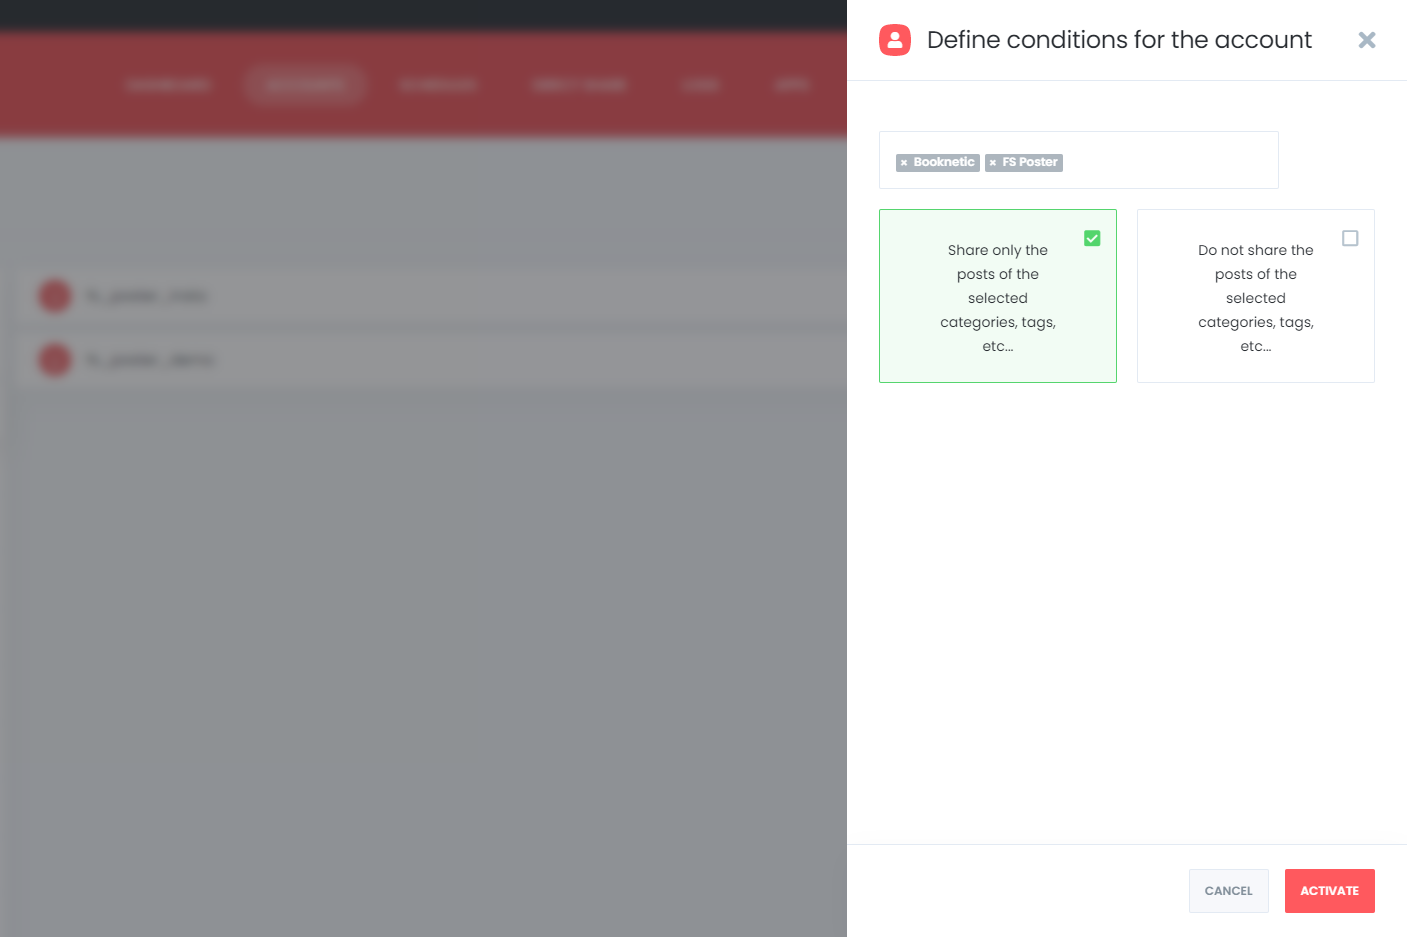
There is also an activate condition feature, which I like a lot.
The Activate condition feature allows you to auto-post specific category posts on specific accounts and locations. You just need to select the categories that you want to share on an account.
The plugin supports the multi-user platform. Each WordPress users can add and manage their own social accounts.
One WordPress user cannot share any post on other's accounts. But you can make your accounts public for other WordPress users.
For this, you should activate the Make Public option. As a result, other WordPress users can post on those accounts by activating these accounts for auto-post.

You can set a custom message with ready keywords for all your posts in the settings, and you can also customize it when you publish a post.
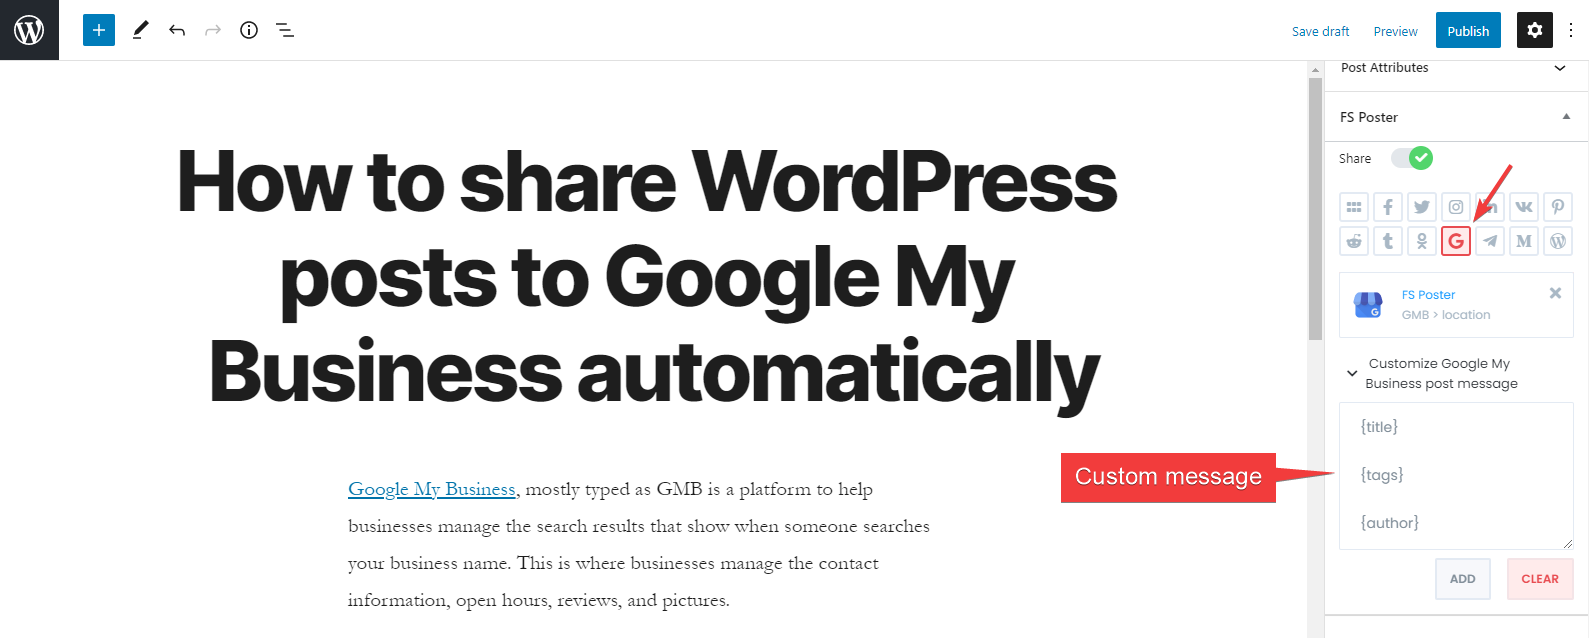
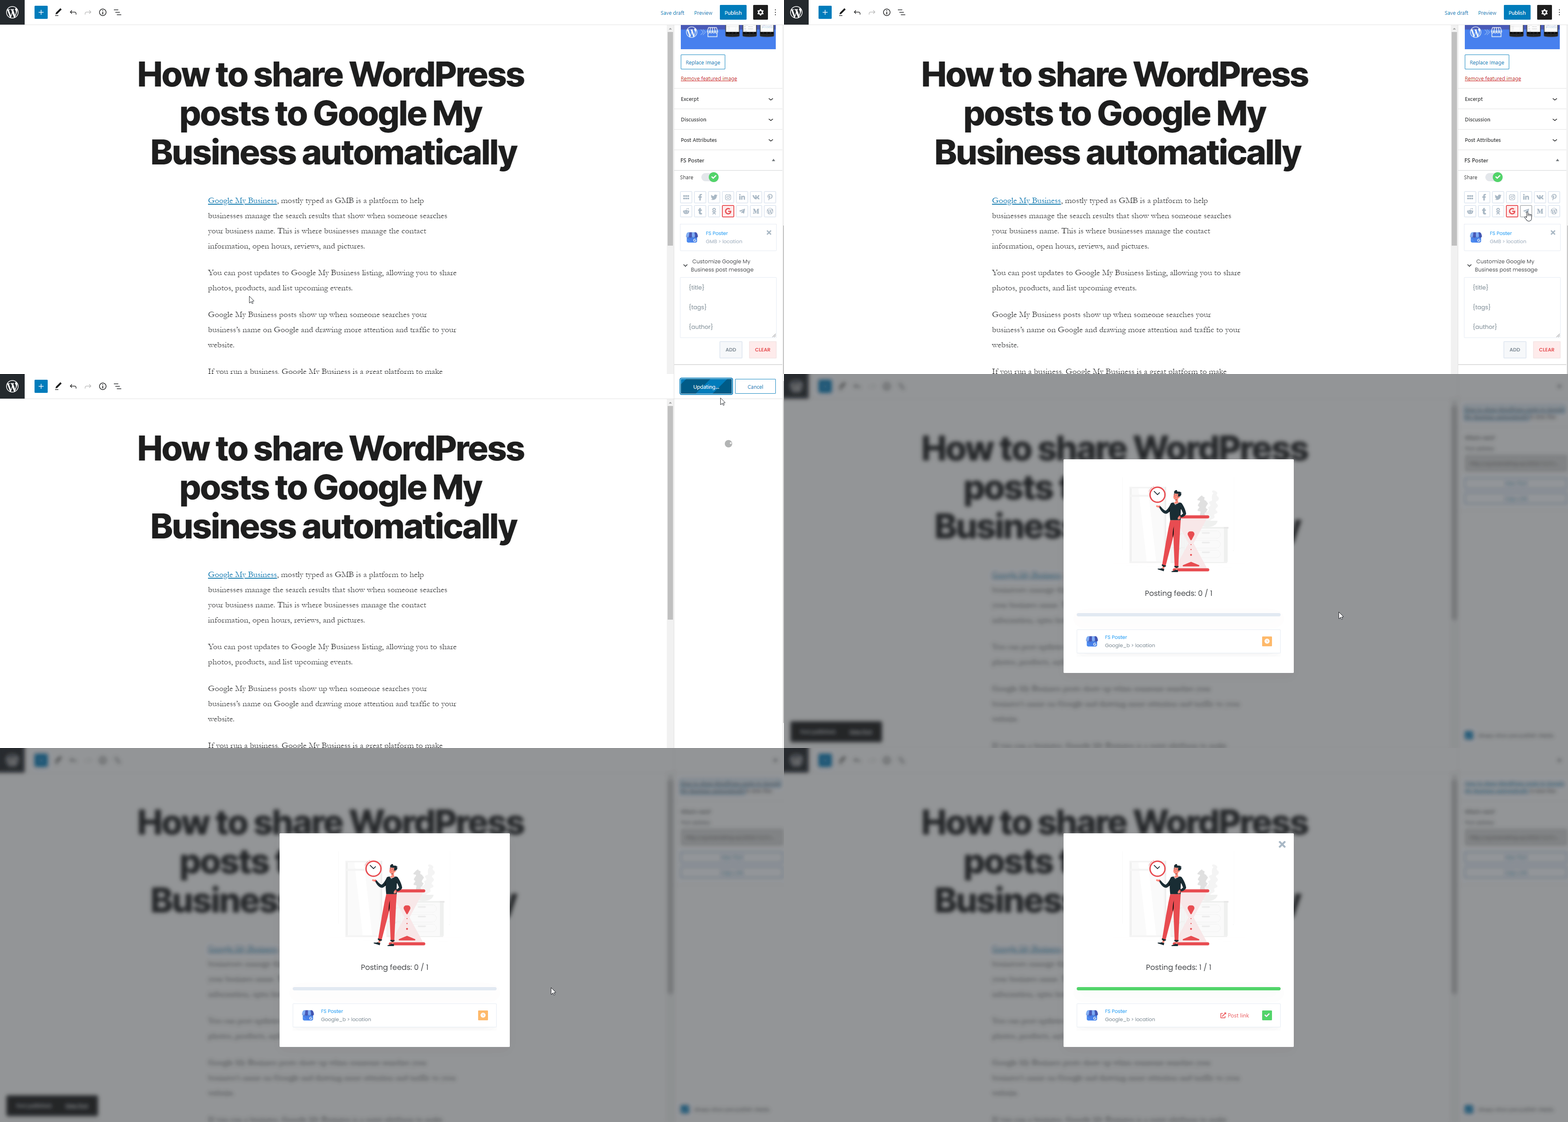
Now, we can publish WordPress posts. The plugin will share the WordPress post to my Location.

I disabled the "Share in the background" option in the settings because I wanted to show the result visually. You can enable the option and continue posting. The plugin will share the post on Social Networks in the background.
I am sure you have hundreds of accounts, groups, pages, etc. You can use FS Poster to save your time by sharing your posts automatically.
You can also go to the post link, share the post again, or schedule the post again after sharing.
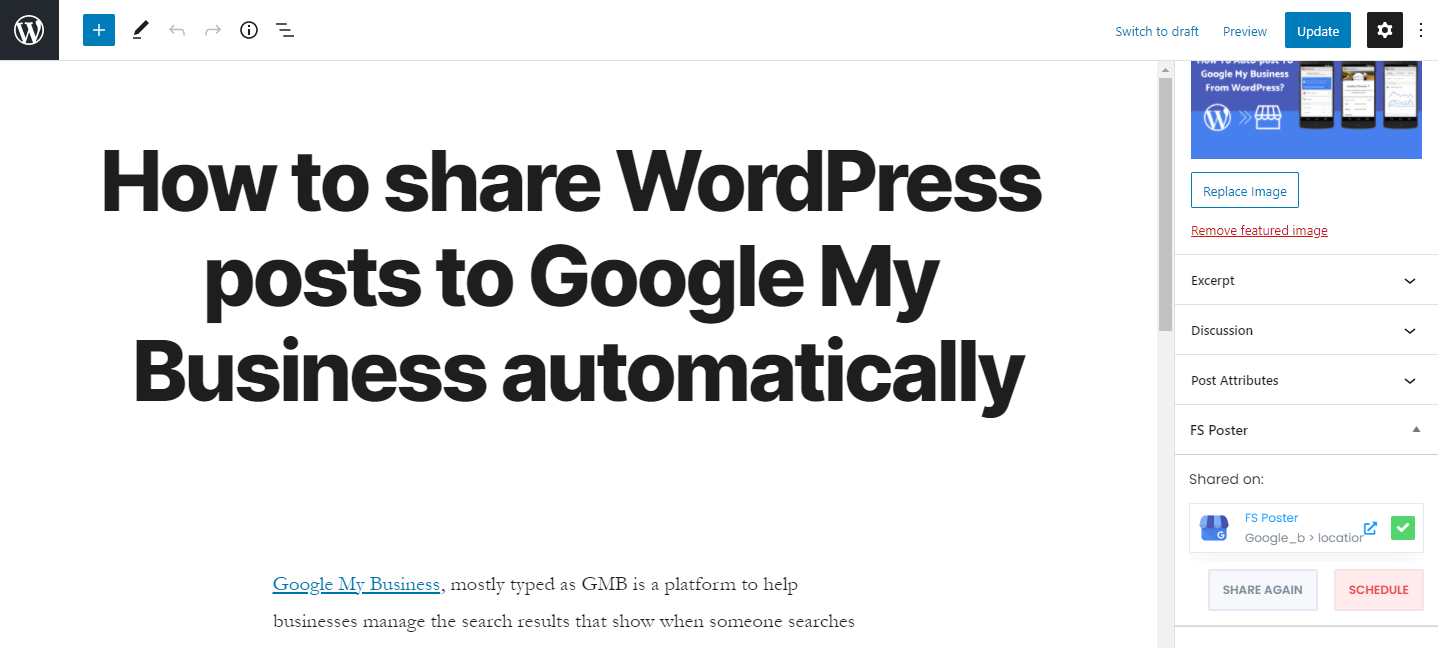
You can also share, schedule a post, or bulk schedule some posts from the post table. Use FS Poster to share all custom post types as well.

How to schedule posts on Google Business Profile Locations from WordPress
Fortunately, you can share previously created WordPress posts, products, etc., on Locations using the FS-Poster Schedule module.
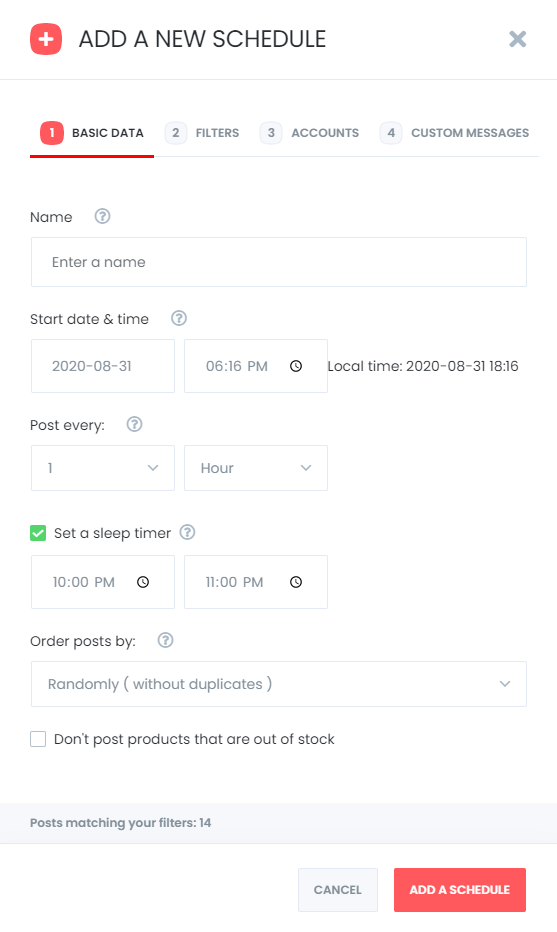
You can set an interval time for each post in the "Post every" section.
The " Set a sleeper time" allows you to exclude a specific time period when you do not want to share.
You have four options to order post by:
- Randomly (without duplicates): shares each of your posts once;
- Randomly: shares all your posts. If you do not stop the schedule, it will share posts repeatedly;
- Old posts first: start sharing from the old one;
- New posts first: start sharing from the new one;
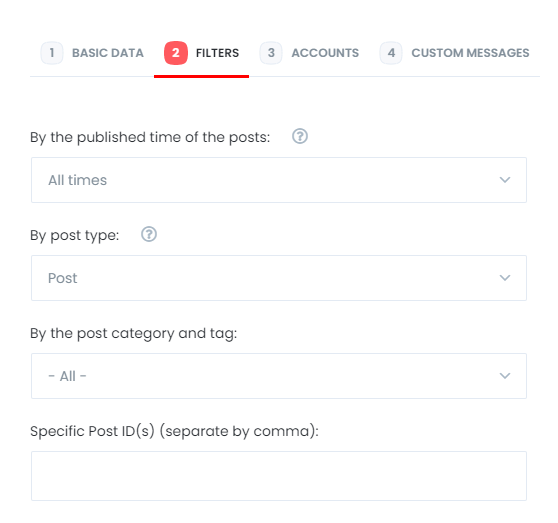
The second tab will let you filter posts by time, type, category, tag, and id.
The Accounts tab allows you to choose accounts. You can add or delete them, depending on your posts.
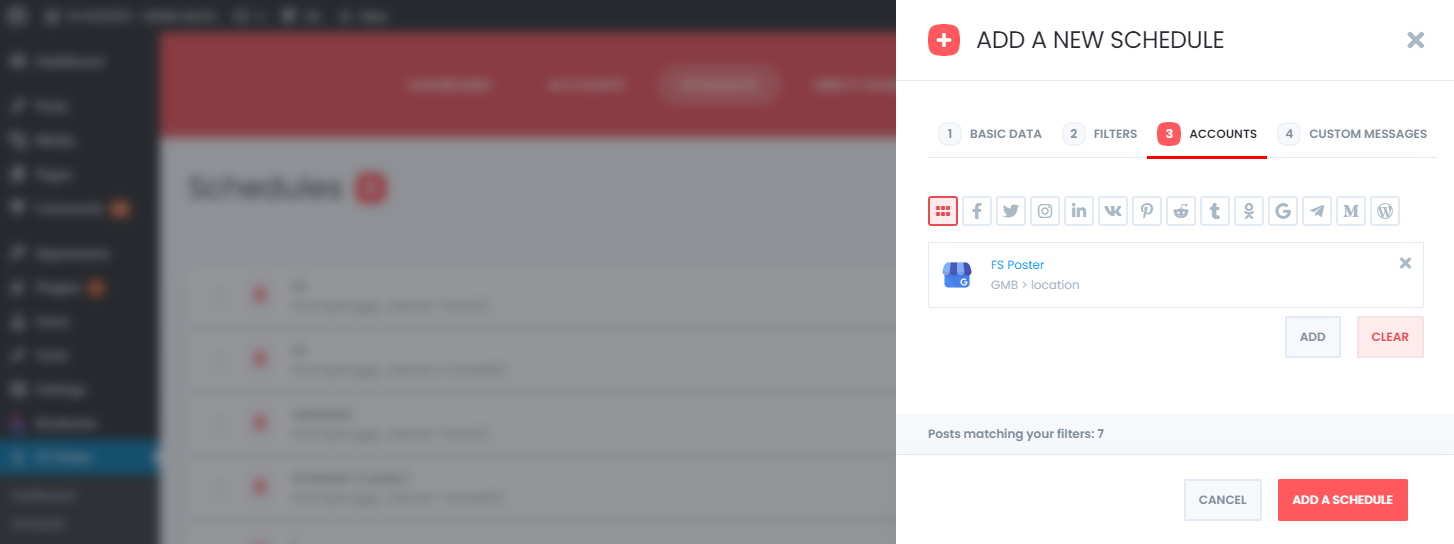
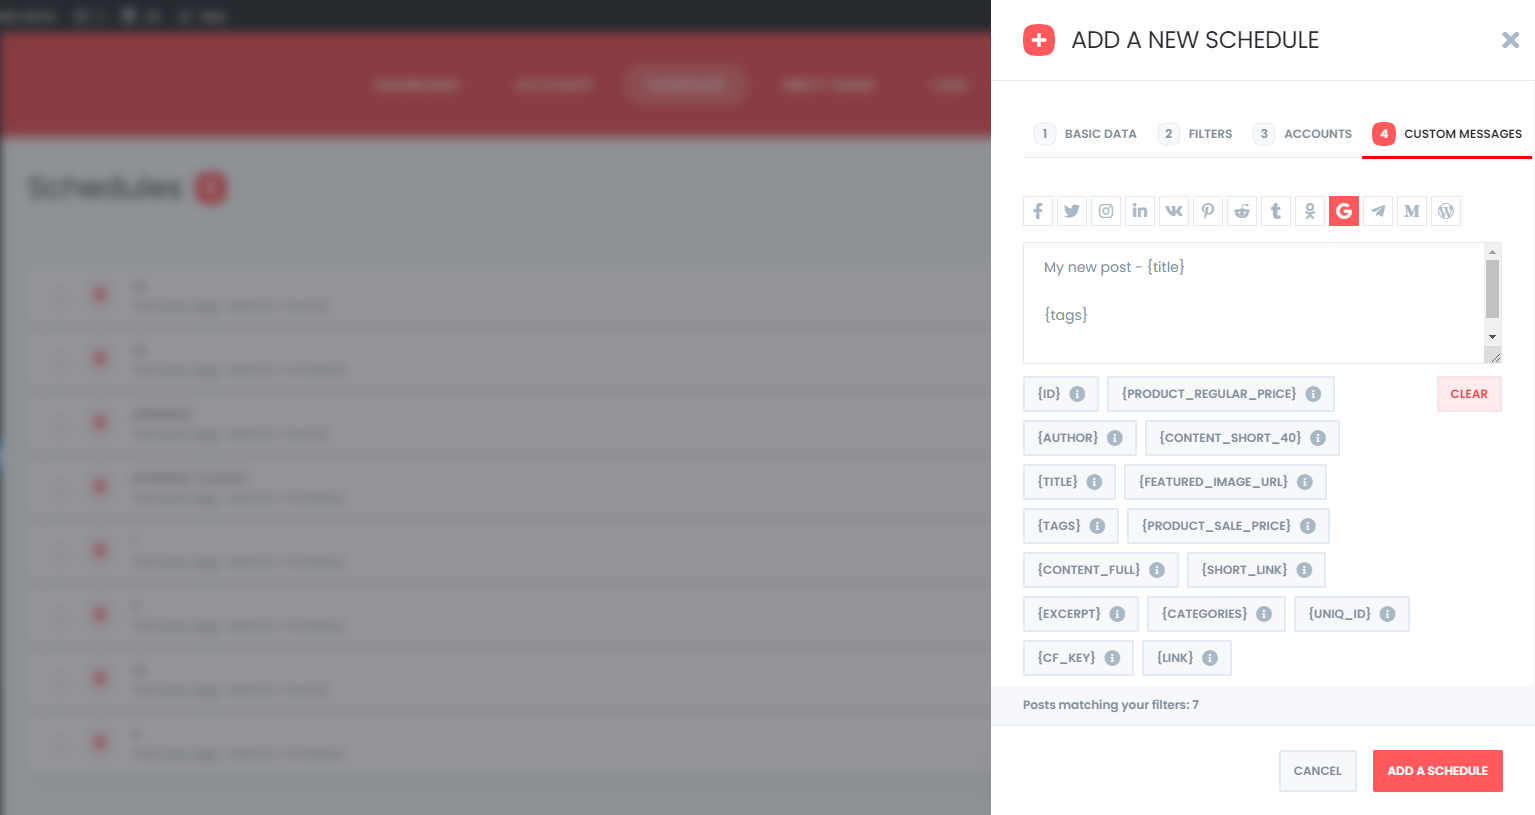
And the Custom messages tab allows you to add a custom message for each Social Network.
You are able to edit, re-schedule, pause, and delete schedules.

The logs tab allows you to track shared posts.

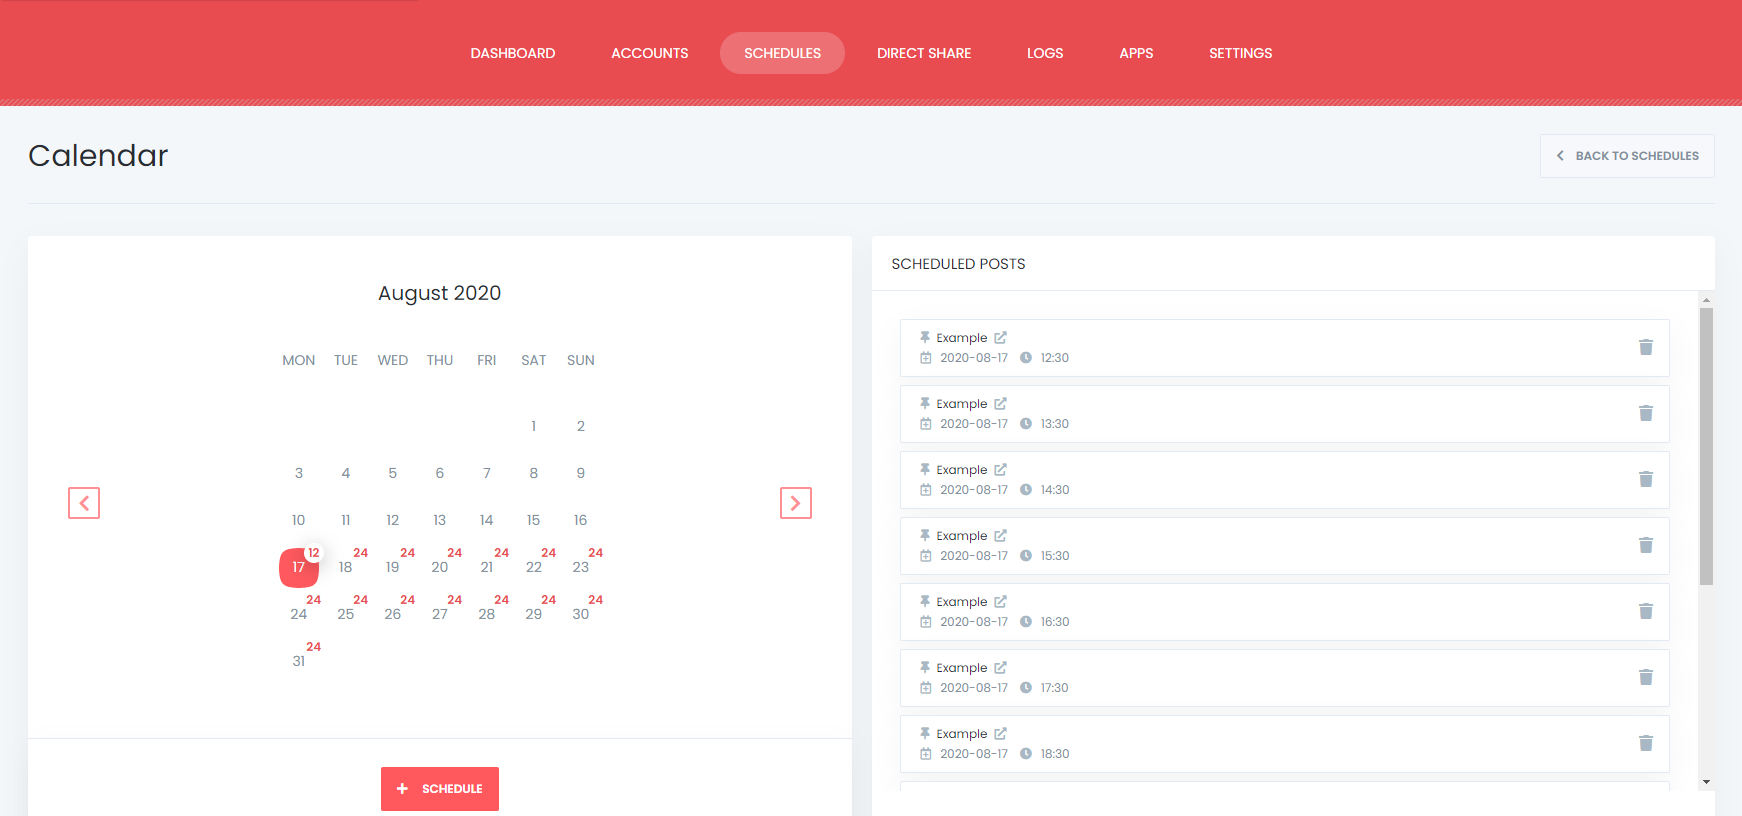
And you can see all Scheduled posts in the Calendar view.
How to share or schedule posts to Google Business Profile without creating a WordPress post
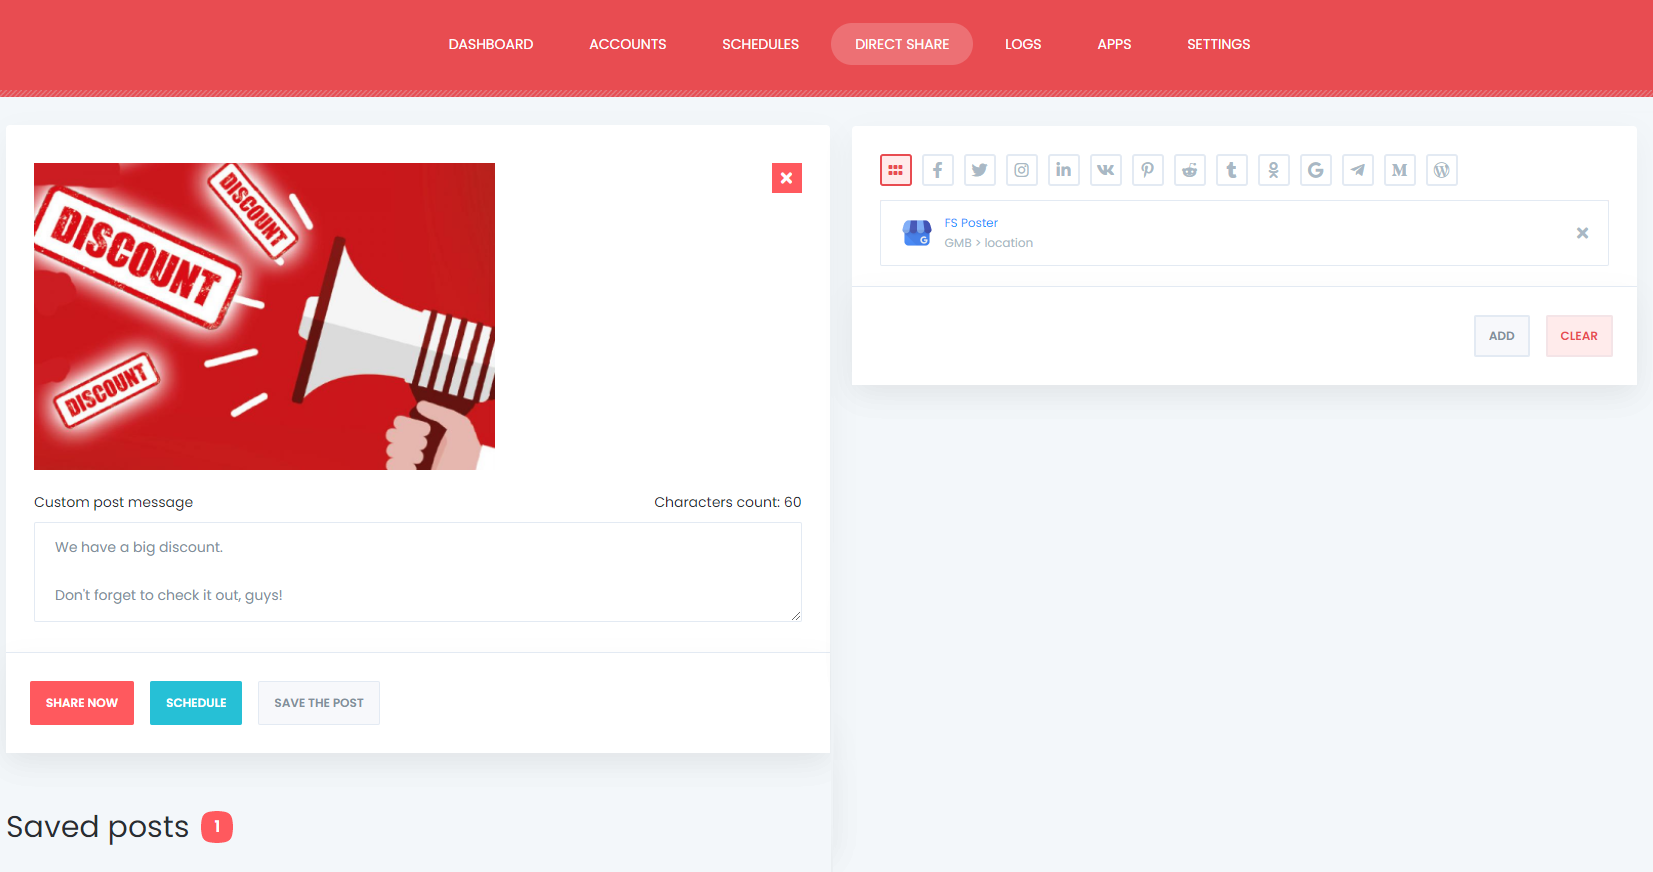
The plugin has a Direct Share Panel dedicated to sharing images, links, and custom messages.
That helps many of our customers because they do not need to have a blog, but they need to share their content on hundreds of accounts, and they do not want to log in to their accounts one by one to share the content.
Instead, they add their accounts to the plugin once and automate their manual work.
You can also save these FS Poster posts to share or schedule them later again and again.
The dashboard tab allows you to view shares count, clicks count, and comparison of social networks.

Conclusion
This article discusses how to auto-post to Google Business Profile from WordPress using the best auto poster plugin, FS Poster.
You can check out the core features of the plugin
Feel free to contact us for pre-sale questions: [email protected]
If you decide to continue with FS Poster, you can check out the official website.


