The App method is the best method for adding a Facebook account. It is safer, more relevant, and works 100% of the time: no errors, no chance of being blocked by Facebook. You can get permission to share posts on your pages. Facebook does not officially allow users to share posts on groups and accounts using Facebook Apps. Read more about the announcement.
Firstly, you should create your personal Facebook App and send it to the review. It may take some days to be approved. After approval, you can add your account using your personal App.
To create a personal Facebook App, and send it to the review, please follow these steps:
- Go to Facebook Apps and if you have not applied for Facebook developers yet, apply by going to the Get Started menu.

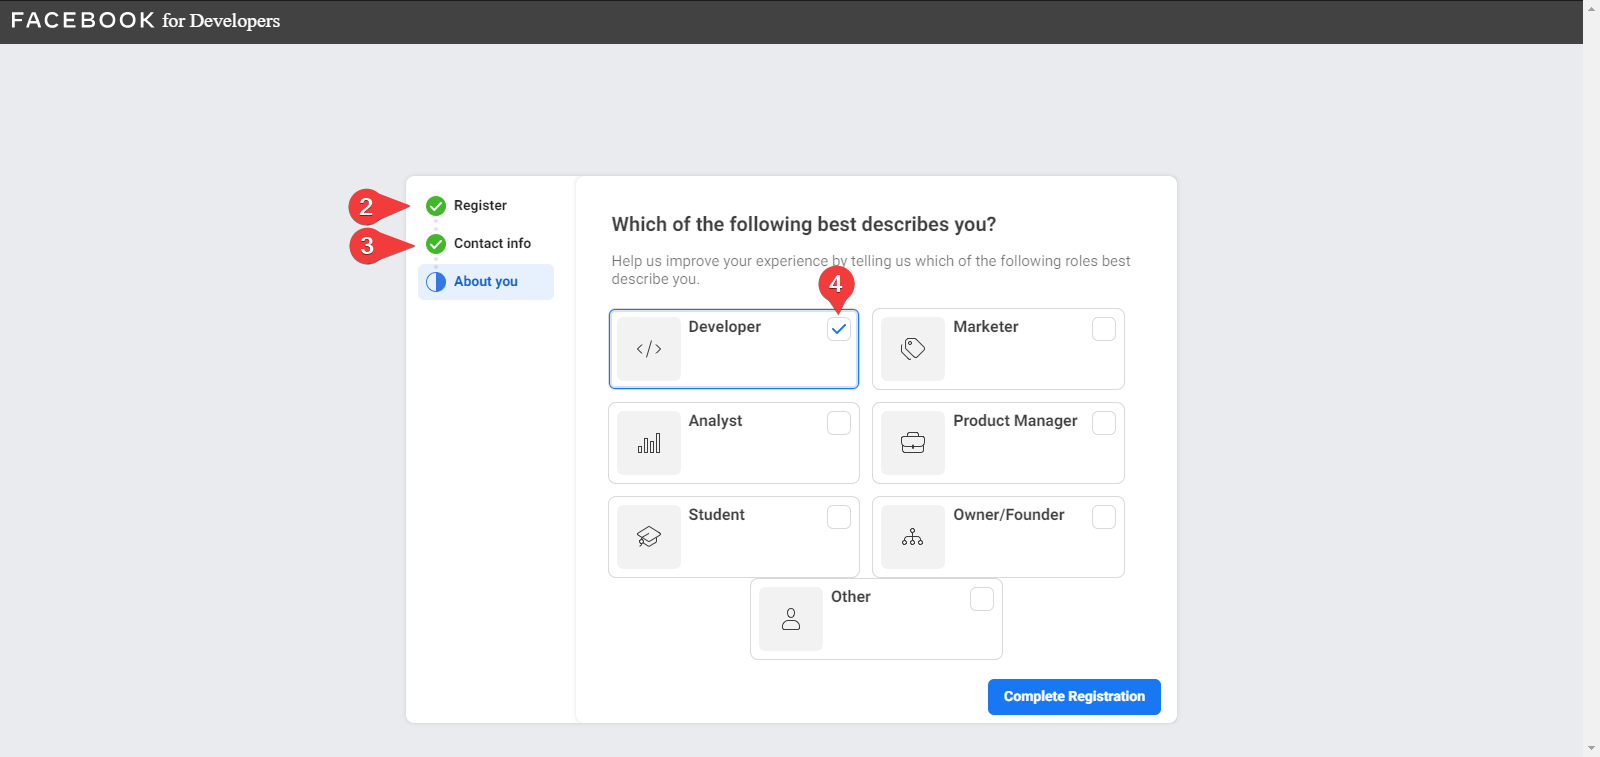
- Click the Continue button on the Register step;
- Review your contact info and Continue;
- Select the Developers option and Complete the registration;
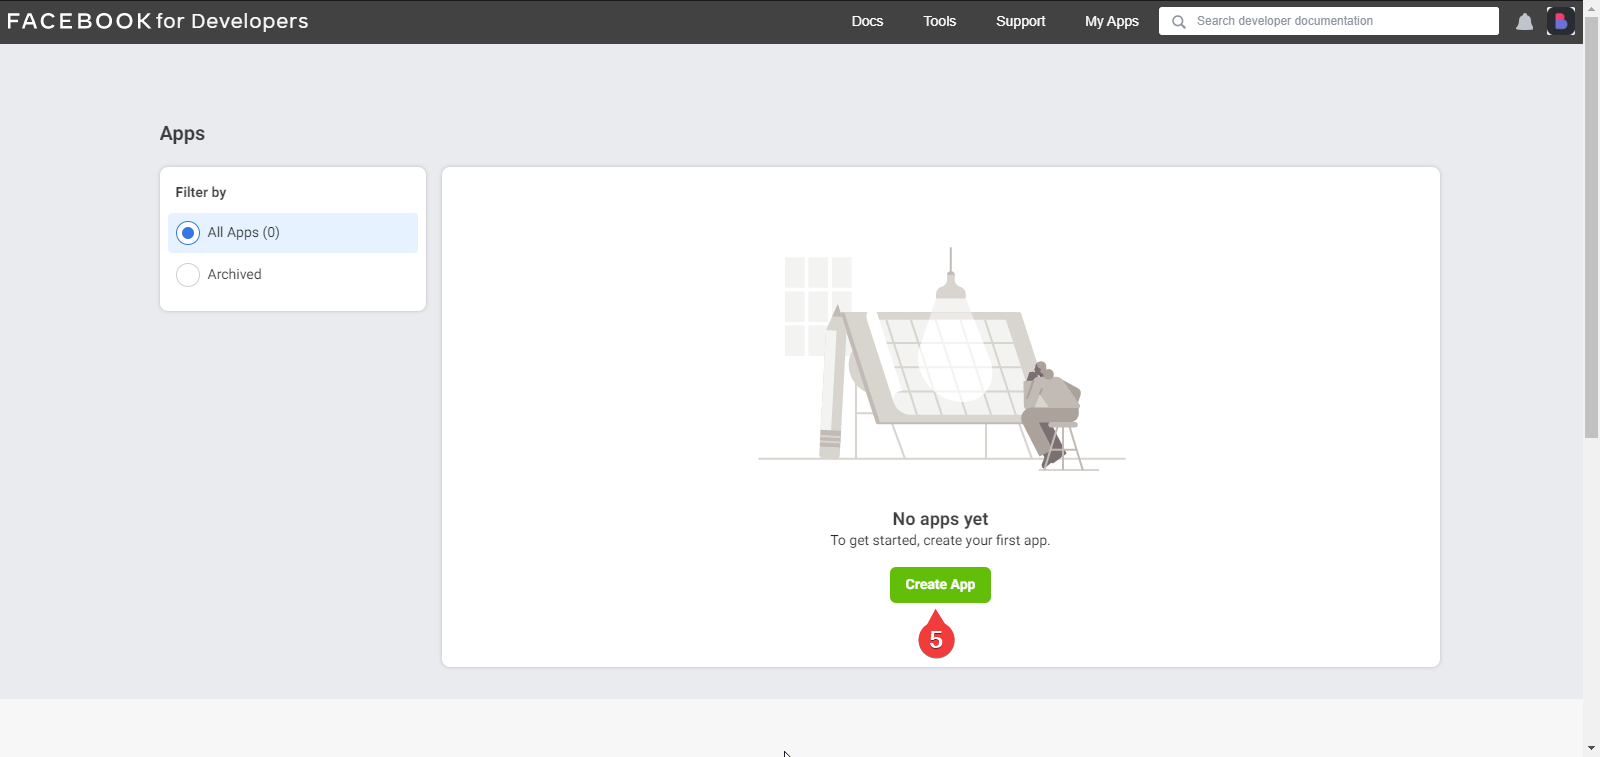
- Then click the Create App button;
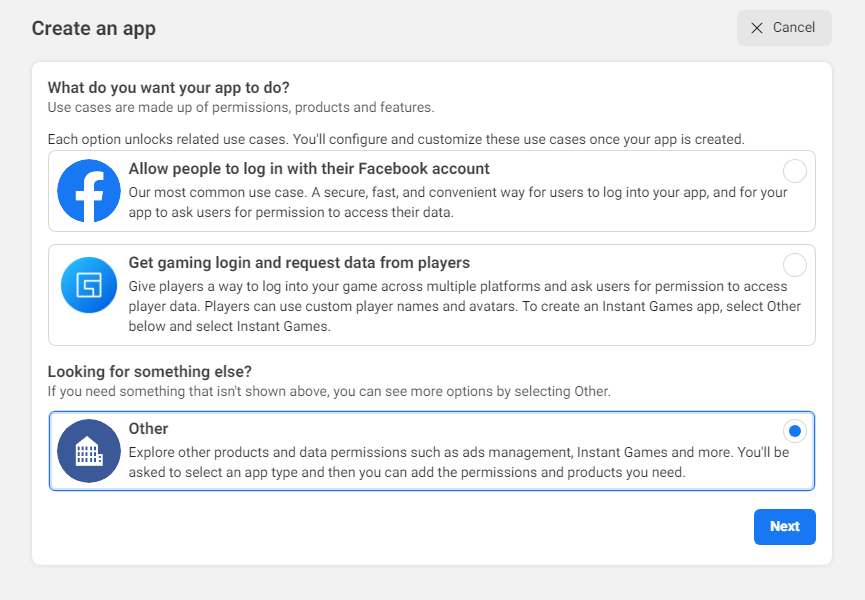
- Select the Other option;
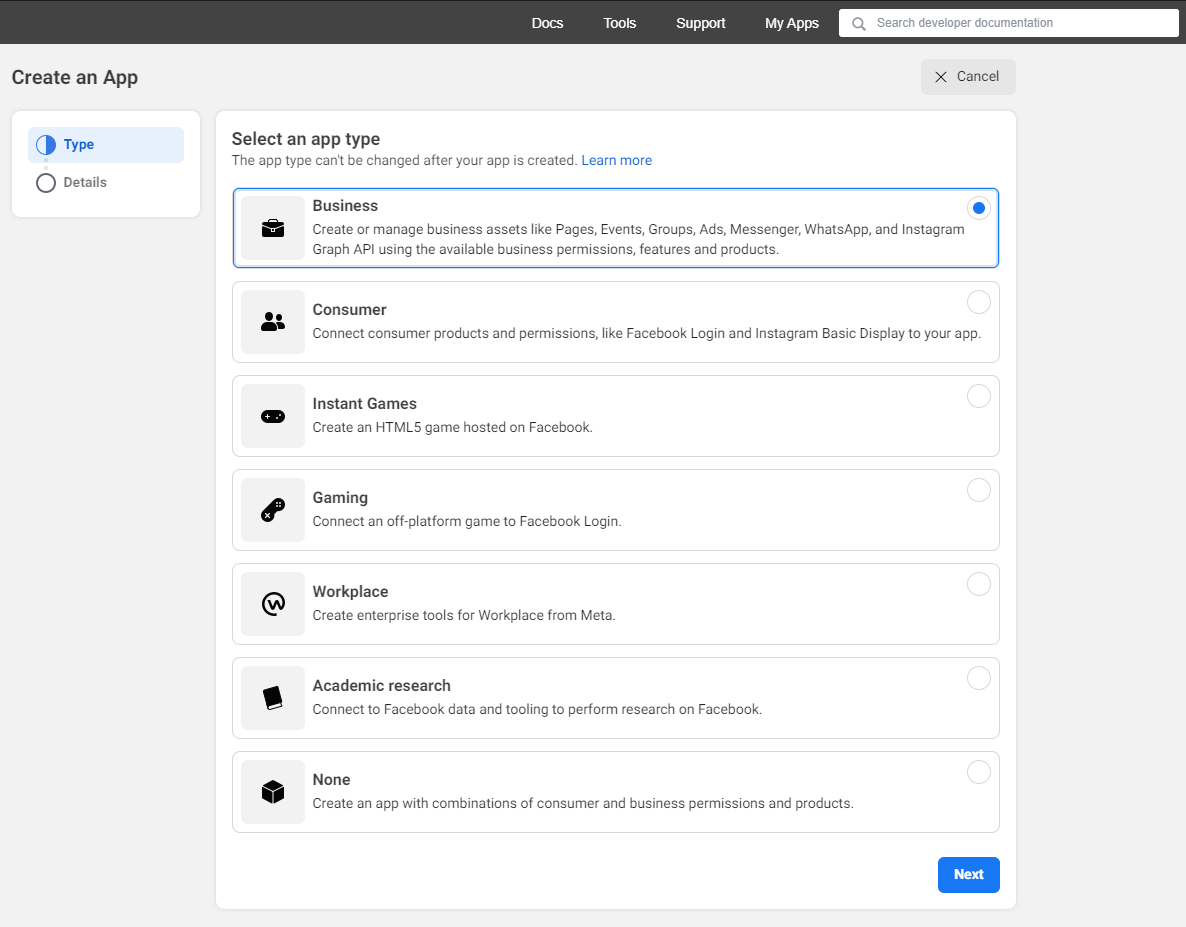
- Then select the App type as Business and click Next;
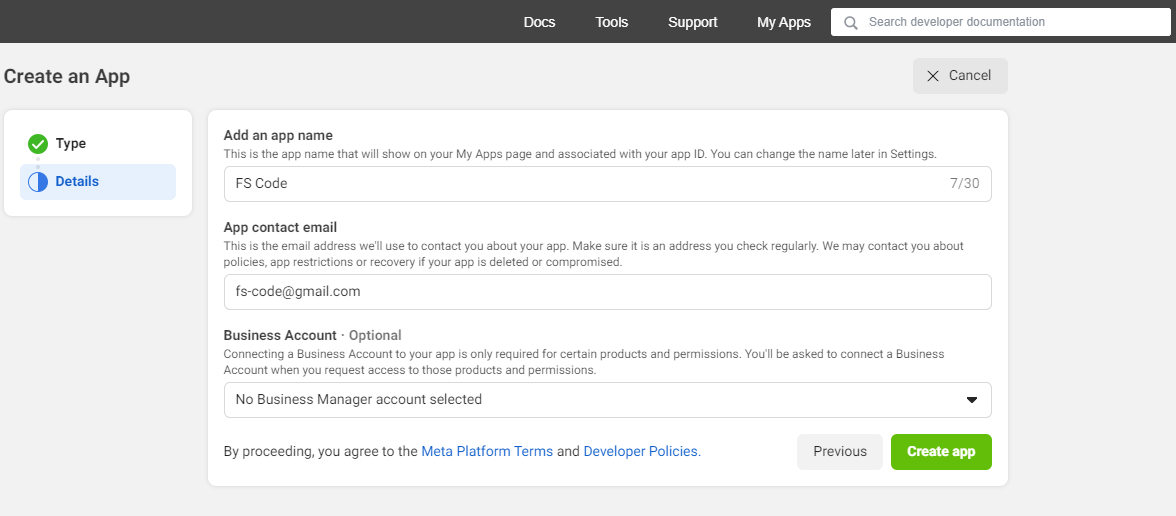
- Enter a name for your App and create the App. Try to name it according to your business or blog to notice it easily among all Facebook Apps;
- You will be asked to authenticate yourself by adding your Facebook account password;
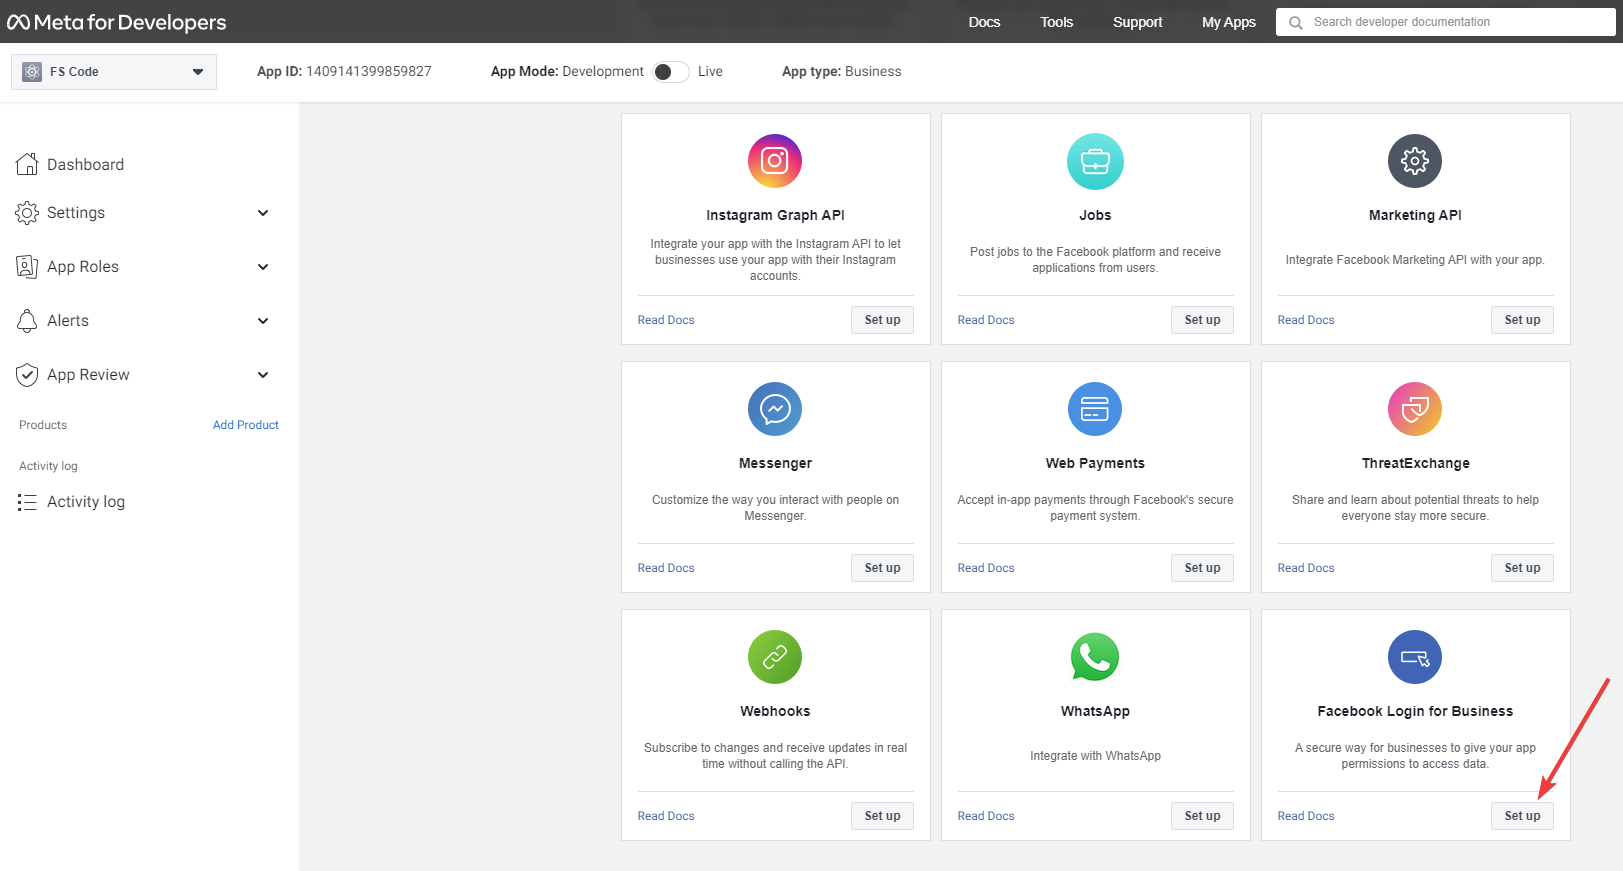
- Then click the Set Up button within the Facebook Login for Business section;
- You will be redirected to the Facebook Login for Business > Settings menu. Enter the "Valid OAuth Redirect URL" and save changes;
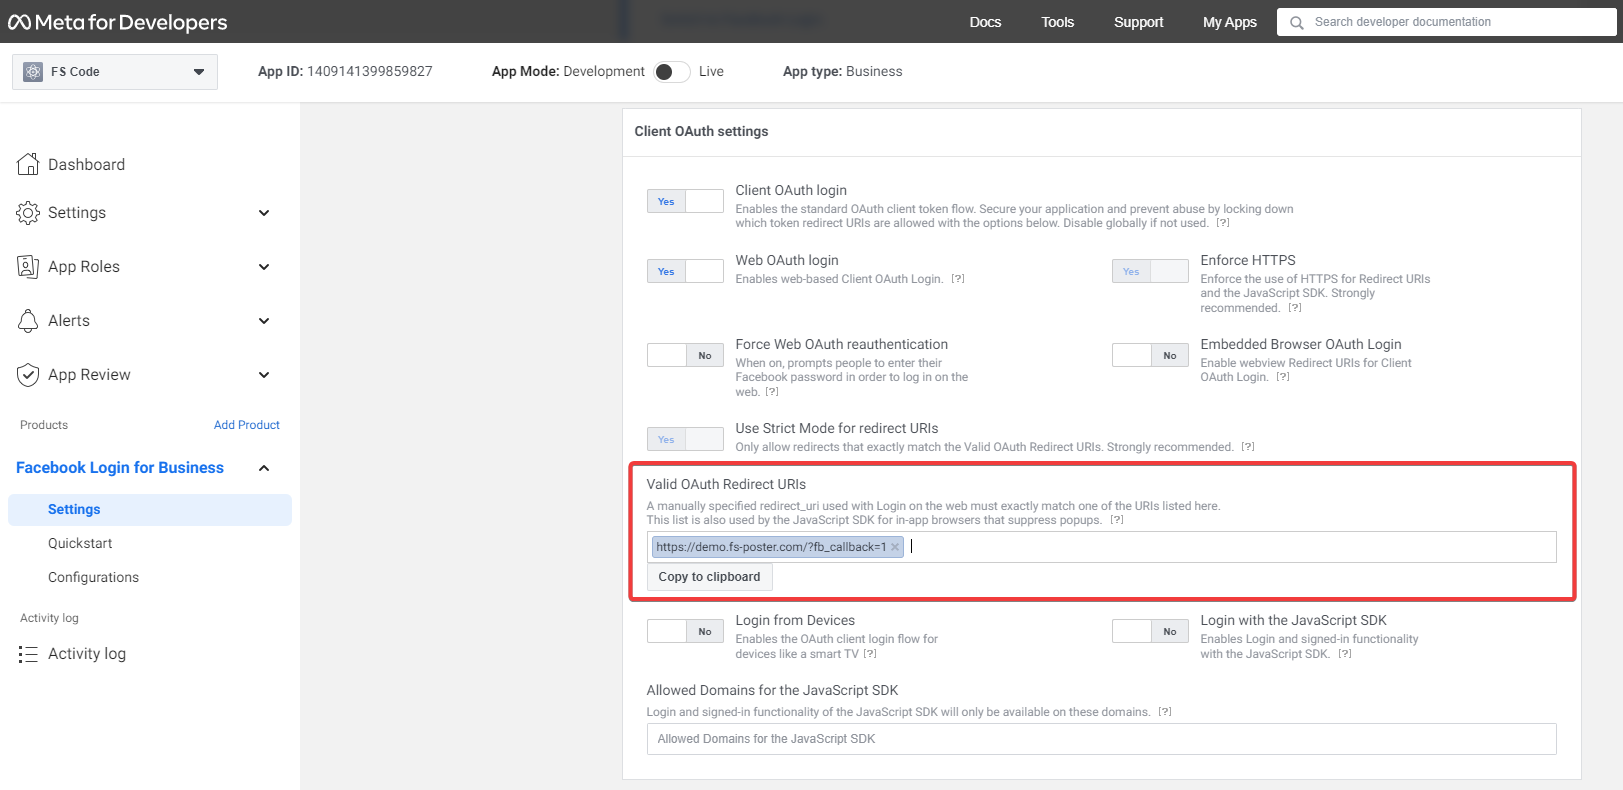
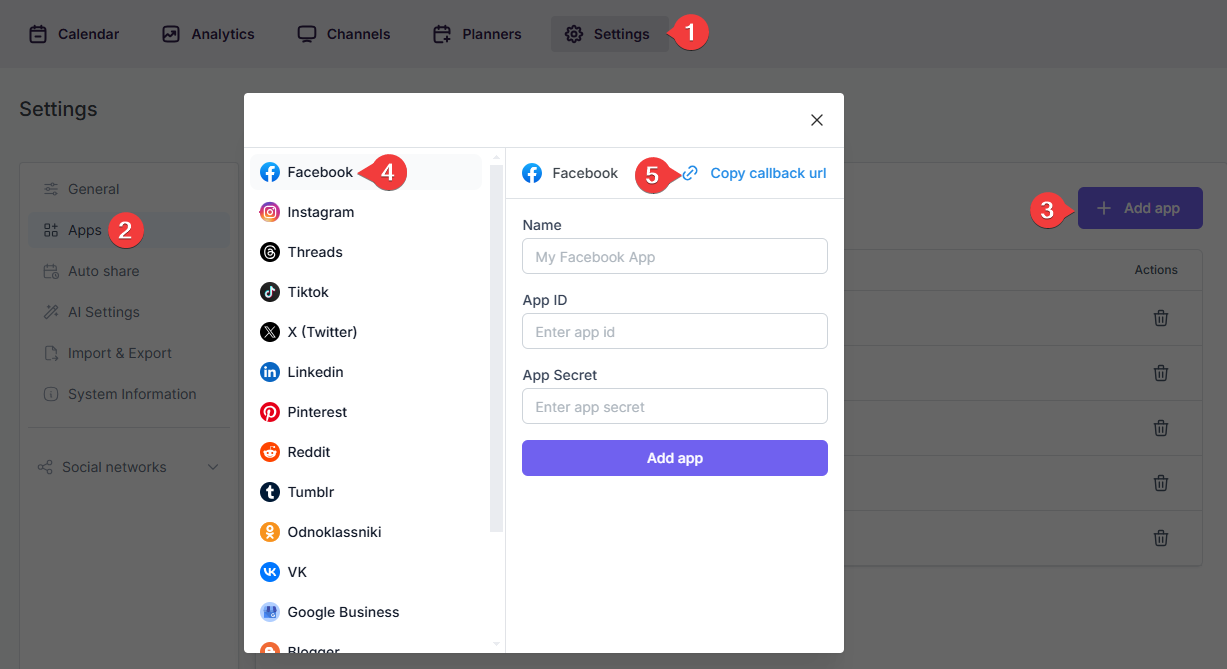
- You can copy your redirect URL from the Apps tab of the Plugin;
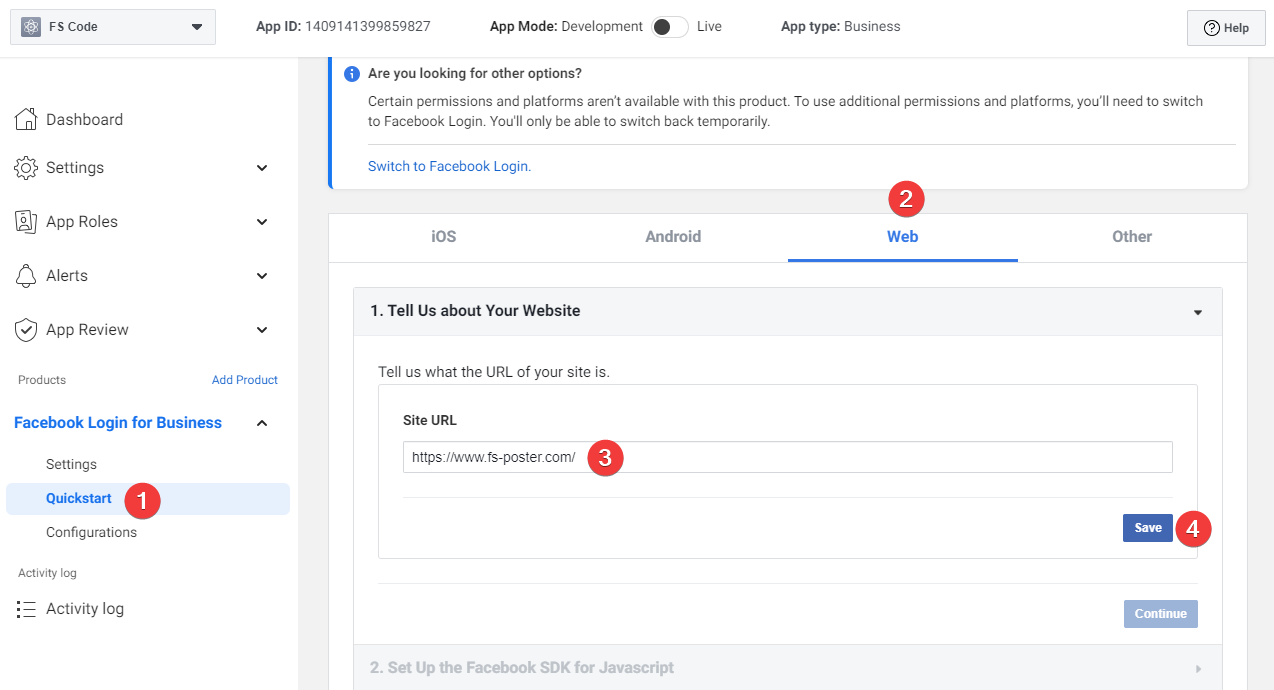
- Select the Web in the Quickstart menu, enter your website URL, and click the Save button;
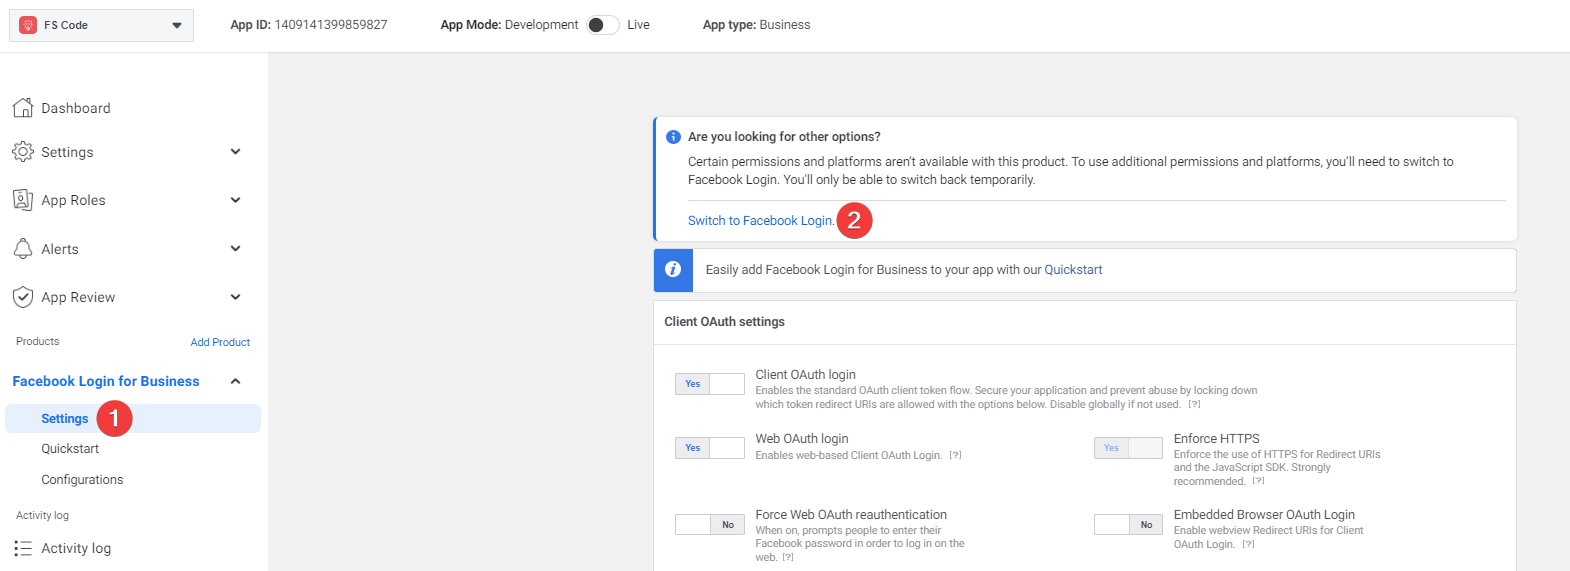
Then Switch to Facebook Login;
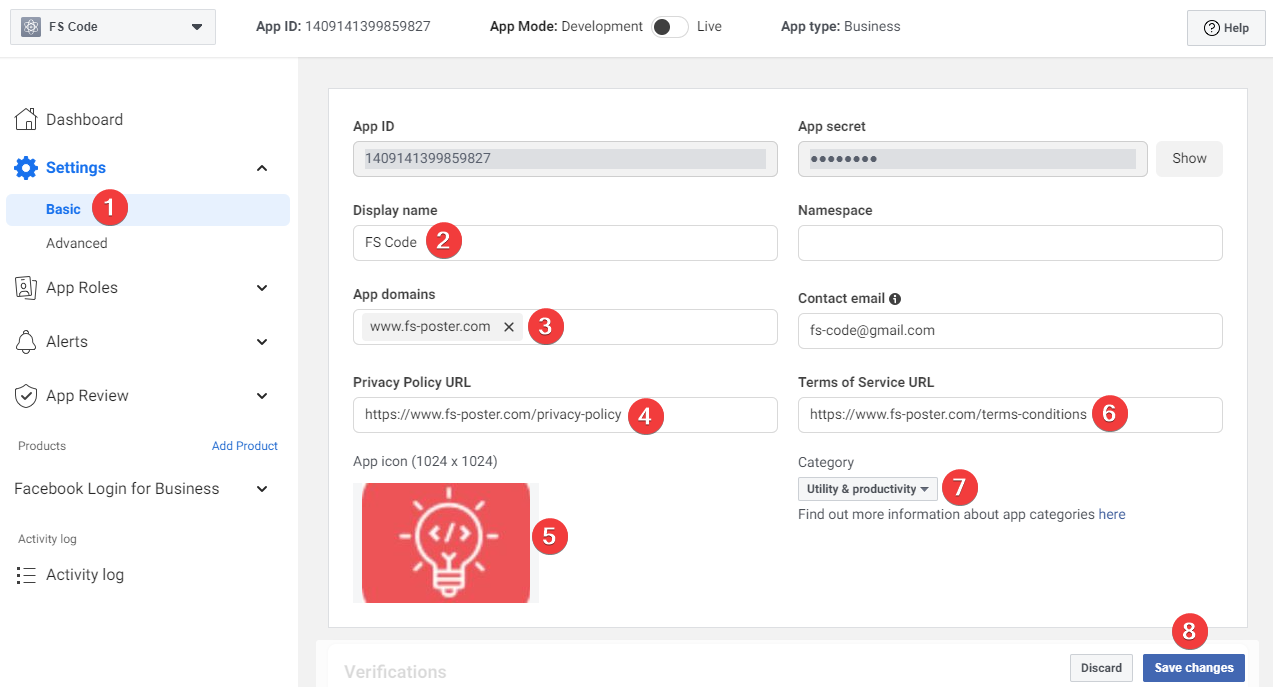
- Go to Settings > Basic and fill out the form. You need to type your website and your information;
- Copy the App ID and App secret;
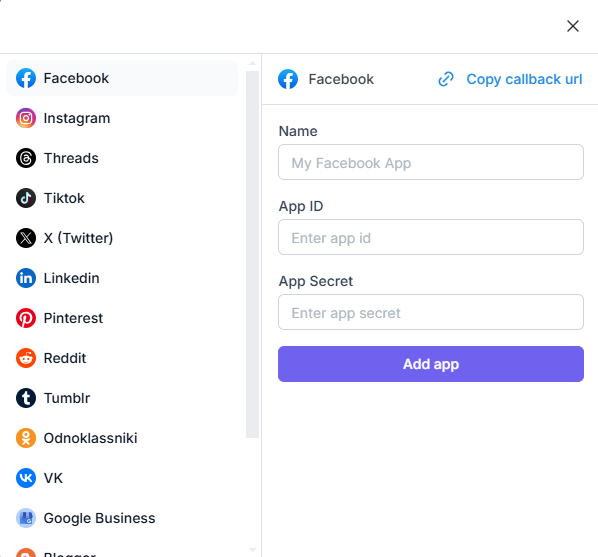
- Now you can give a name for the app to recognize it and add the App credentials to the plugin;
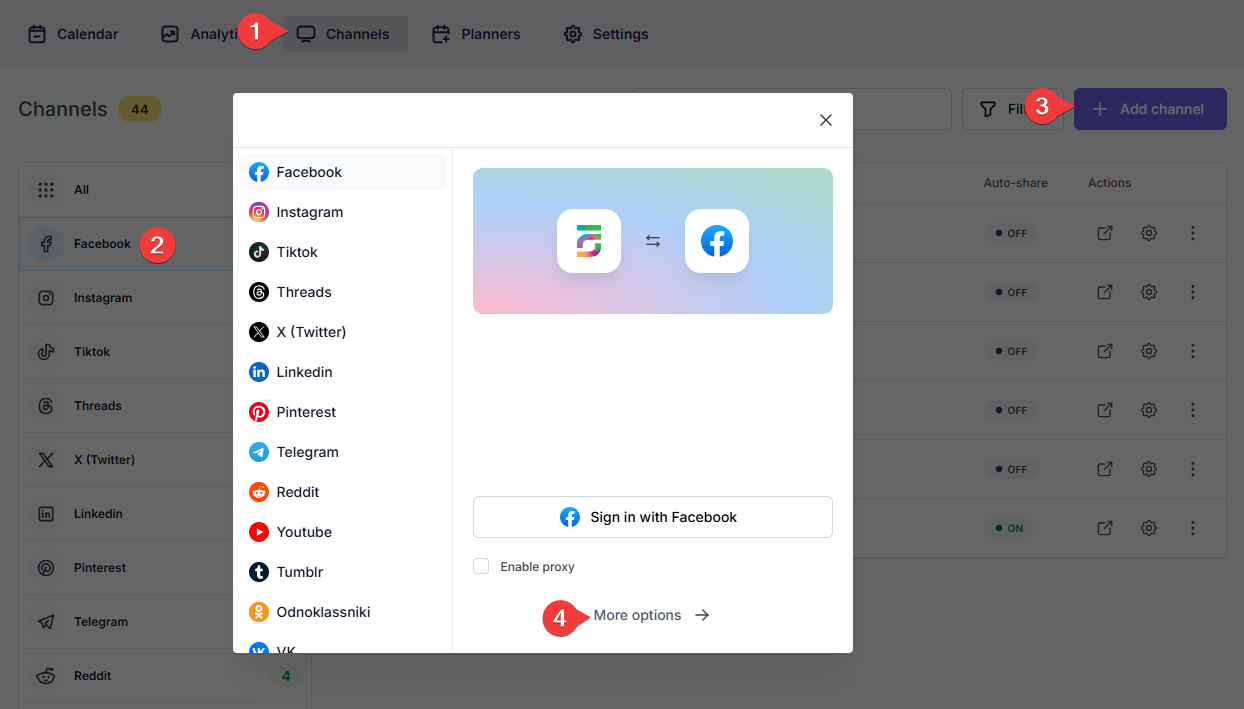
- Go to FS Poster > Channels > Facebook menu and click the Add channel button;
- Next, click the More options button;
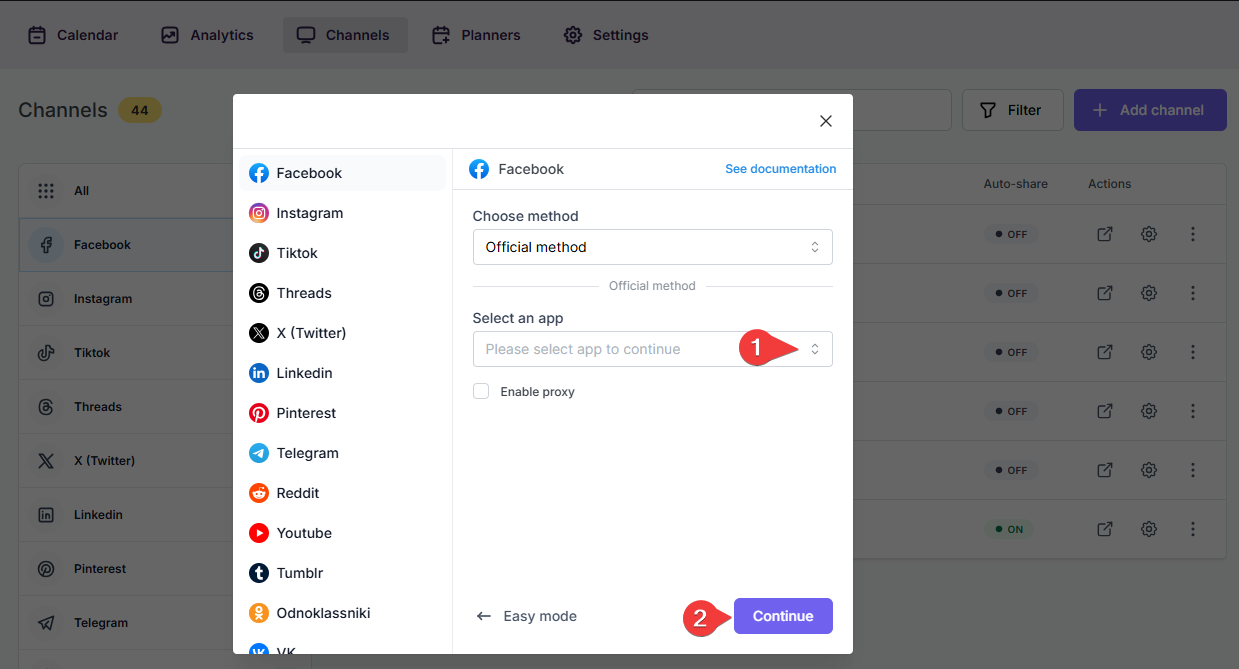
- Select your App from the list and click the Continue button.
- You have the option to add the account with a Prxoy as well;
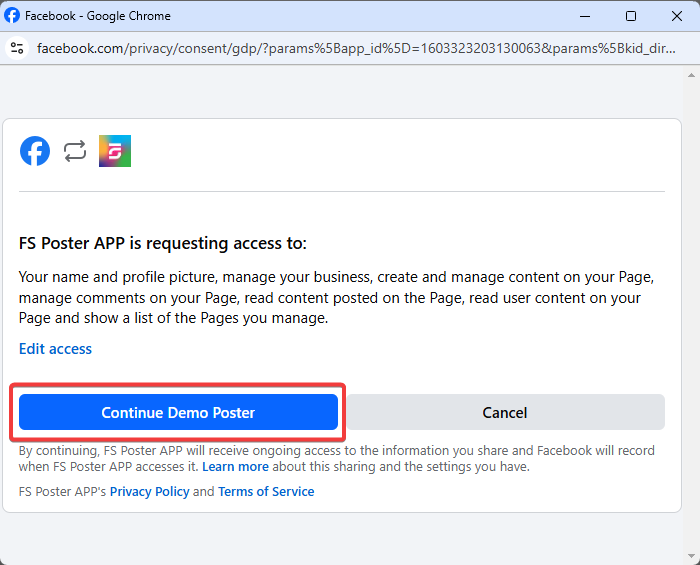
- When the Facebook authorization page appears, click the Continue (account name) button without editing access. The page will display the account name currently logged into the browser. If this is not the account you want to add to the plugin, or if you wish to add a different account, log into the desired account in a new browser tab. Since the App is not approved yet, you can only add the Facebook account that you use to apply for the Facebook App. After approval, you can add other accounts;
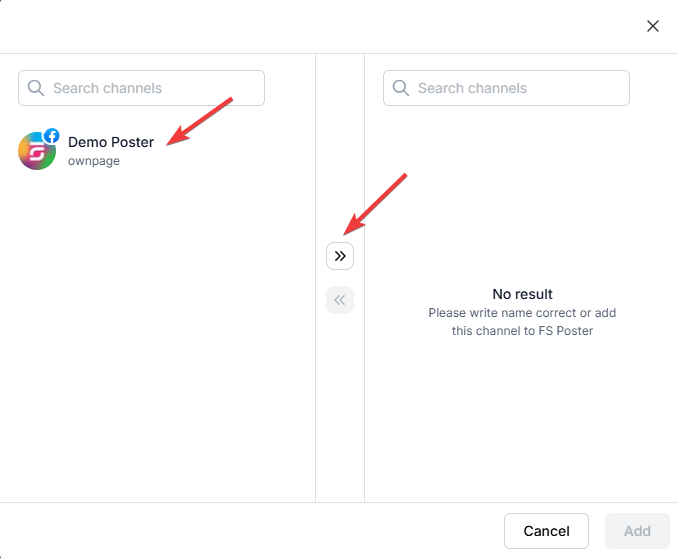
- Click the page to add it to the plugin or click the >> button to add all of them at once in case you have many;
- Publish a post on pages and wait for 24 hours so you can request the necessary App permissions;
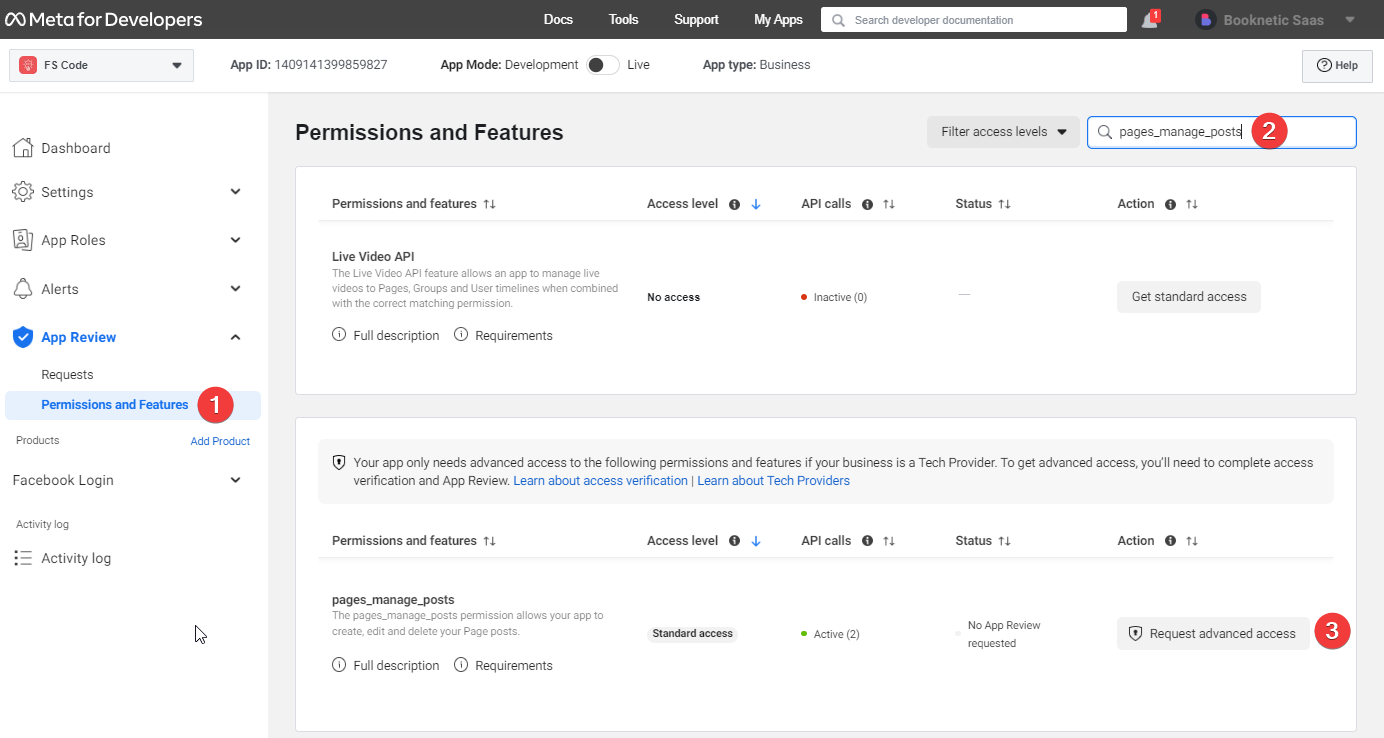
- Go to the App Review > Permission and Features menu;
- Search for public_profile, pages_manage_posts, pages_read_engagement, pages_read_user_content, and business_management permissions one by one, and click the Request advanced access button in front of each one;
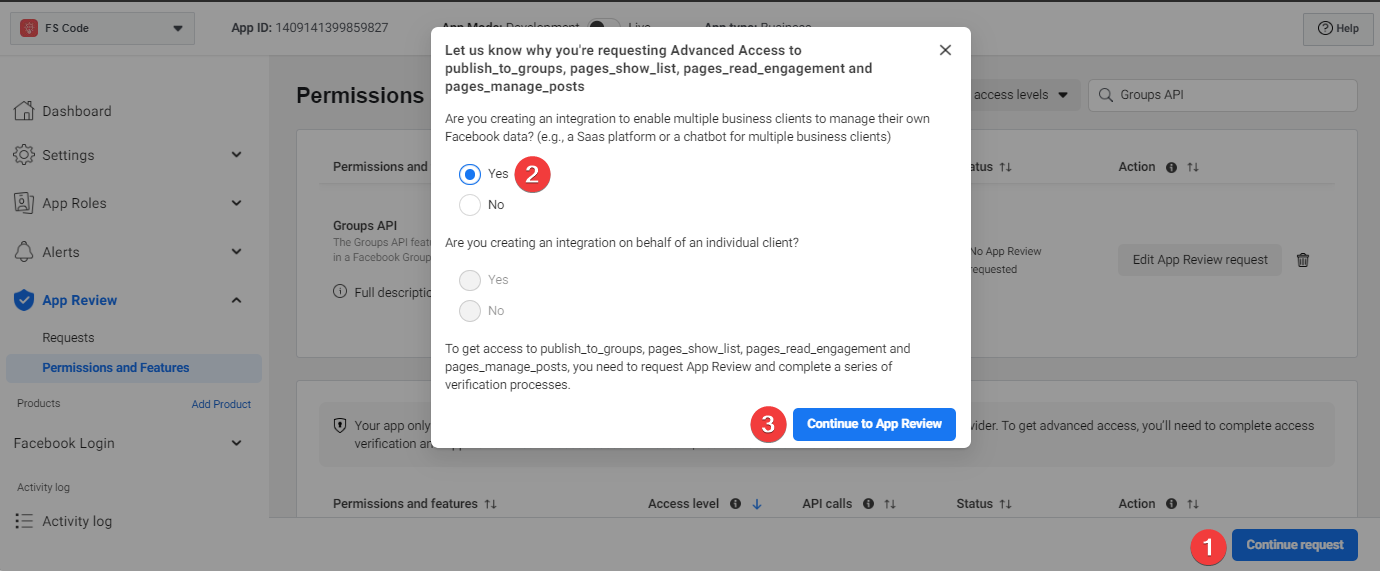
- Click the "Continue request" button and then the Continue to App Review button;
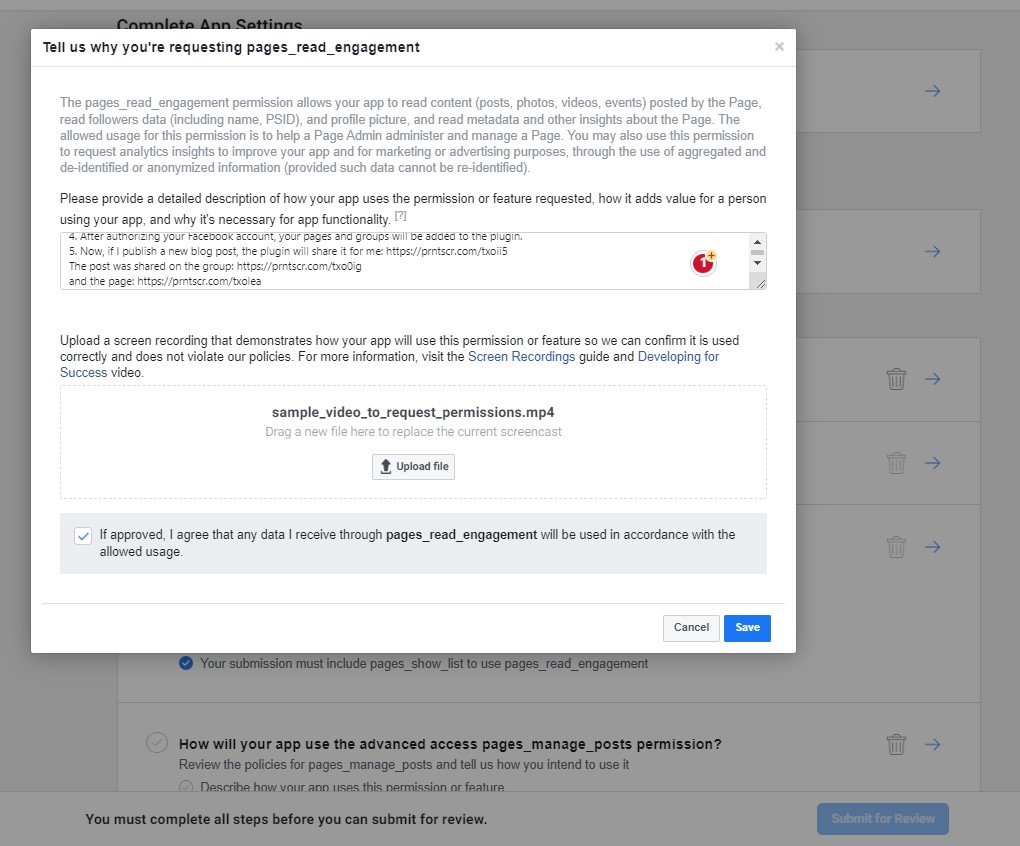
Click each item and a new modal will appear. So you will need to fill out the form for each permission and send your App to review.
You need to wait for up to 5 days. A random Facebook worker will review it. The worker needs to test it on your website. That is why you need to create a user for the App tester and add the App to your website so that they can test it. If that employee does not have knowledge about plugins or WordPress, he does not review your request properly and declines it. Please try to re-submit the same request again. Eventually, your request will be accepted.
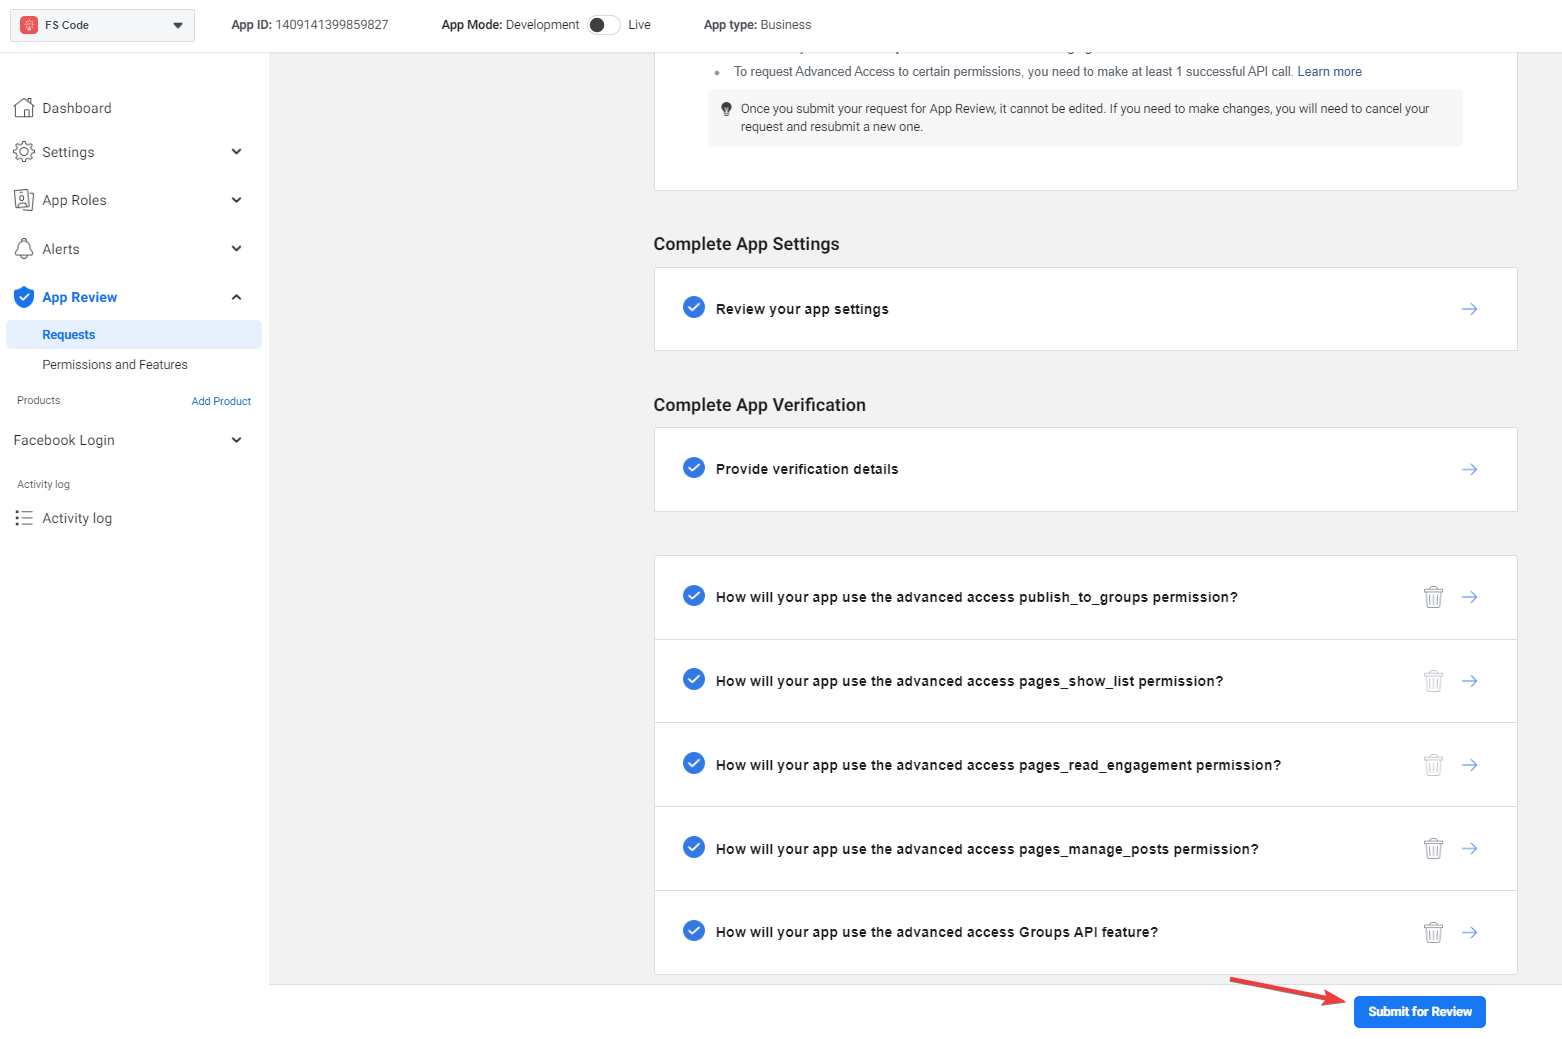
Here is a sample detail for the review form. Add your website URLs and change screenshots to your own App:
Website: "type the URL of your website"
Testing login: "type a username of your website"
Testing password: "type the password for the username"
I need the App to share my blog posts on Facebook. I add my App to a plugin, and the plugin uses the Facebook API to share my posts on my Facebook pages. To see how public_profile, pages_manage_posts, pages_read_engagement, pages_read_user_content, and business_management permissions are used in my App:
1. Navigate to "type your FS Poster App tab URL on your website"
2. Click the Add an App button and add the App: https://prntscr.com/tzdkw2
3. Then, add a Facebook account to the plugin using a Facebook API. Head to Accounts > Facebook menu, and Click to the ADD AN ACCOUNT button: https://prntscr.com/txkboa
4. Select the App method, select the unapproved App (My FS Poster App), and click the ADD button: https://prnt.sc/u2xahm
5. Then, the plugin redirects you to the Facebook authorization page.
6. After authorizing your Facebook account, your pages will be added to the plugin.
7. Now, if I publish a new blog post, the plugin will share it for me: https://prntscr.com/txoii5
The post shared on the page: https://prntscr.com/txo0ig
and the page: https://prntscr.com/txolea
And you need to create a screencast to provide it to Facebook. You can use any screen recorder app like Screencast.com to create the video. You need to record a video on how you add the App credentials to the plugin, add Facebook pages, and share Wordpress posts using the FS Poster plugin.
- When your App is approved, you will be able to add as many accounts as you want and enjoy all the features of the Facebook App;
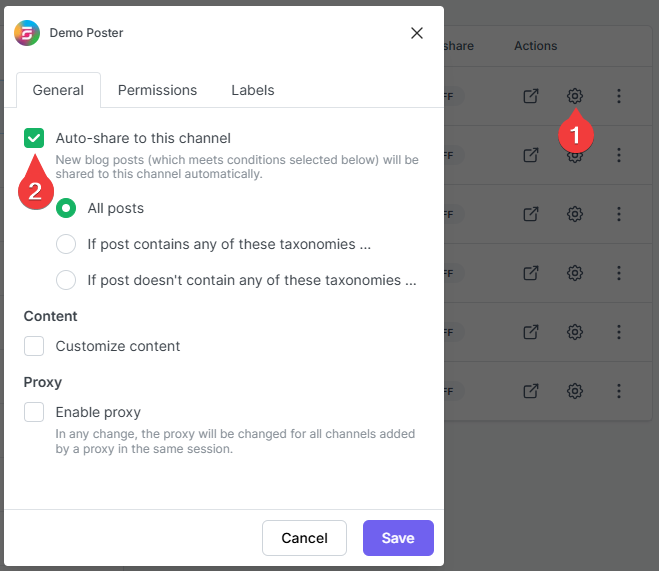
- After adding channels, you need to activate your channels to share posts on social networks automatically whenever a new WordPress post is published on your website. If you do not activate channels, you need to add them to the FS Poster section whenever you want to share specific posts on your social network accounts;
- You can also activate channels conditionally by selecting specific taxonomies to share specific posts or not share specific posts on particular channels. This will apply to only auto-posts;
- The Customize content option allows you to assign specific content for this specific channel which will override the content you specifically in the social network settings;
- Moreover, you can enable proxy or edit the proxy credentials without reauthorizing the channel to the plugin;
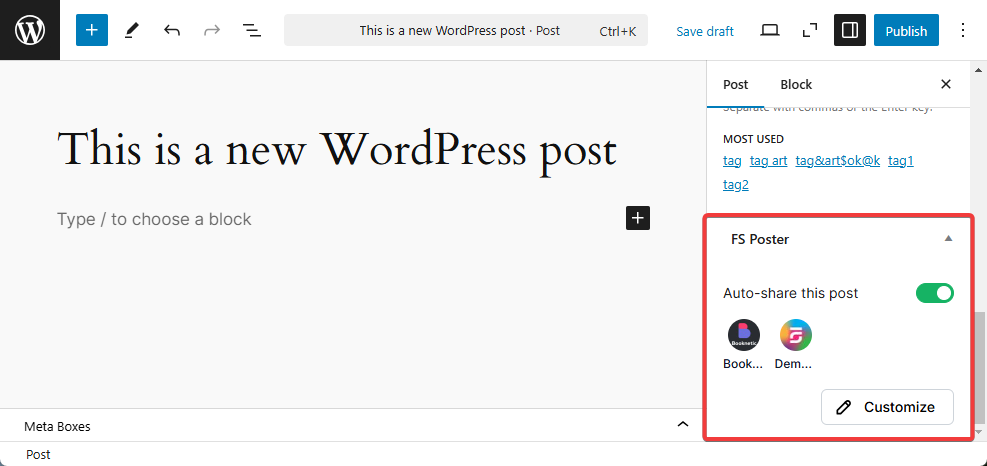
- Since channels are activated, they will appear on the FS Poster section when publishing a new WordPress post. Once the post is published, the plugin will share the post on these channels automatically;
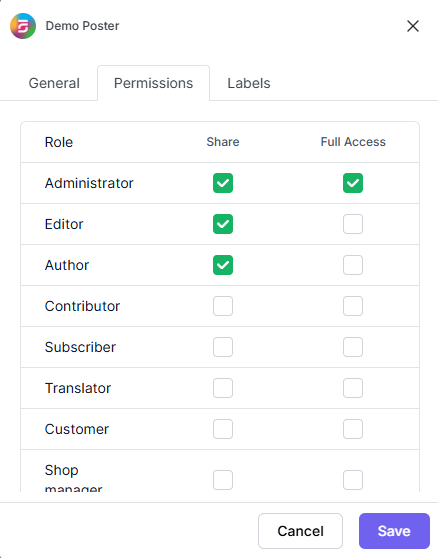
- In the Permissions tab, you can permit other WordPress users to use the channels in their FS Poster dashboard. You can either allow them to only share posts or give them full access to manage the channel, and edit its settings;
- In the Labels tab, you can organize channels into specific groups, making it easier to add a group of channels to the Planners or Schedules instead of adding them one by one.
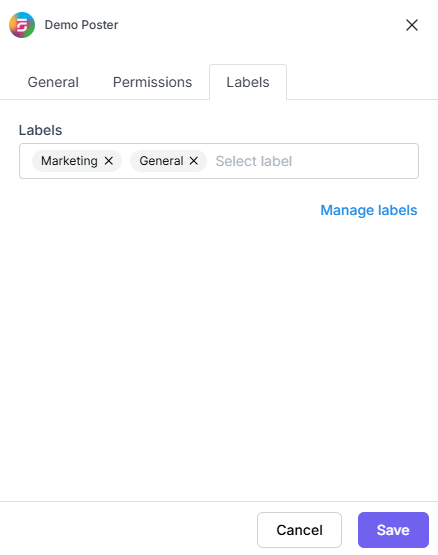
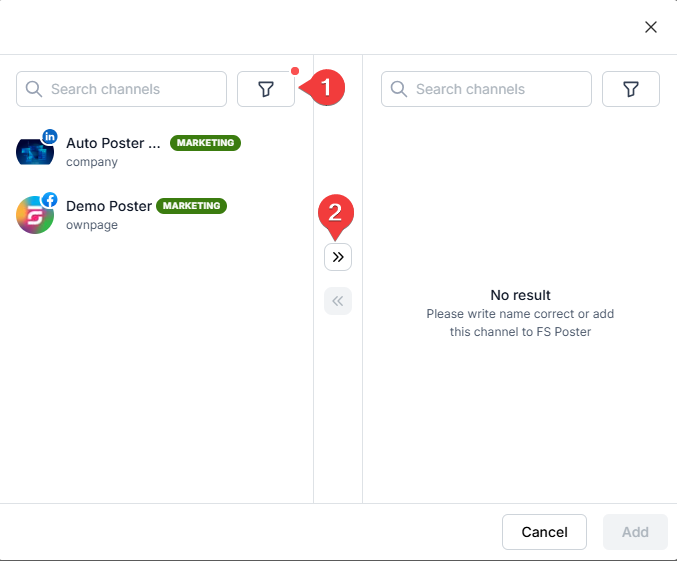
- Now, you can easily filter channels by label and click the >> button to add them all at once for sharing;
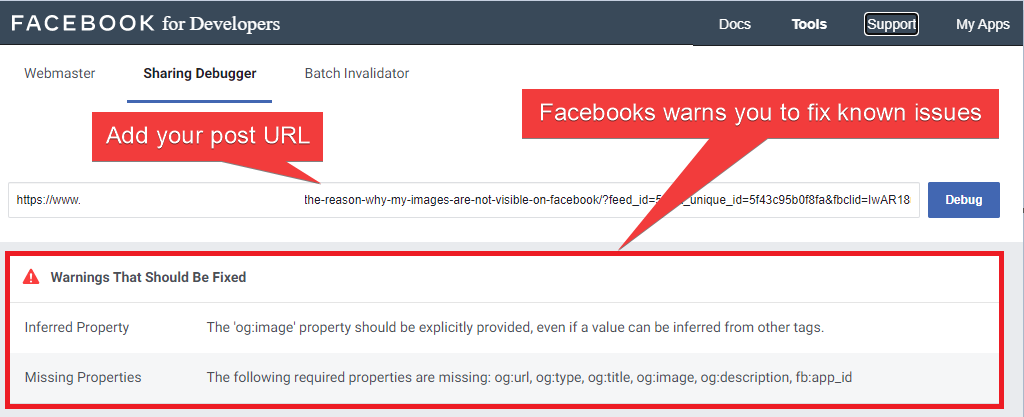
- You can set the plugin to share your post URL as a link card view or upload post images. If the post images are not visible on Facebook, you can debug your website on the Facebook developer page to see the reason behind the issue.
